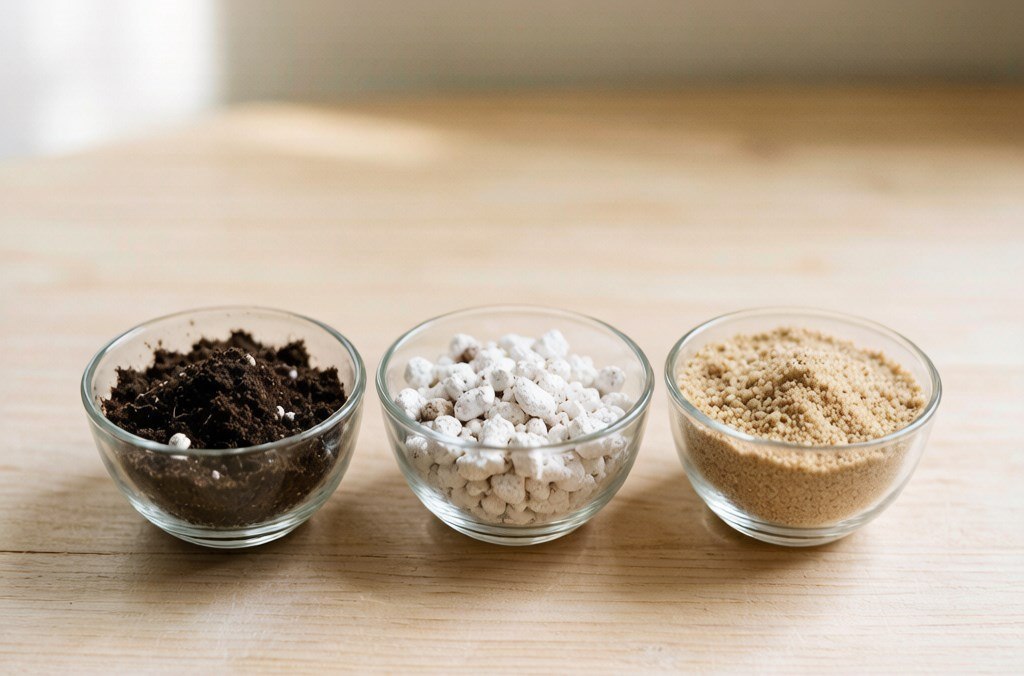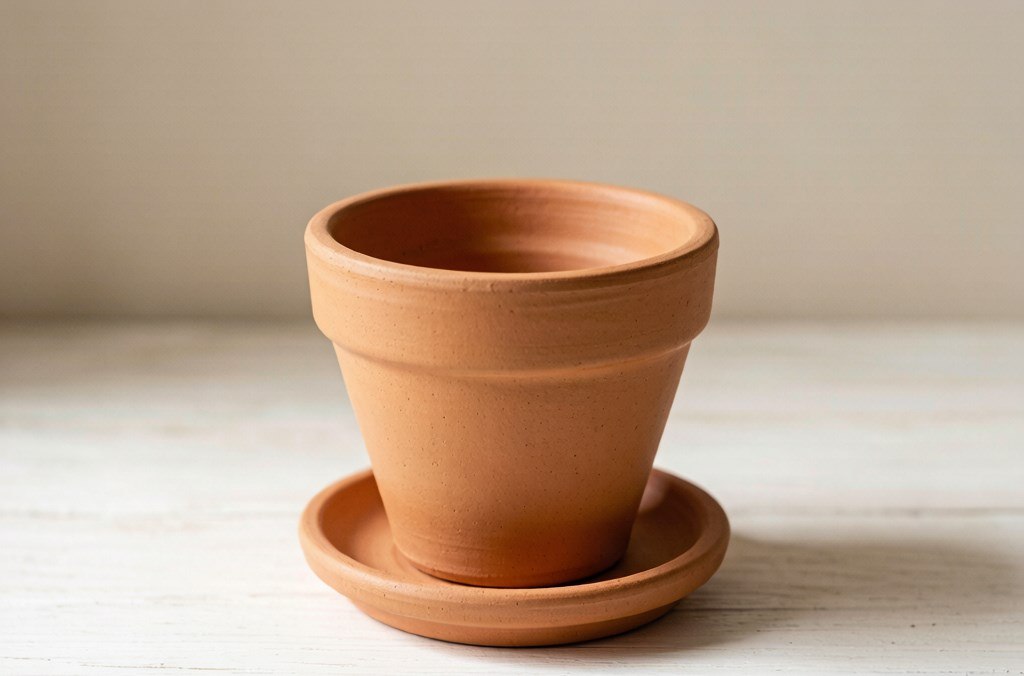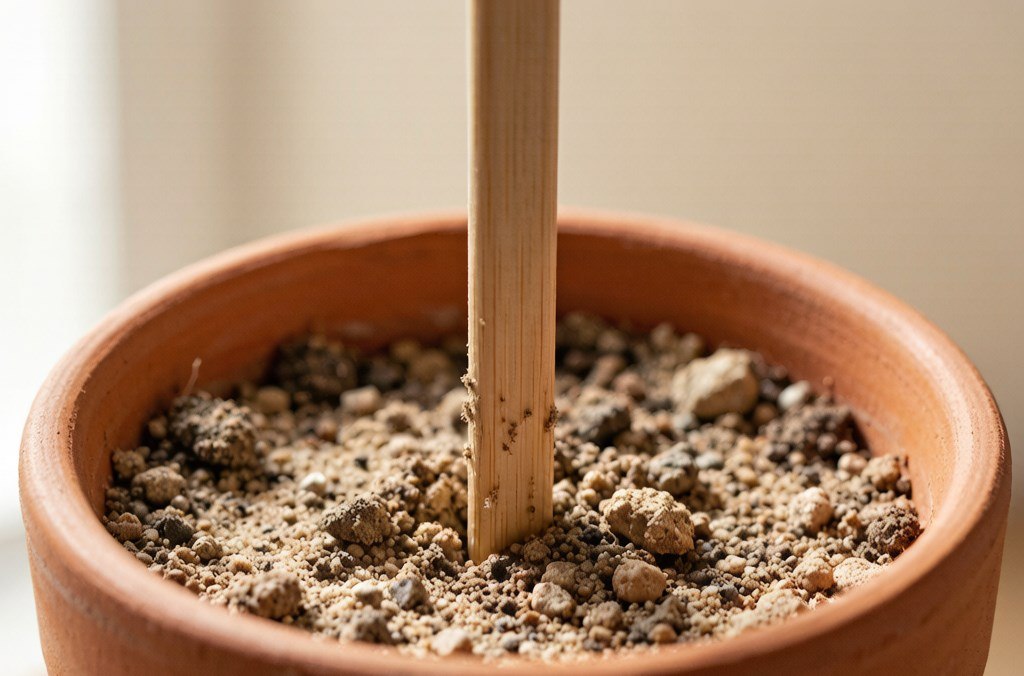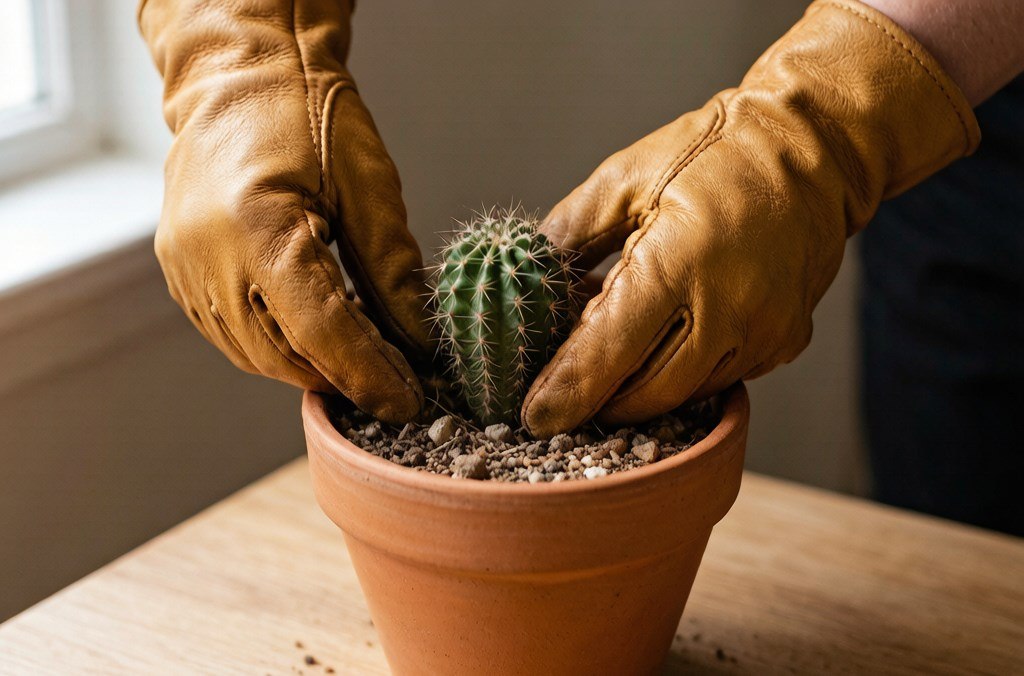
<?xml version="1.0" encoding="utf-8"?>
<feed xmlns="http://www.w3.org/2005/Atom">
  <author>
    <name>Sage</name>
  </author>
  <generator uri="https://hexo.io/">Hexo</generator>
  <id>https://homegrownnook.com/</id>
  <link href="https://homegrownnook.com/" rel="alternate"/>
  <link href="https://homegrownnook.com/atom.xml" rel="self"/>
  <rights>All rights reserved 2026, Sage</rights>
  <subtitle>Houseplants for real homes</subtitle>
  <title>homegrownnook</title>
  <updated>2026-09-18T13:00:00.000Z</updated>
  <entry>
    <author>
      <name>Sage</name>
    </author>
    <category term="Plant Library" scheme="https://homegrownnook.com/categories/plant-library/"/>
    <category term="Beginner Basics" scheme="https://homegrownnook.com/categories/plant-library/beginner-basics/"/>
    <category term="Houseplants" scheme="https://homegrownnook.com/categories/Houseplants/"/>
    <category term="indoor-plants" scheme="https://homegrownnook.com/tags/indoor-plants/"/>
    <category term="houseplant-care" scheme="https://homegrownnook.com/tags/houseplant-care/"/>
    <category term="beginner-houseplants" scheme="https://homegrownnook.com/tags/beginner-houseplants/"/>
    <category term="easy-houseplants" scheme="https://homegrownnook.com/tags/easy-houseplants/"/>
    <category term="pet-friendly-plants" scheme="https://homegrownnook.com/tags/pet-friendly-plants/"/>
    <content>
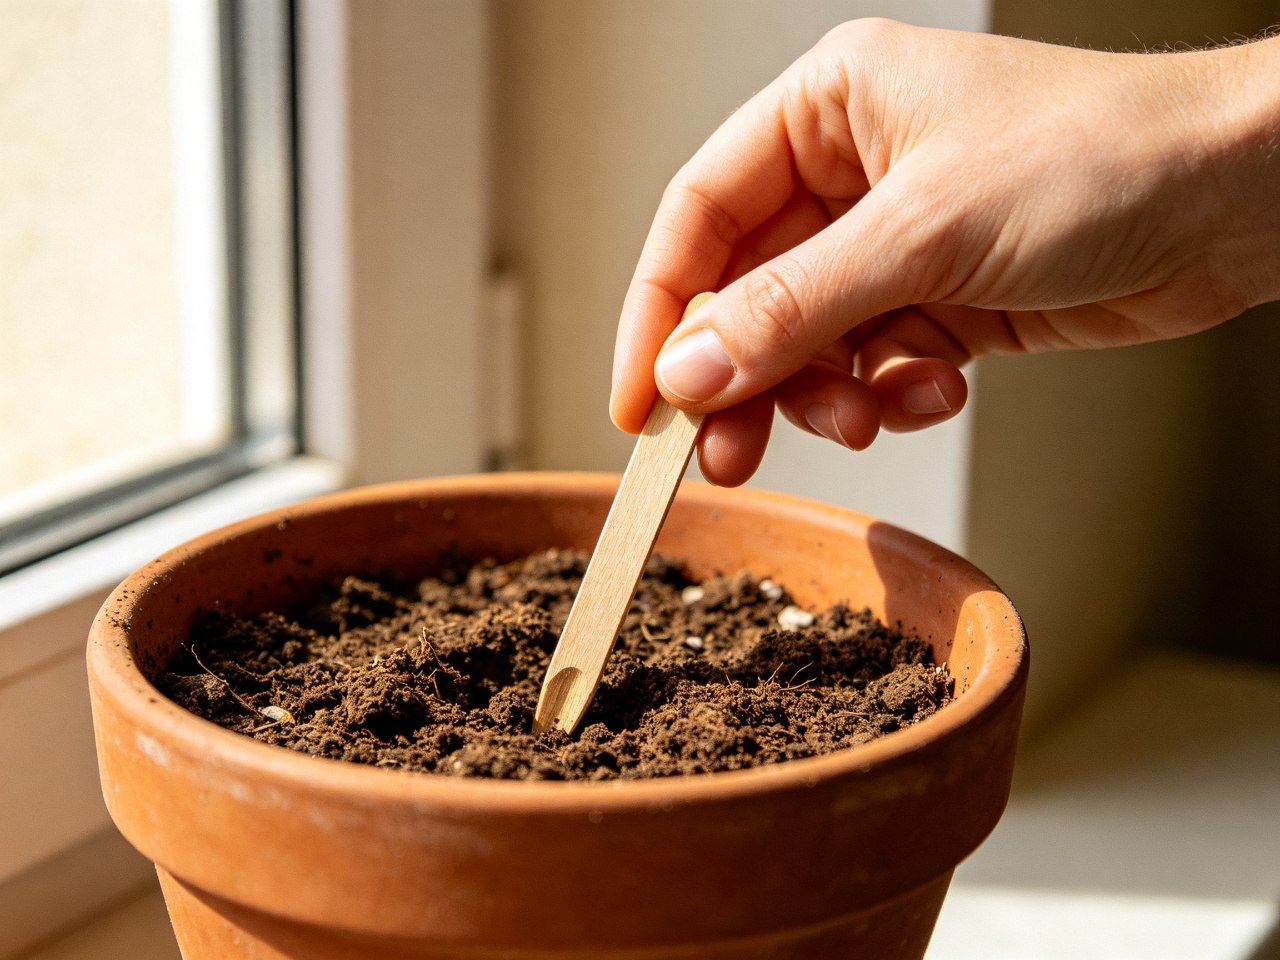
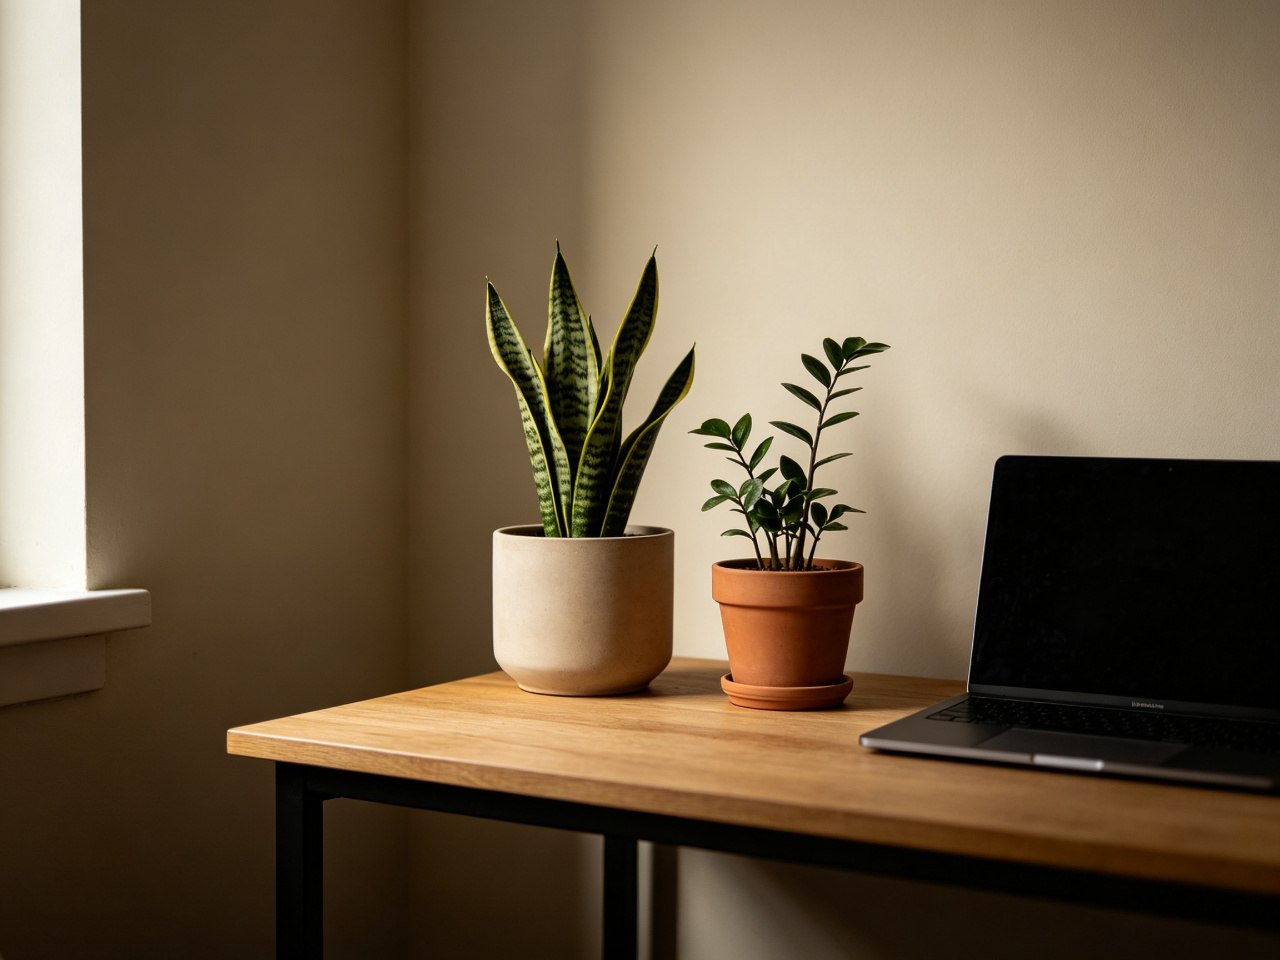
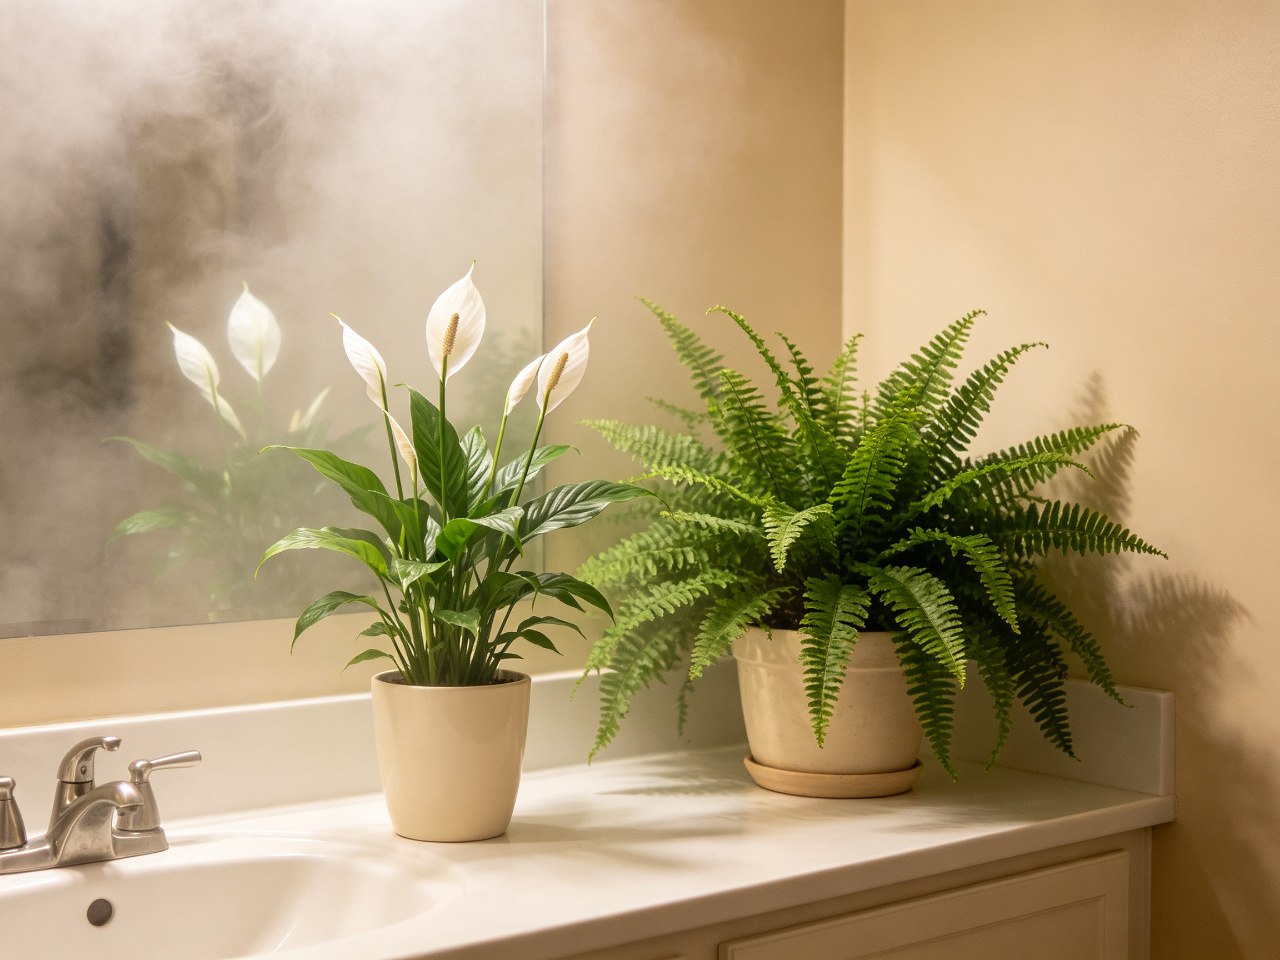
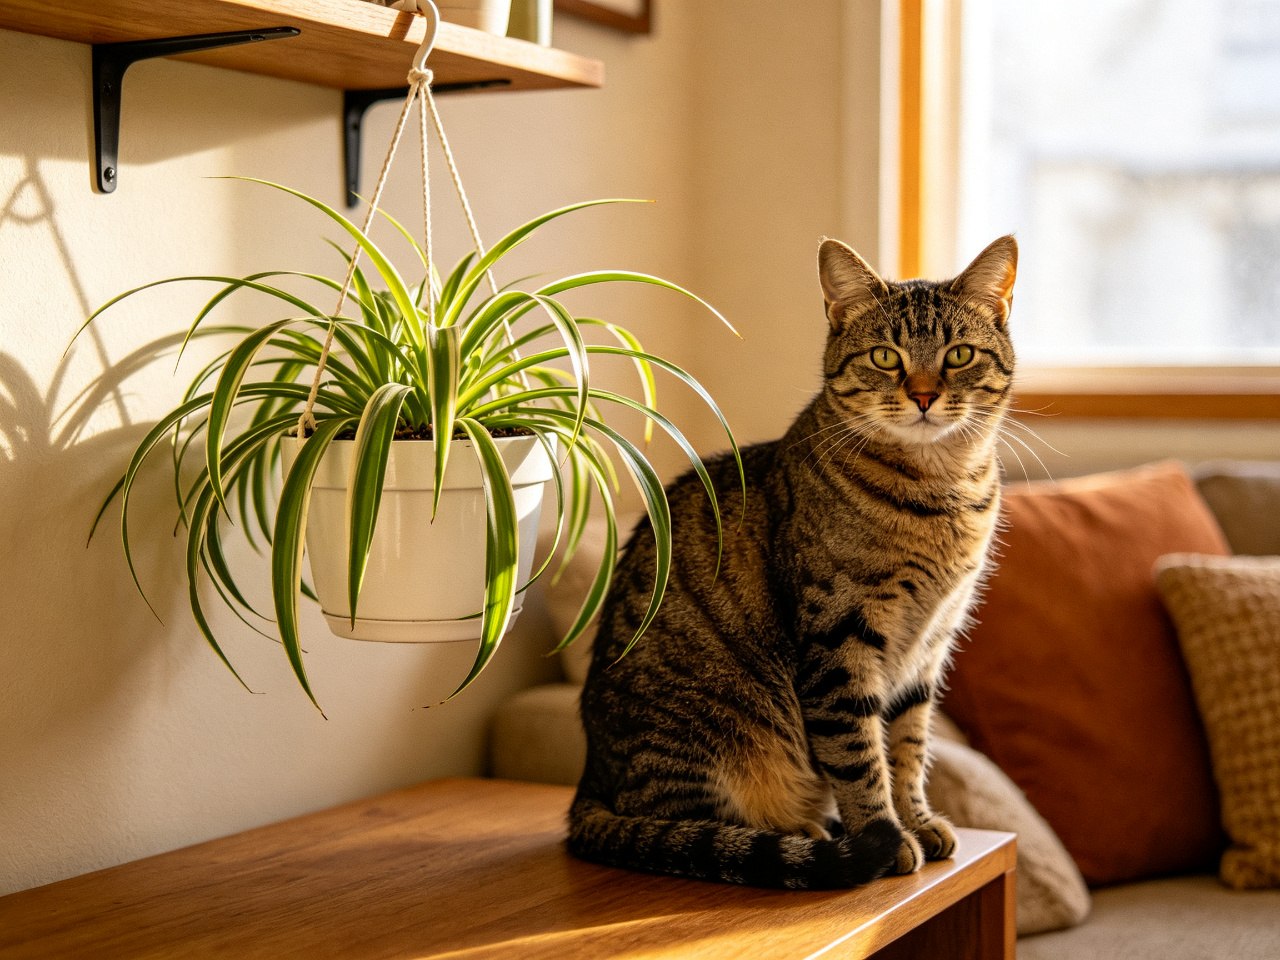
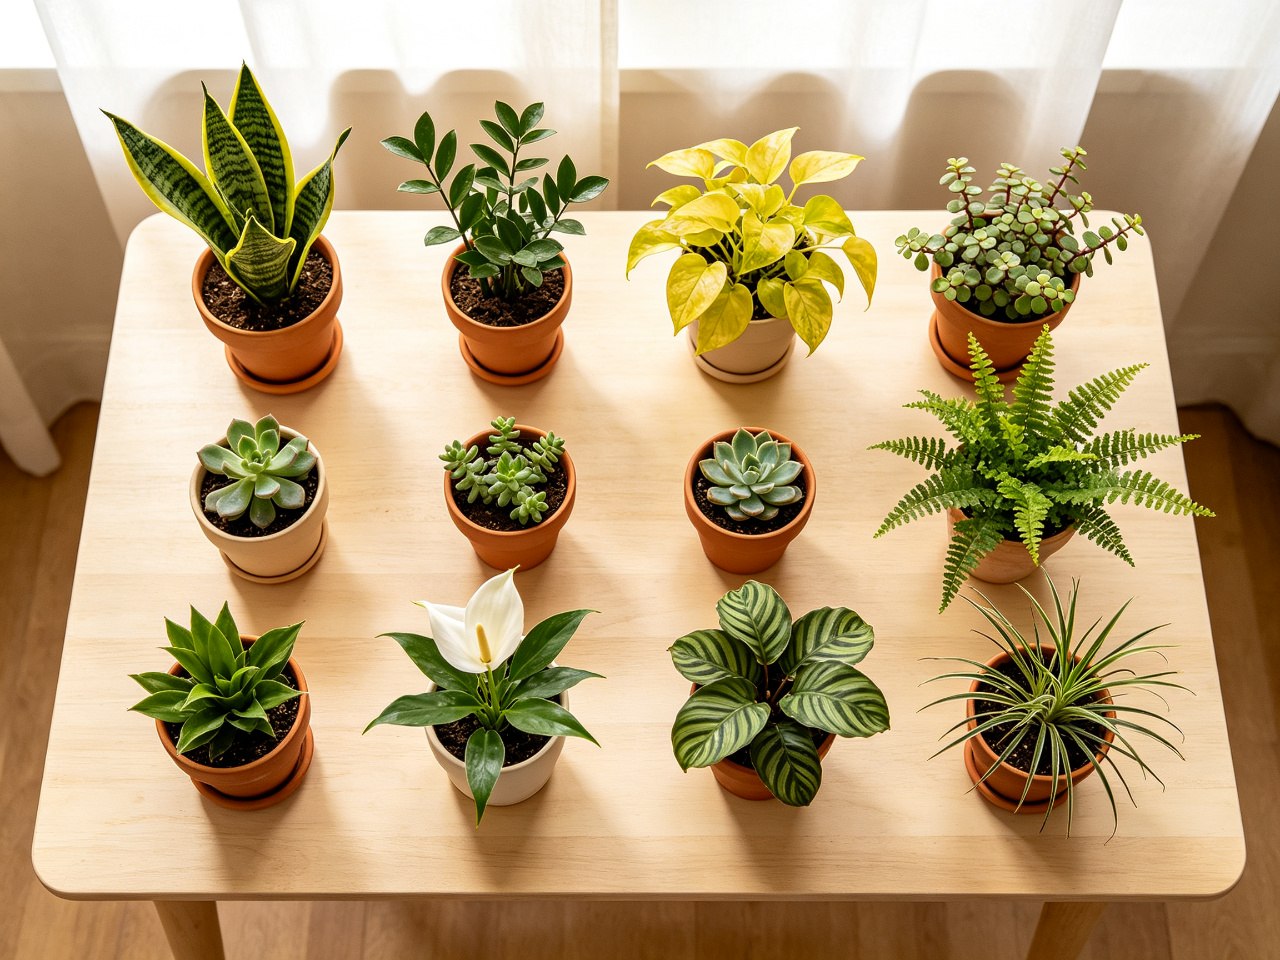
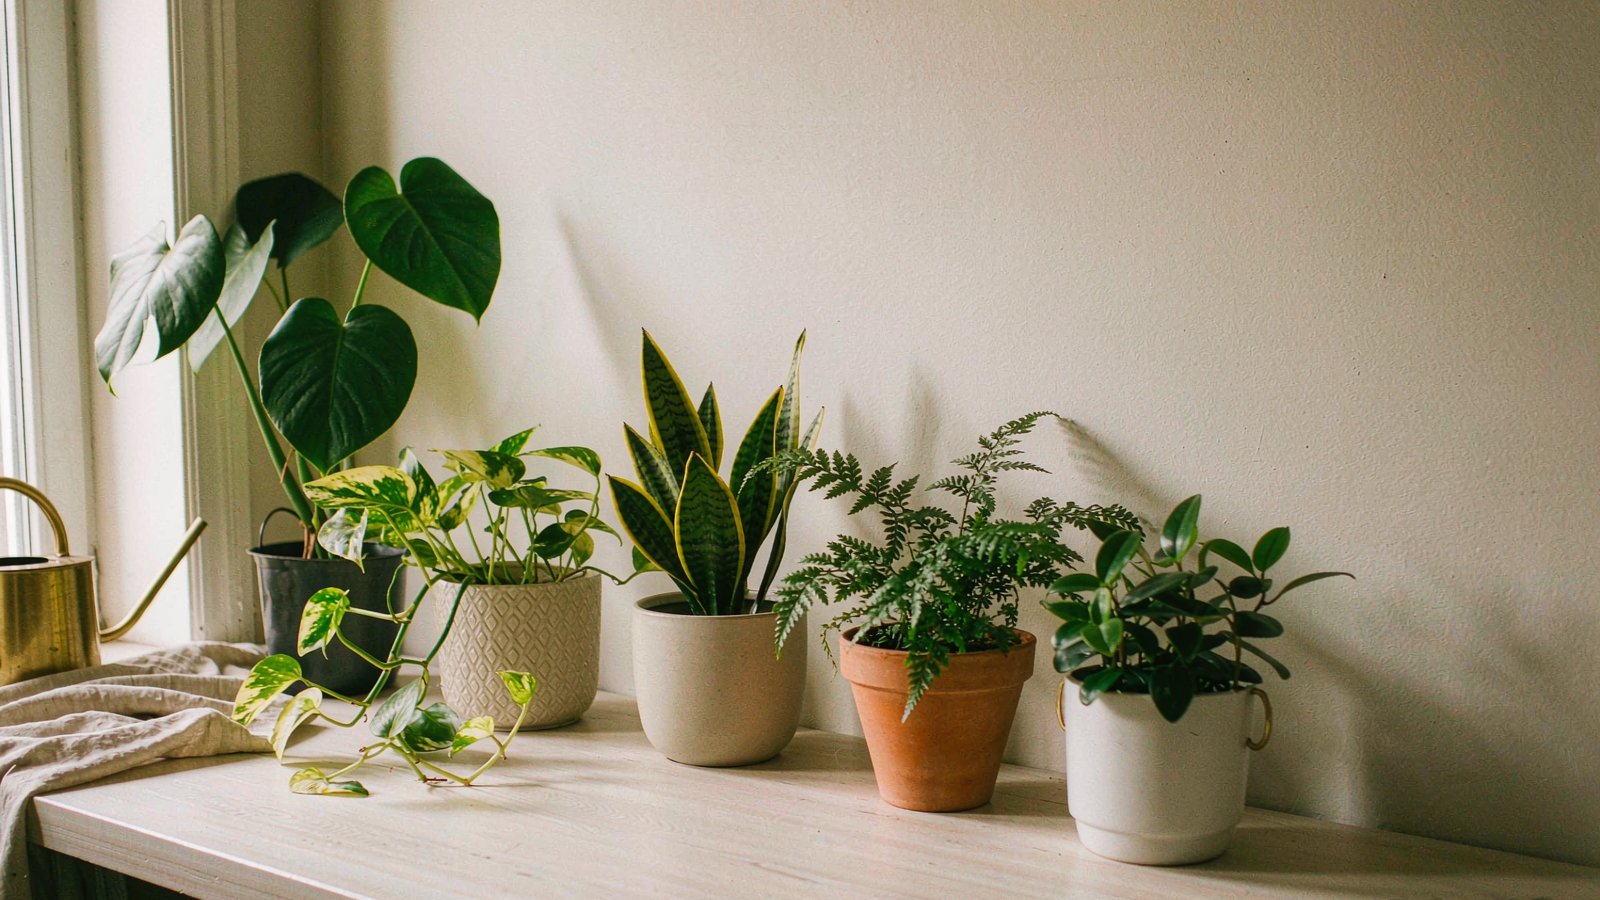
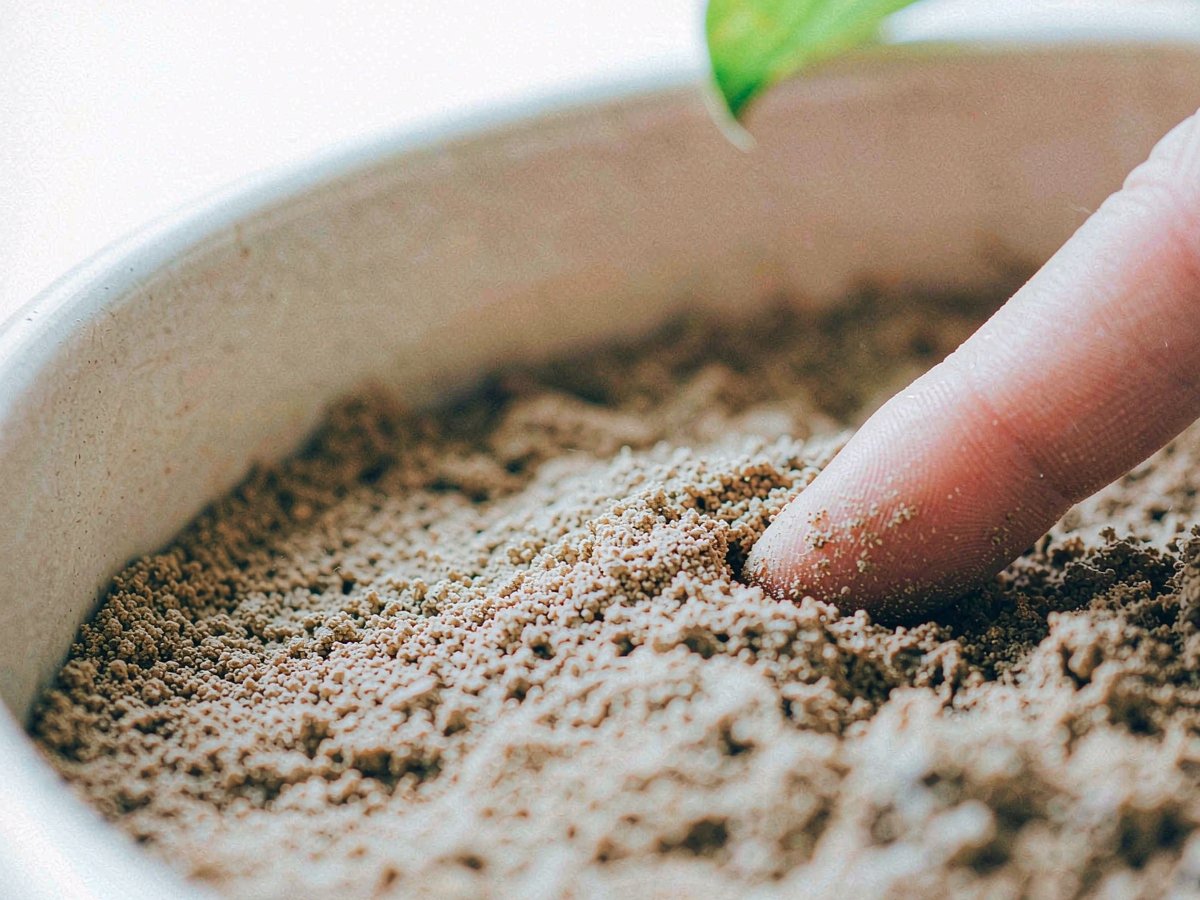
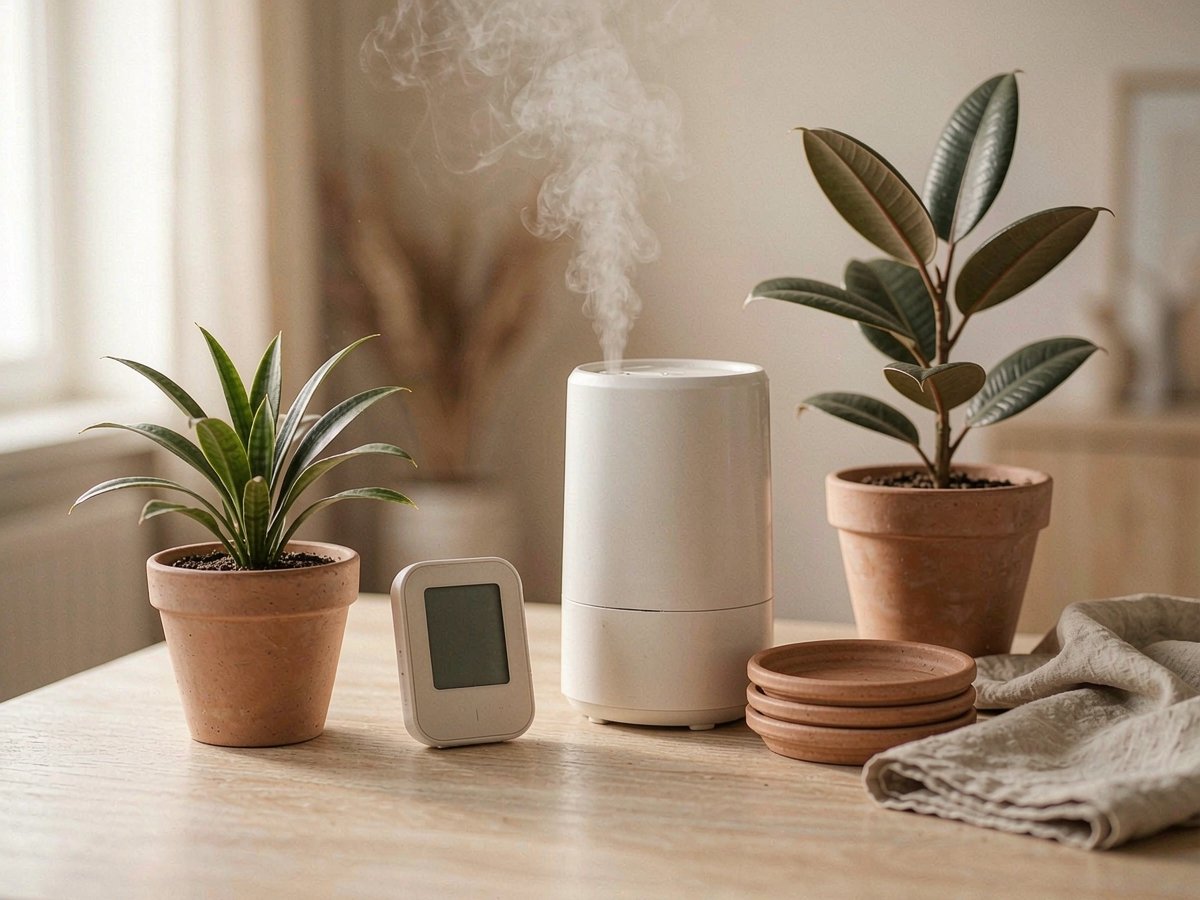
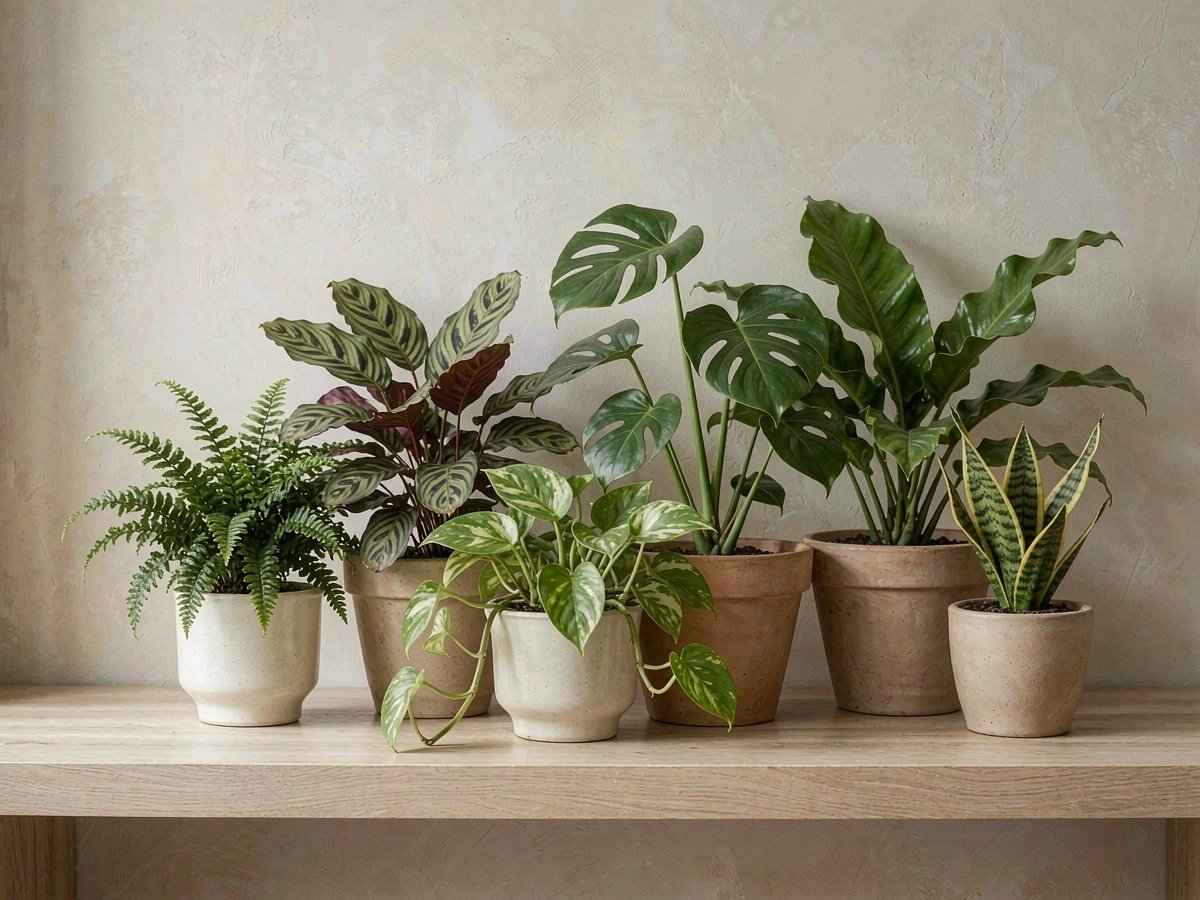
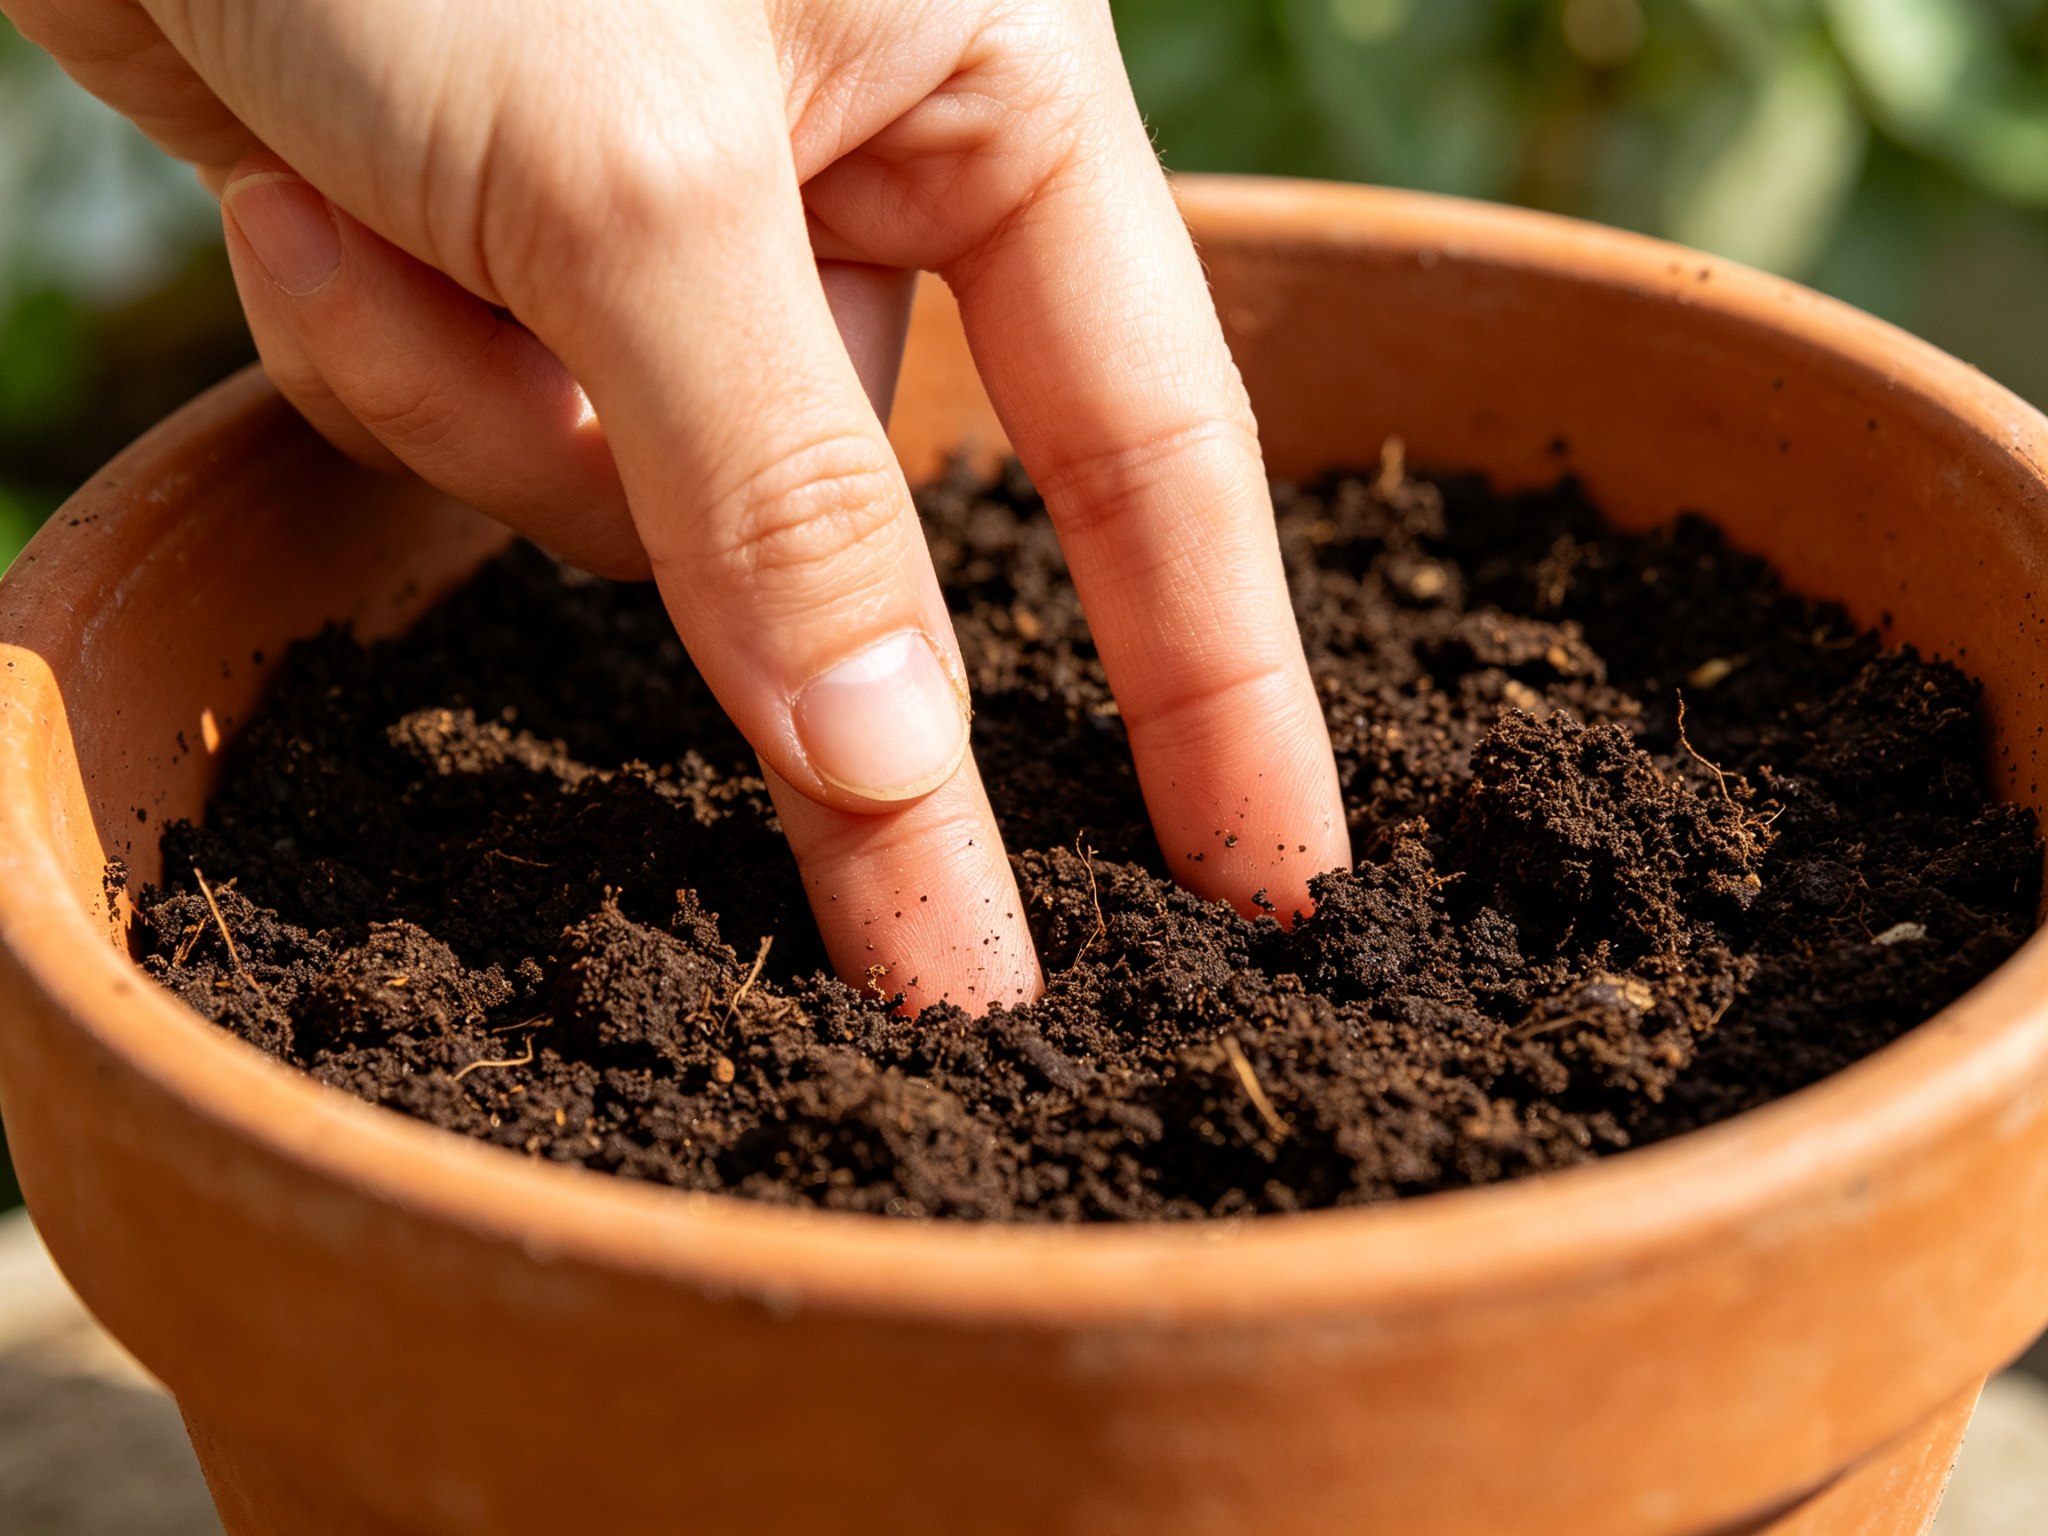
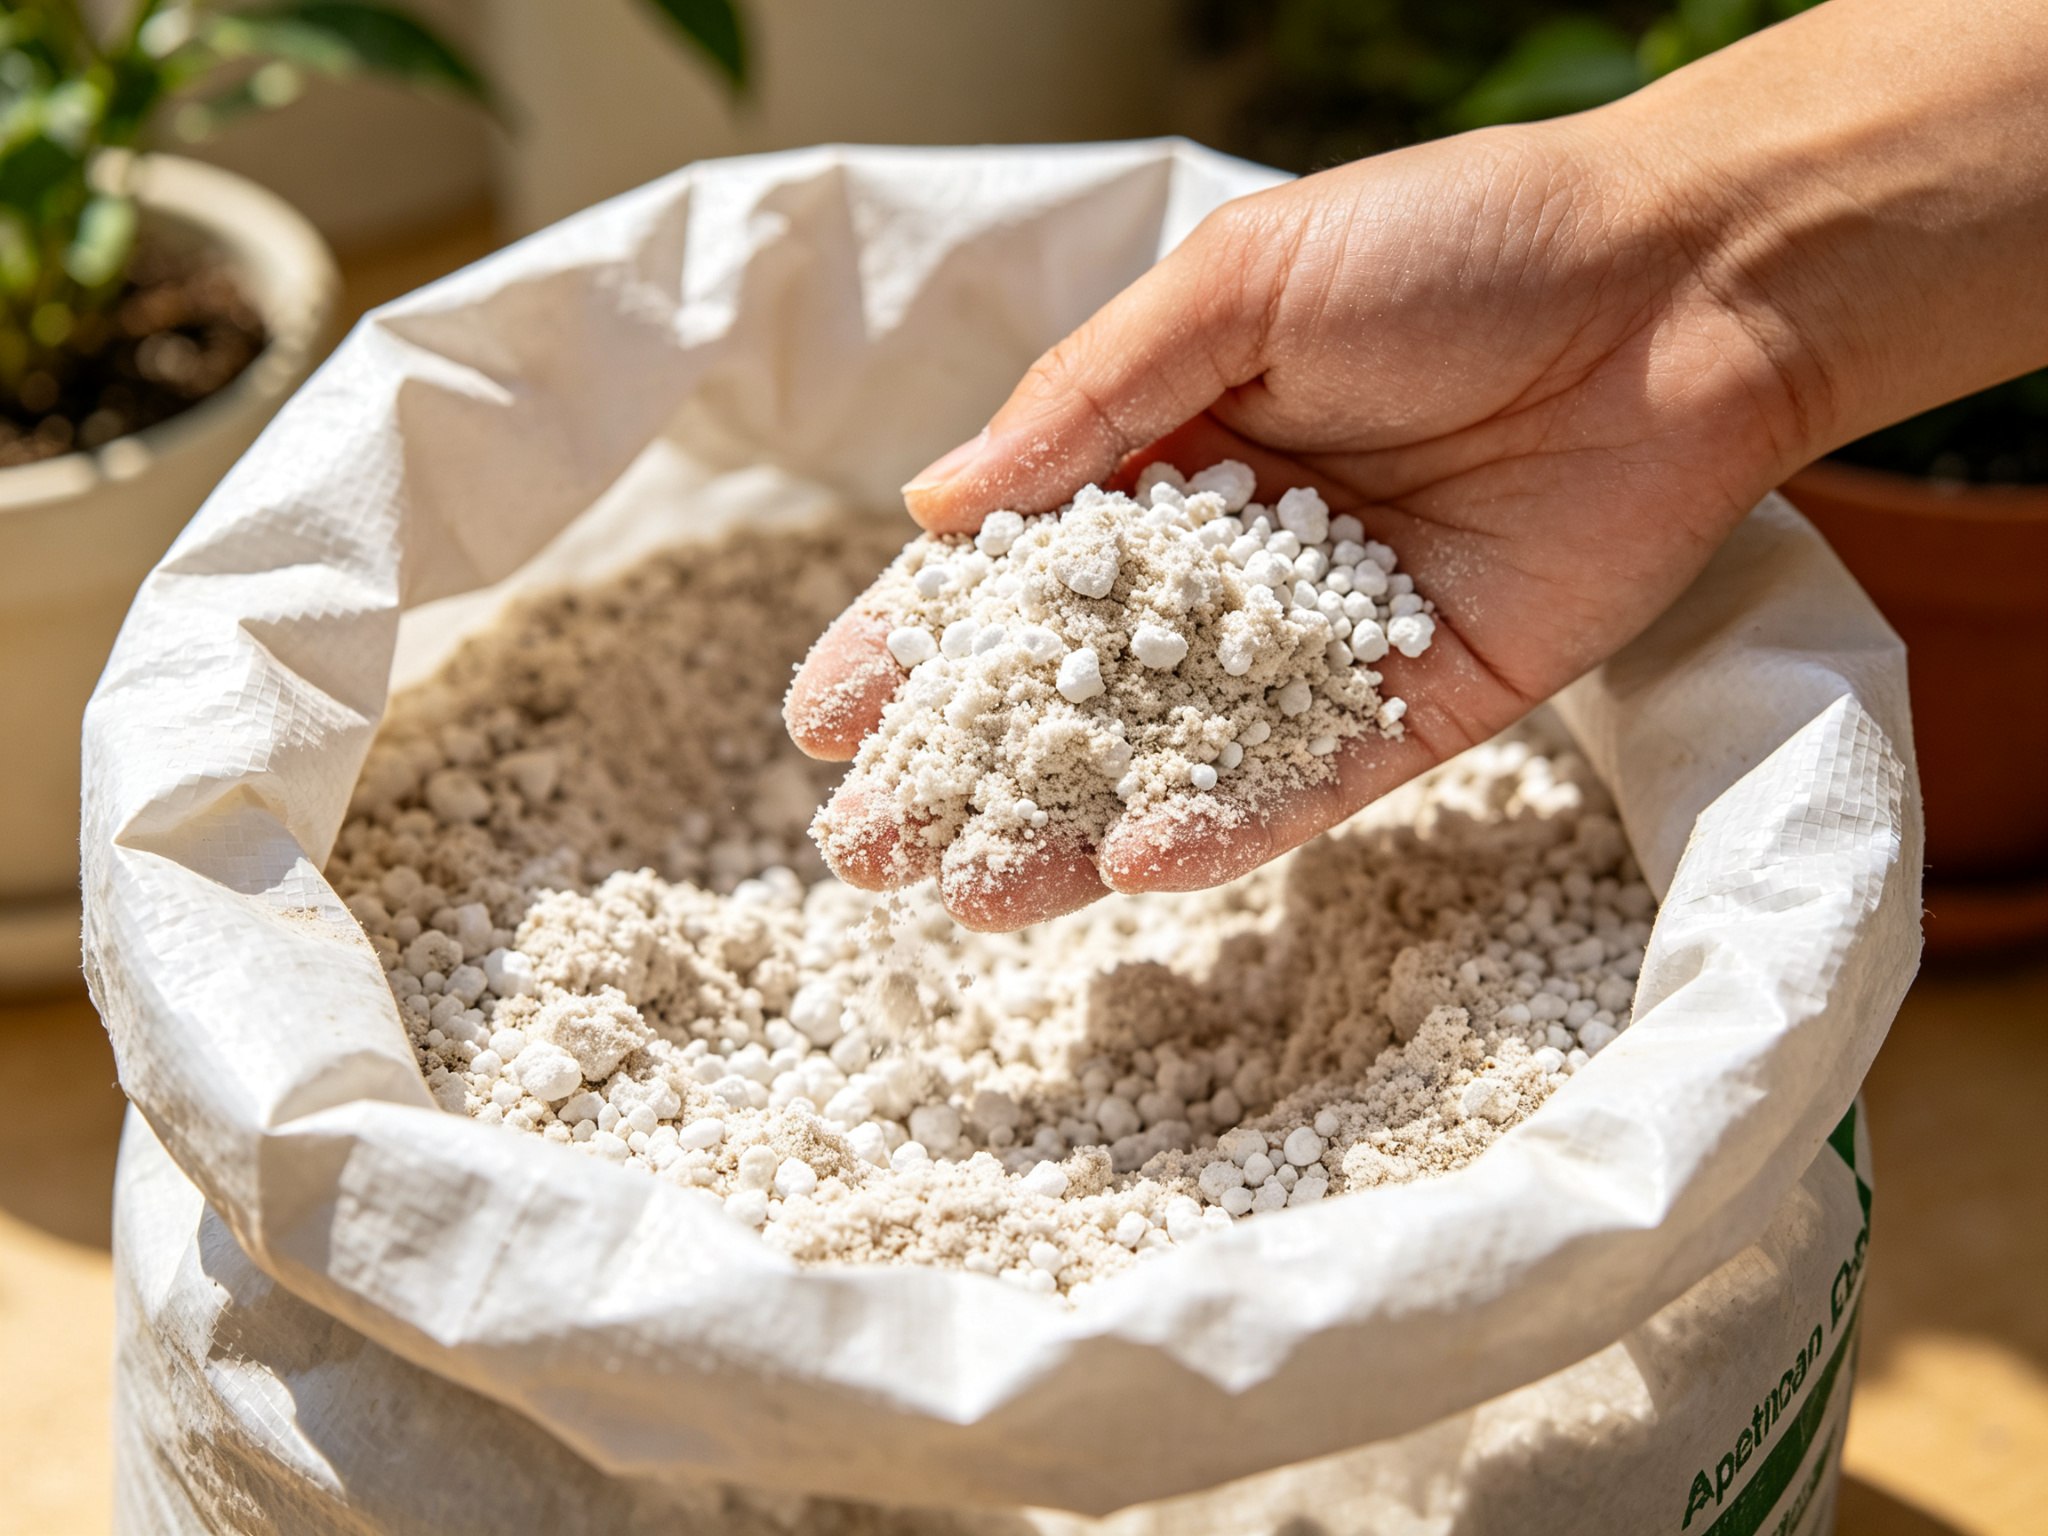
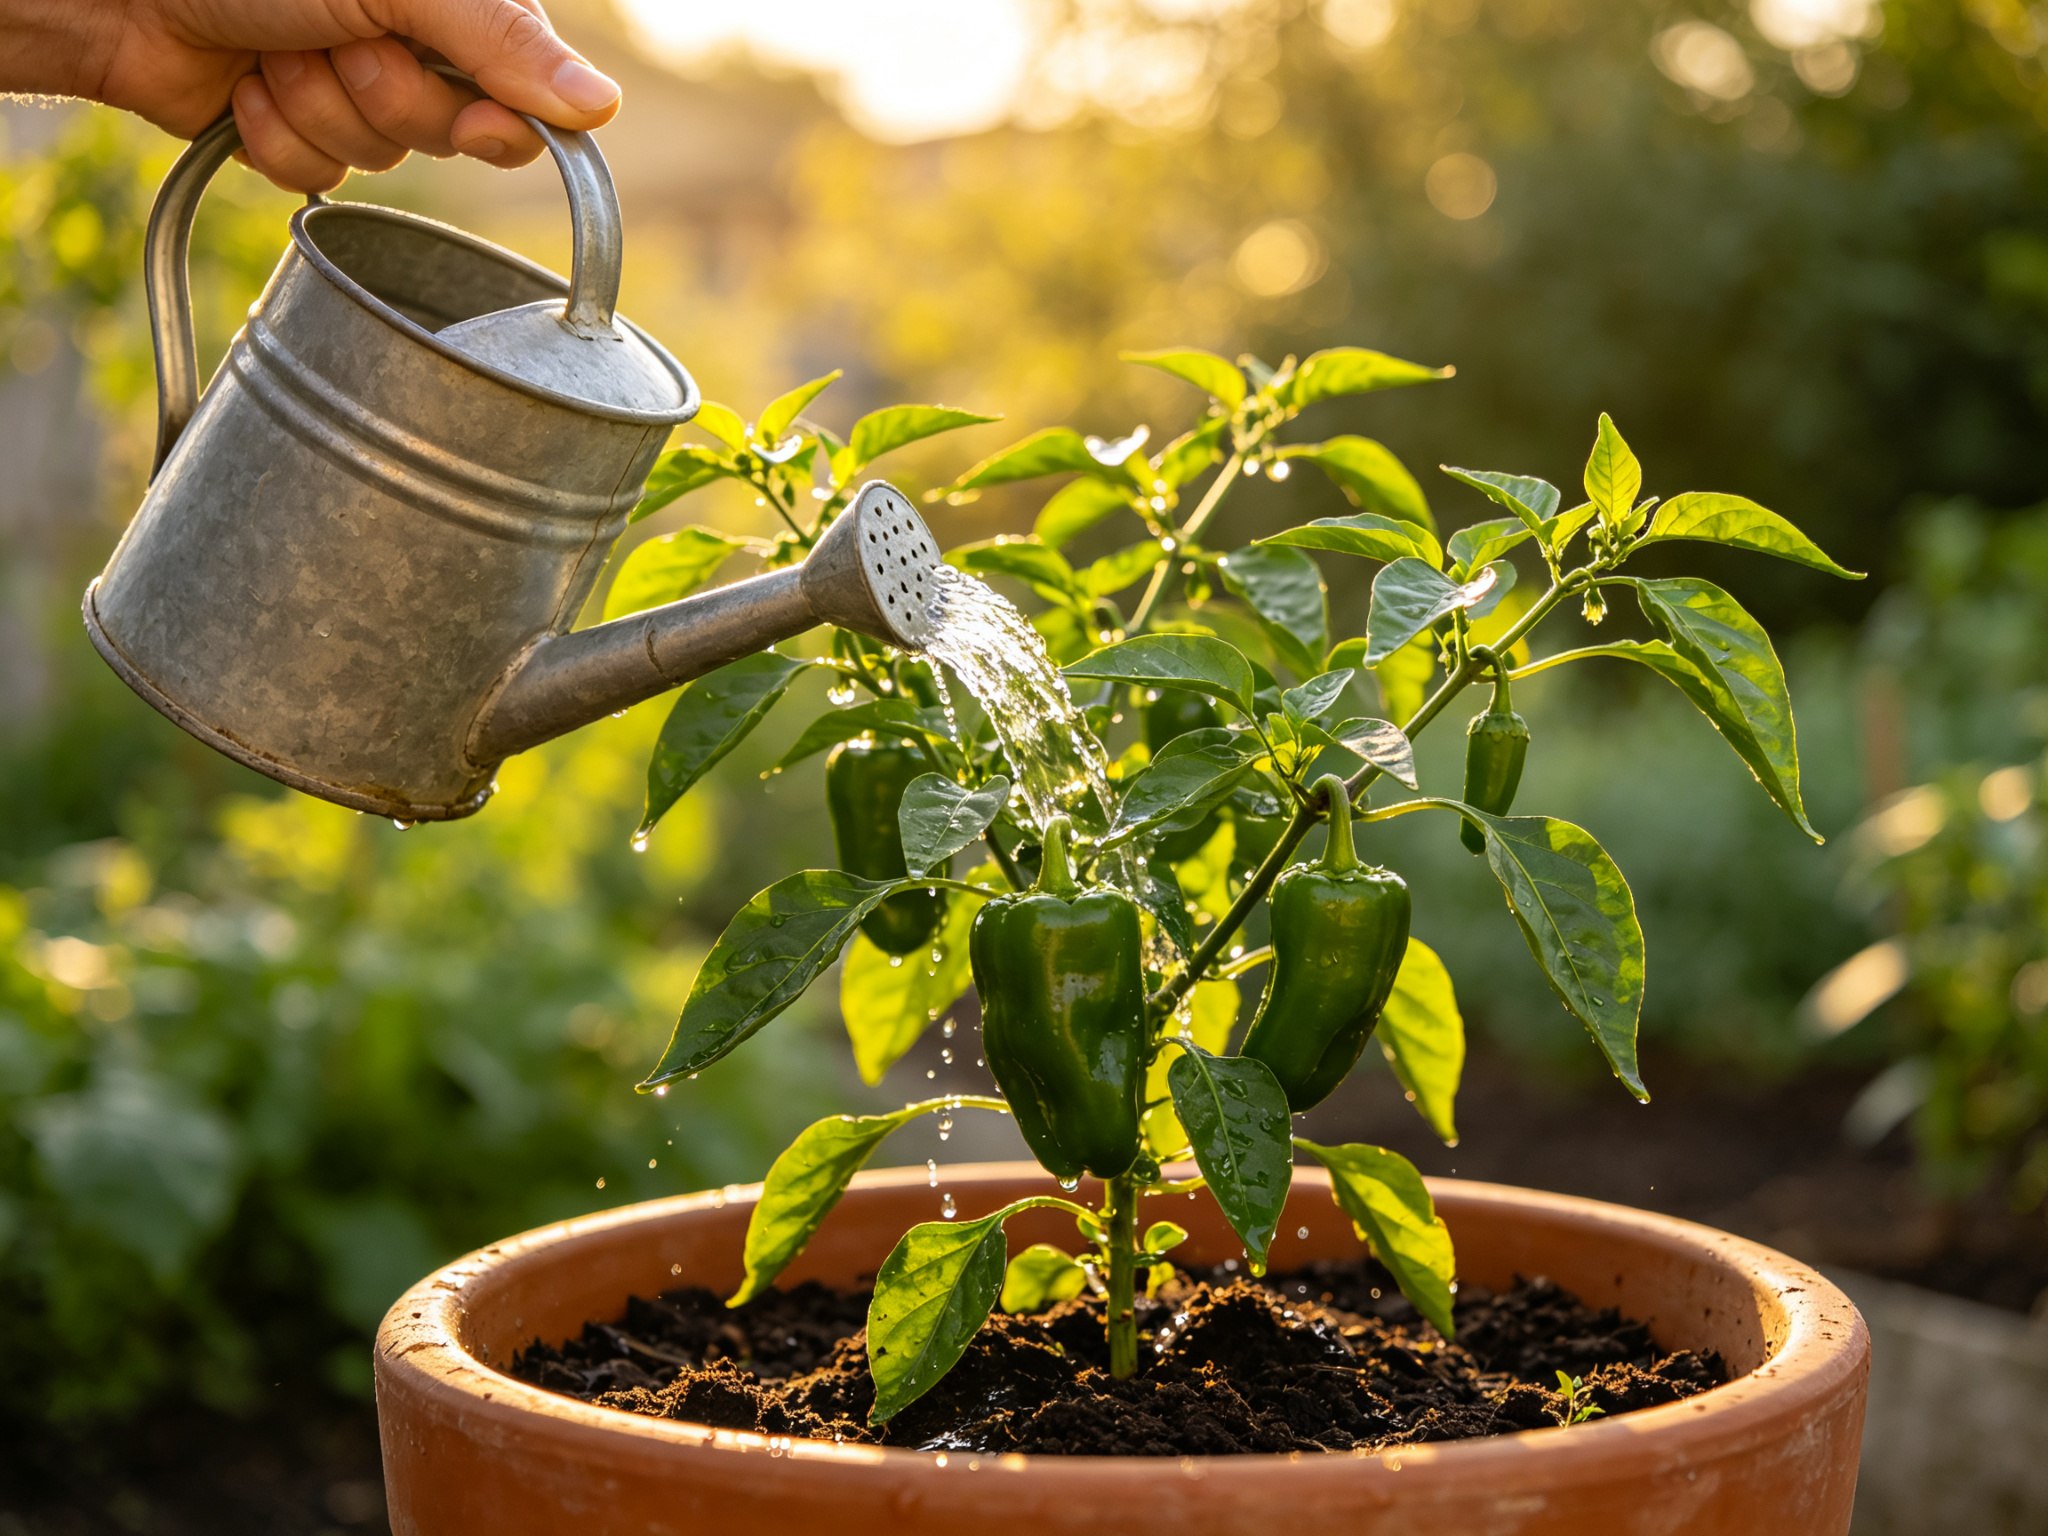
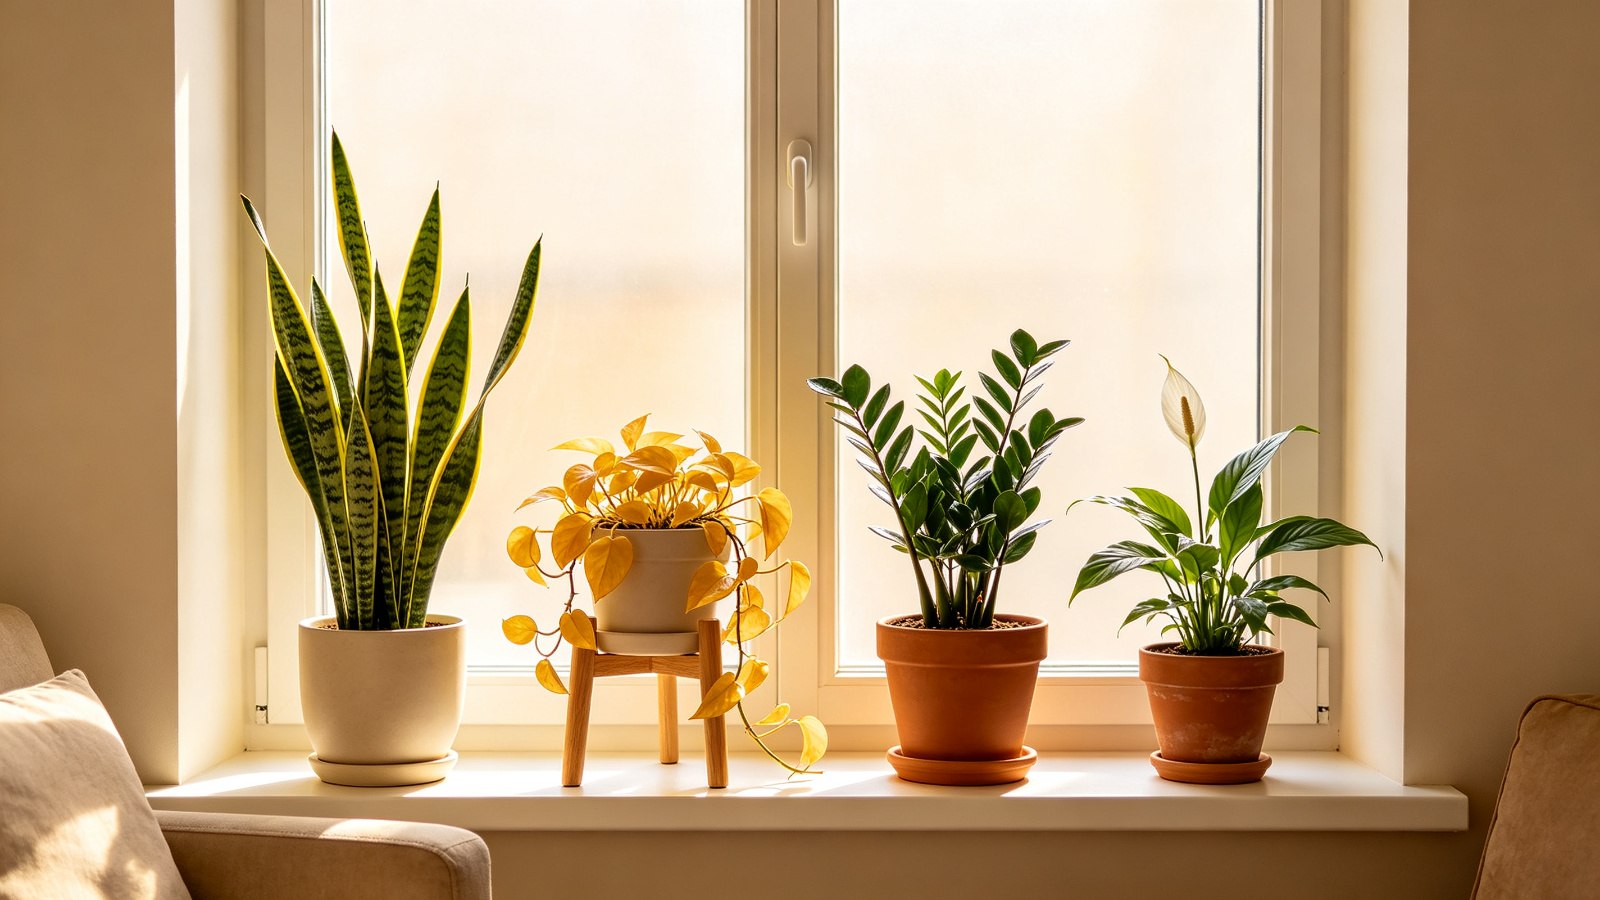
      <![CDATA[<h1 id="9-Hard-to-Kill-Houseplants-for-Beginners-3-Mistakes-to-Avoid"><a href="#9-Hard-to-Kill-Houseplants-for-Beginners-3-Mistakes-to-Avoid" class="headerlink" title="9 Hard-to-Kill Houseplants for Beginners: 3 Mistakes to Avoid"></a>9 Hard-to-Kill Houseplants for Beginners: 3 Mistakes to Avoid</h1><p><img src="https://img.673383.xyz/api/cfile/AgACAgUAAyEGAASo6uz_AANPaqvX7wEzNmtinUn9GPNGeGluLTsAAmUTaxsDQGFVulcNWYoTcQ8BAAMCAAN3AAM9BA" alt="A bright windowsill lined with beginner-friendly houseplants: snake plant, golden pothos, ZZ plant, and peace lily in terracotta and ceramic pots"></p><p>Most first plants don’t die from neglect. They die from kindness. Someone buys a cute little plant, waters it every Sunday like clockwork, and watches it rot in six weeks. The fix isn’t a greener thumb. It’s picking a plant that matches your actual light, your actual schedule, and your actual pets, then avoiding three mistakes that kill more first plants than any pest ever will.</p><p>This guide walks you through the nine easiest houseplants to keep alive, grouped by the four situations new plant parents actually live in. Each plant gets one line on why it survives you, and one line on how to care for it. Pick your situation, pick a plant, and skip the funeral.</p><h2 id="The-3-mistakes-that-kill-most-first-plants"><a href="#The-3-mistakes-that-kill-most-first-plants" class="headerlink" title="The 3 mistakes that kill most first plants"></a>The 3 mistakes that kill most first plants</h2><p><strong>Mistake 1: watering on a schedule.</strong> Plants don’t drink on a calendar. Water when the soil is dry, not when the app tells you to. Stick a finger two inches into the soil; if it comes out damp, close the watering can. A cheap <a href="https://www.amazon.com/dp/B0B7DQDRZC?tag=homegrownnook-20">soil moisture meter</a> takes the guesswork out of the finger test.</p><p><img src="https://img.673383.xyz/api/cfile/AgACAgUAAyEGAASo6uz_AANRaqvX-WkkKznkcLupsBSkh476ZwUAAmcTaxsDQGFVA9pgqqhEzZYBAAMCAAN5AAM9BA" alt="A hand inserting a wooden moisture meter probe into dry potting soil in a terracotta pot by a window"></p><p><strong>Mistake 2: choosing a plant for looks instead of light.</strong> That dreamy calathea with painted leaves will sulk on a dark shelf, and you’ll blame yourself. Match the plant to the room first. If the room gets almost no light, pick from Group 1 below and stop browsing the Instagram plants.</p><p><strong>Mistake 3: fussing.</strong> Repotting the week you bring it home, moving it to a new spot every few days, fertilizing it to show love. Every change is stress. Give a new plant two weeks in one spot before you do anything except water it. If you’re tempted to do more, go make tea instead. (More on container basics and common setup slips in our <a href="/container-gardening-mistakes/">container gardening mistakes post</a>.)</p><h2 id="Group-1-Low-light-north-windows-offices-bathrooms"><a href="#Group-1-Low-light-north-windows-offices-bathrooms" class="headerlink" title="Group 1: Low light: north windows, offices, bathrooms"></a>Group 1: Low light: north windows, offices, bathrooms</h2><p><strong>Snake Plant (Dracaena trifasciata).</strong> The plant that forgives everything. It tolerates low light, dry air, and weeks of neglect, and it only needs watering every two to three weeks. Why it survives you: it stores water in thick leaves and photosynthesizes on a slow schedule. Care: bright light is fine, dim light is fine; just don’t sit it in soggy soil.</p><p><strong>ZZ Plant (Zamioculcas zamiifolia).</strong> The other unkillable low-light legend. Shiny dark leaves that look fake, growth that keeps going in a corner that gets morning light for an hour. Why it survives you: underground rhizomes hold water reserves, so missed waterings bounce right back. Care: water when the top two inches are dry, which can be every two to three weeks.</p><p><img src="https://img.673383.xyz/api/cfile/AgACAgUAAyEGAASo6uz_AANQaqvX9CAYcn_qdNVF5Na2yb01cX0AAmYTaxsDQGFVdg1TSQkR4-kBAAMCAAN5AAM9BA" alt="A snake plant and a ZZ plant in matte ceramic pots on a wooden desk in a dim north-facing corner"></p><p>If your space has no real window light at all, even these two will eventually stretch. A <a href="https://www.amazon.com/dp/B0C3364WGY?tag=homegrownnook-20">full-spectrum grow bulb</a> in a desk lamp can carry them for years on a north wall, and we explain exactly how far to hang it in our <a href="/grow-lights-for-indoor-plants/">grow lights for indoor plants guide</a>.</p><h2 id="Group-2-Forgetting-to-water-busy-schedules-and-travel"><a href="#Group-2-Forgetting-to-water-busy-schedules-and-travel" class="headerlink" title="Group 2: Forgetting to water: busy schedules and travel"></a>Group 2: Forgetting to water: busy schedules and travel</h2><p><strong>Golden Pothos (Epipremnum aureum).</strong> The plant that tells you when it’s thirsty: leaves droop dramatically, then bounce back within hours of a drink. Why it survives you: it forgives both under-watering and over-watering better than almost anything. Care: water when the top inch dries, bright indirect light or a modest window.</p><p><strong>Hoya (wax plant).</strong> Thick waxy leaves store water like a succulent, so it genuinely prefers to dry out between waterings. Why it survives you: it wants to be forgotten. Care: water every two to three weeks, let it trail from a shelf, and leave it alone.</p><p><strong>Succulents and cacti.</strong> The classic “I forgot about you for a month” plants. Why they survive you: they’re built for drought. Care: bright light, gritty soil, and water only when the soil is bone dry. If you want the full routine, we have a whole <a href="/easy-succulents-beginners/">succulents for beginners guide</a> and a <a href="/how-to-grow-cactus-at-home/">cactus care walkthrough</a> with the soil mix that actually keeps them alive.</p><h2 id="Group-3-Humid-rooms-bathrooms-and-kitchens"><a href="#Group-3-Humid-rooms-bathrooms-and-kitchens" class="headerlink" title="Group 3: Humid rooms: bathrooms and kitchens"></a>Group 3: Humid rooms: bathrooms and kitchens</h2><p><strong>Peace Lily (Spathiphyllum).</strong> The plant that visibly faints when thirsty, then stands back up after a drink. Why it survives you: it’s loud about its needs, which is the opposite of most houseplants. Care: it likes the humidity of a bathroom, bright indirect light, and watering when the leaves start to droop.</p><p><strong>Boston Fern (Nephrolepis exaltata).</strong> The humidity lover that thrives in steamy bathrooms and kitchens. Why it survives you: it’s forgiving as long as the air isn’t dry and the soil isn’t bone dry. Care: keep the soil lightly moist, give it indirect light, and trim the brown tips without guilt.</p><p>A note beginners get backwards: high humidity does not mean more watering. A fern in a steamy bathroom wants a drink only when the top inch of soil dries, not every day. In dry winter air, a small <a href="https://www.amazon.com/dp/B013IJPTFK?tag=homegrownnook-20">cool-mist humidifier</a> on the counter keeps ferns from crisping at the tips.</p><p><img src="https://img.673383.xyz/api/cfile/AgACAgUAAyEGAASo6uz_AANSaqvX_S8OwMNZpyD475y76qRQq44AAmgTaxsDQGFV-j2ZtzZ9cqABAAMCAAN5AAM9BA" alt="A peace lily with white blooms and a lush Boston fern in cream pots on a bathroom counter near a mirror"></p><h2 id="Group-4-Pets-at-home-plants-safe-for-cats-and-dogs"><a href="#Group-4-Pets-at-home-plants-safe-for-cats-and-dogs" class="headerlink" title="Group 4: Pets at home: plants safe for cats and dogs"></a>Group 4: Pets at home: plants safe for cats and dogs</h2><p><strong>Spider Plant (Chlorophytum comosum).</strong> A safe, forgiving, fast-growing plant that cats sometimes nibble without harm. Why it survives you: it tolerates a wide range of light and bounces back from missed waterings. Care: bright indirect light, water when the top inch dries, and it’ll reward you with baby plantlets.</p><p><strong>Calathea (prayer plant family).</strong> The prettiest plant on this list, and the pickiest. Why it survives you: with the right spot it’s reliable, and many varieties are non-toxic to pets. Care: it needs consistent moisture and humidity, so keep it in a bathroom or near a humidifier. Check the ASPCA’s toxic plant list before you commit to any plant, including these two, because individual tolerance varies.</p><p><img src="https://img.673383.xyz/api/cfile/AgACAgUAAyEGAASo6uz_AANTaqvYAAFns4dvm8_3BDvxneOa6NfcAAJpE2sbA0BhVa6KgPvzHdItAQADAgADeQADPQQ" alt="A tabby cat sitting calmly beside a healthy trailing spider plant in a white hanging pot on a wooden shelf"></p><h2 id="What-to-actually-buy-for-a-first-plant"><a href="#What-to-actually-buy-for-a-first-plant" class="headerlink" title="What to actually buy for a first plant"></a>What to actually buy for a first plant</h2><p>You don’t need a shelf full of gadgets. Three things cover 90 percent of beginners:</p><ol><li><strong>A pot with drainage.</strong> A simple <a href="https://www.amazon.com/dp/B08HCX2D9V?tag=homegrownnook-20">pot with a drainage hole</a>, or a decorative pot you lift the grower pot out of before watering, is the cheapest insurance you can buy. Root rot is the number one plant killer, and it starts with water pooling at the bottom.</li><li><strong>A bagged houseplant mix.</strong> A <a href="https://www.amazon.com/dp/B082BPL2ZF?tag=homegrownnook-20">bagged houseplant mix with perlite</a> drains faster and keeps beginners out of the mud-and-rot trap. Most houseplants hate dense, waterlogged soil.</li><li><strong>A moisture meter.</strong> Ten dollars that ends the “should I water it?” debate. If the needle says dry, water; if it says moist, walk away.</li></ol><h2 id="FAQ"><a href="#FAQ" class="headerlink" title="FAQ"></a>FAQ</h2><p><strong>What is the easiest houseplant to keep alive?</strong><br>Snake plant and ZZ plant are the two that survive almost anything, including low light, missed waterings, and total neglect. For most beginners, a snake plant is the safest first plant on earth.</p><p><strong>How often should I water my houseplants?</strong><br>There’s no universal schedule. Check the soil: water when the top one to two inches are dry, which might mean once a week for a pothos and once a month for a snake plant. The plant, the pot, and the room all change the answer.</p><p><strong>Can houseplants survive in a room with no windows?</strong><br>For a few weeks, yes. For the long term, no plant thrives in true darkness. If you want plants in a windowless office, pair a low-light plant with a grow light (here’s our <a href="/grow-lights-for-indoor-plants/">full grow light guide</a>).</p><p><strong>Are snake plants safe for cats and dogs?</strong><br>No, snake plants are mildly toxic to pets if ingested. For pet households, the safe picks on this list are spider plants and many calathea varieties. Always check the ASPCA’s toxic and non-toxic plant database before buying.</p><h2 id="The-short-version"><a href="#The-short-version" class="headerlink" title="The short version"></a>The short version</h2><p><img src="https://img.673383.xyz/api/cfile/AgACAgUAAyEGAASo6uz_AANUaqvYBXajNcnUkjraiFfwj9AHcCsAAmoTaxsDQGFVxbn2fnSWP_oBAAMCAAN5AAM9BA" alt="An overhead flat-lay of nine beginner houseplants in simple pots arranged in a grid on a pale wooden table"></p><p>Pick your situation first: low light, a busy schedule, a humid bathroom, or a pet household. Pick one plant from that group. Give it a pot with drainage, soil that doesn’t hold water like a sponge, and water only when the soil says dry. Skip the schedule, skip the fussing, and let the plant tell you what it needs. That’s the whole secret, and it’s the same advice our <a href="/fall-houseplant-care-checklist/">fall houseplant care checklist</a> builds on when the seasons change.</p><p><em>Happy growing — the watering can stays closed until the soil says otherwise.</em></p><p><em>Disclosure: Some links in this post are affiliate links. If you buy through them, I may earn a small commission at no extra cost to you. See the full <a href="/affiliate-disclosure/">affiliate disclosure</a>.</em></p>]]>
    </content>
    <id>https://homegrownnook.com/hard-to-kill-houseplants-for-beginners/</id>
    <link href="https://homegrownnook.com/hard-to-kill-houseplants-for-beginners/"/>
    <published>2026-09-17T21:30:00.000Z</published>
    <summary>9 genuinely hard-to-kill houseplants, grouped by the 4 situations new plant parents actually live in, plus the 3 mistakes that kill most first plants.</summary>
    <title>9 Hard-to-Kill Houseplants for Beginners: 3 Mistakes to Avoid</title>
    <updated>2026-09-18T13:00:00.000Z</updated>
  </entry>
  <entry>
    <author>
      <name>Sage</name>
    </author>
    <category term="Plant Library" scheme="https://homegrownnook.com/categories/plant-library/"/>
    <category term="Beginner Basics" scheme="https://homegrownnook.com/categories/plant-library/beginner-basics/"/>
    <category term="Grow Lights" scheme="https://homegrownnook.com/categories/Grow-Lights/"/>
    <category term="indoor-plants" scheme="https://homegrownnook.com/tags/indoor-plants/"/>
    <category term="houseplants" scheme="https://homegrownnook.com/tags/houseplants/"/>
    <category term="grow-lights" scheme="https://homegrownnook.com/tags/grow-lights/"/>
    <category term="led-lighting" scheme="https://homegrownnook.com/tags/led-lighting/"/>
    <category term="gear-picks" scheme="https://homegrownnook.com/tags/gear-picks/"/>
    <content>
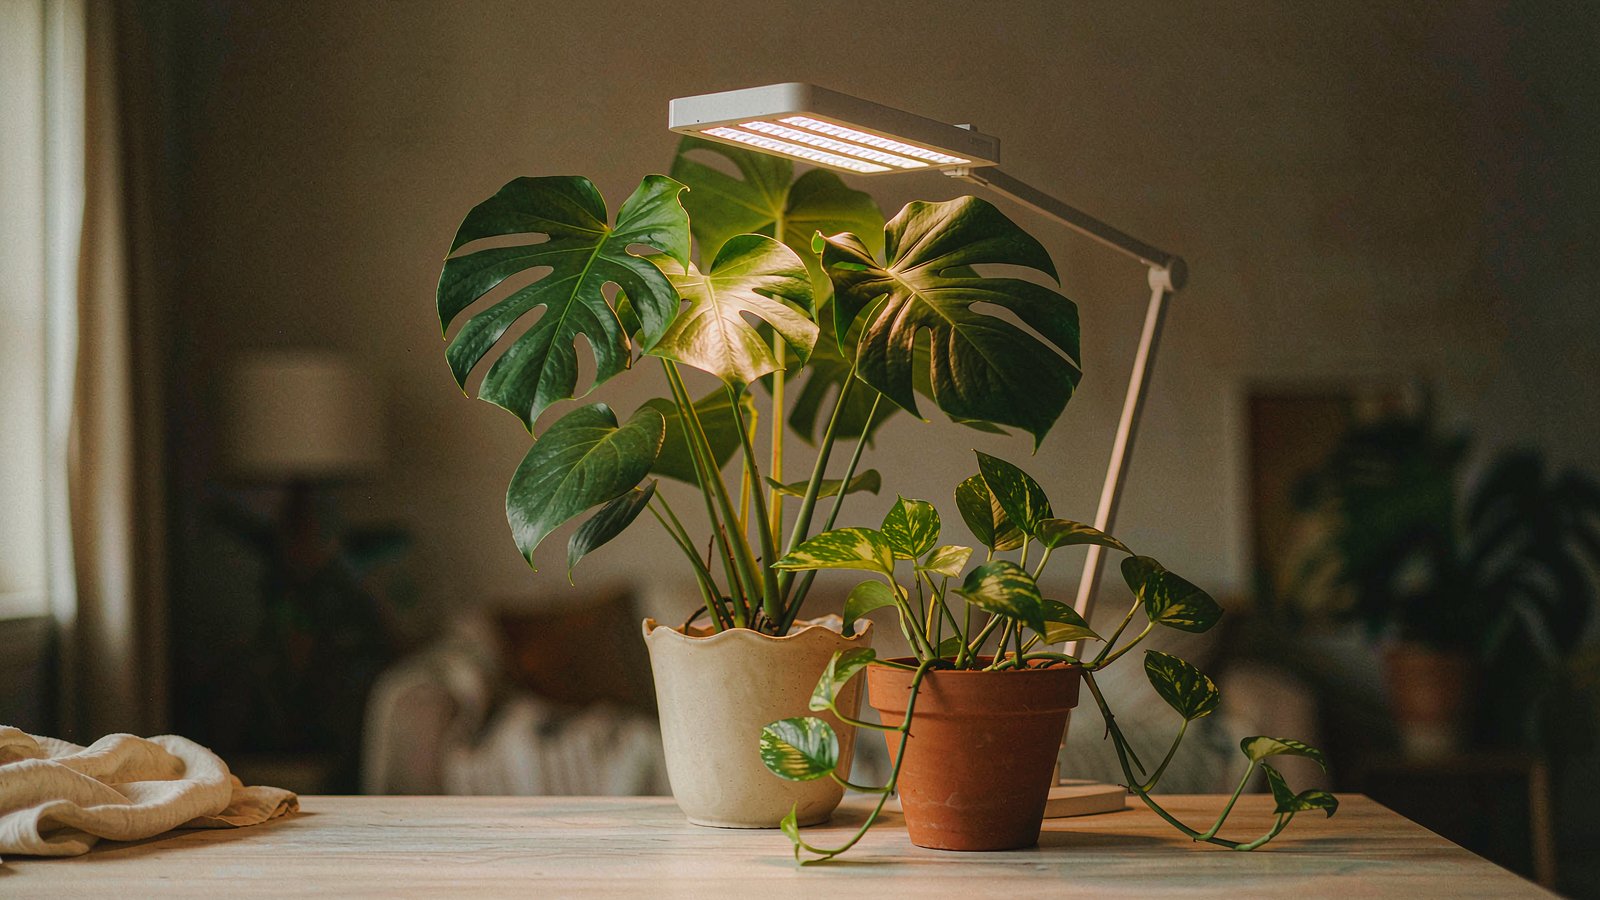
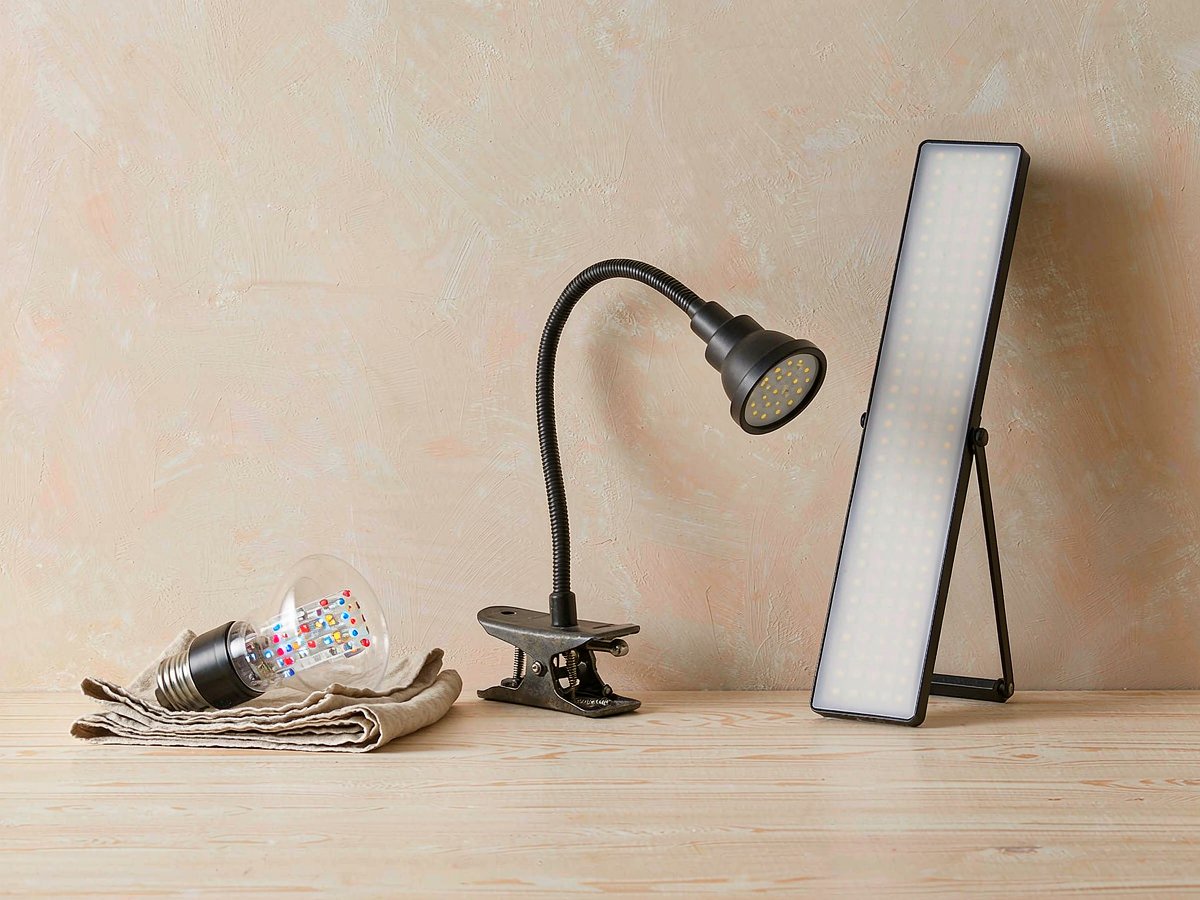
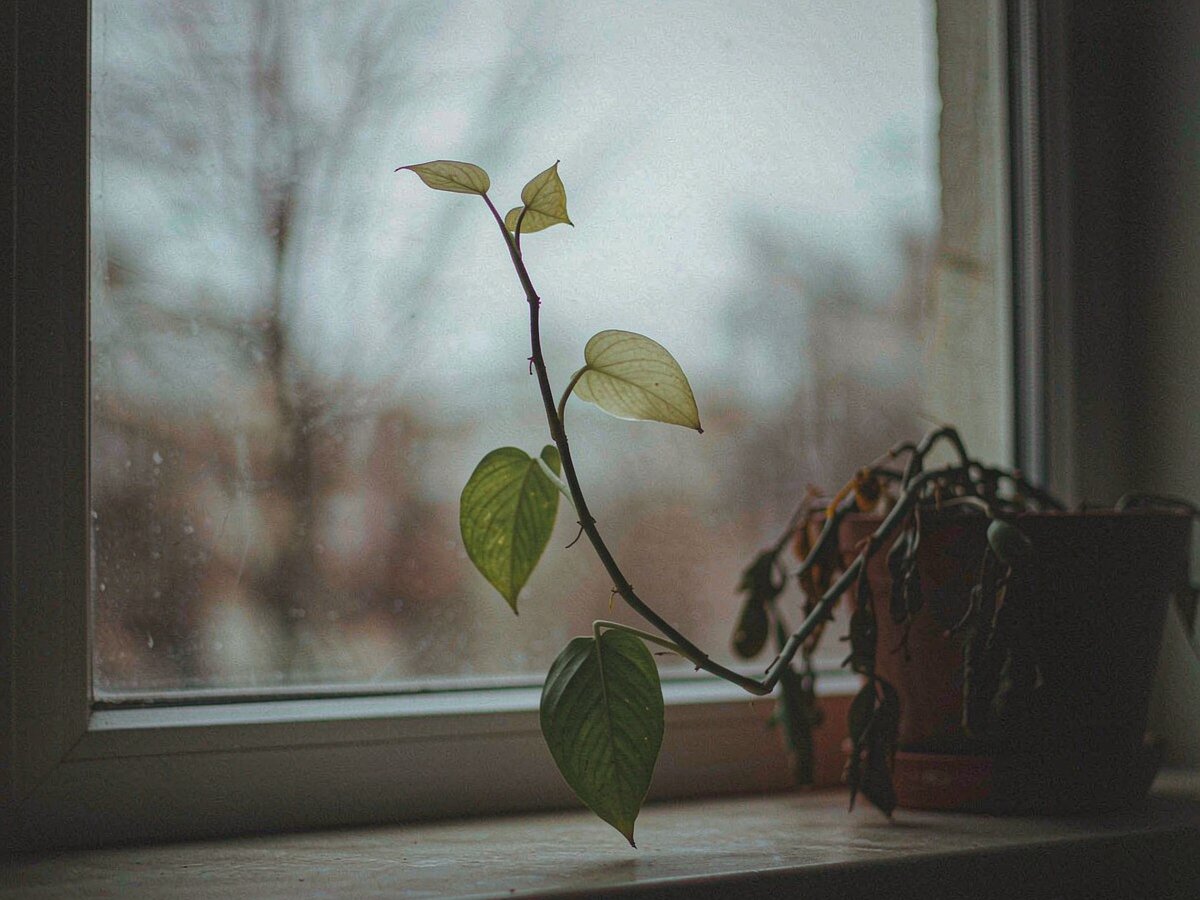
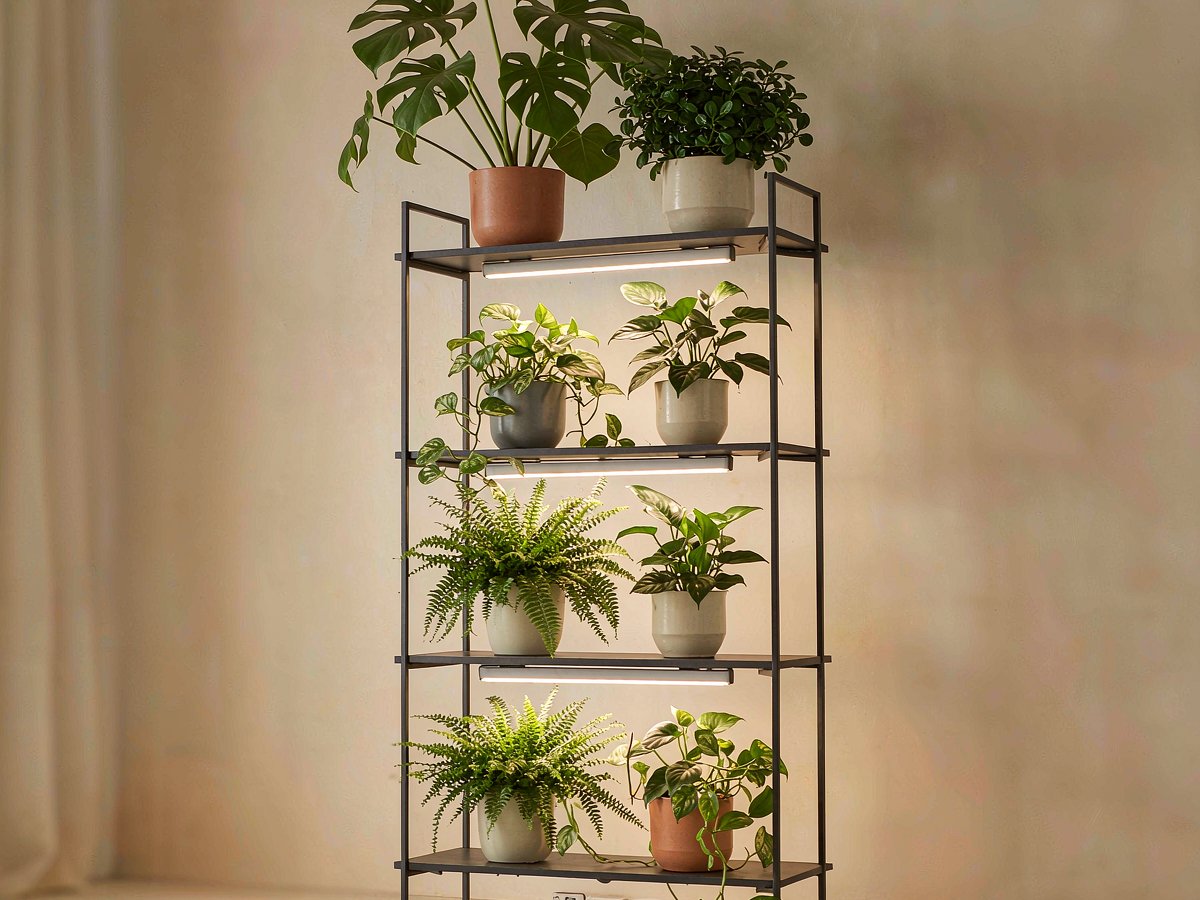
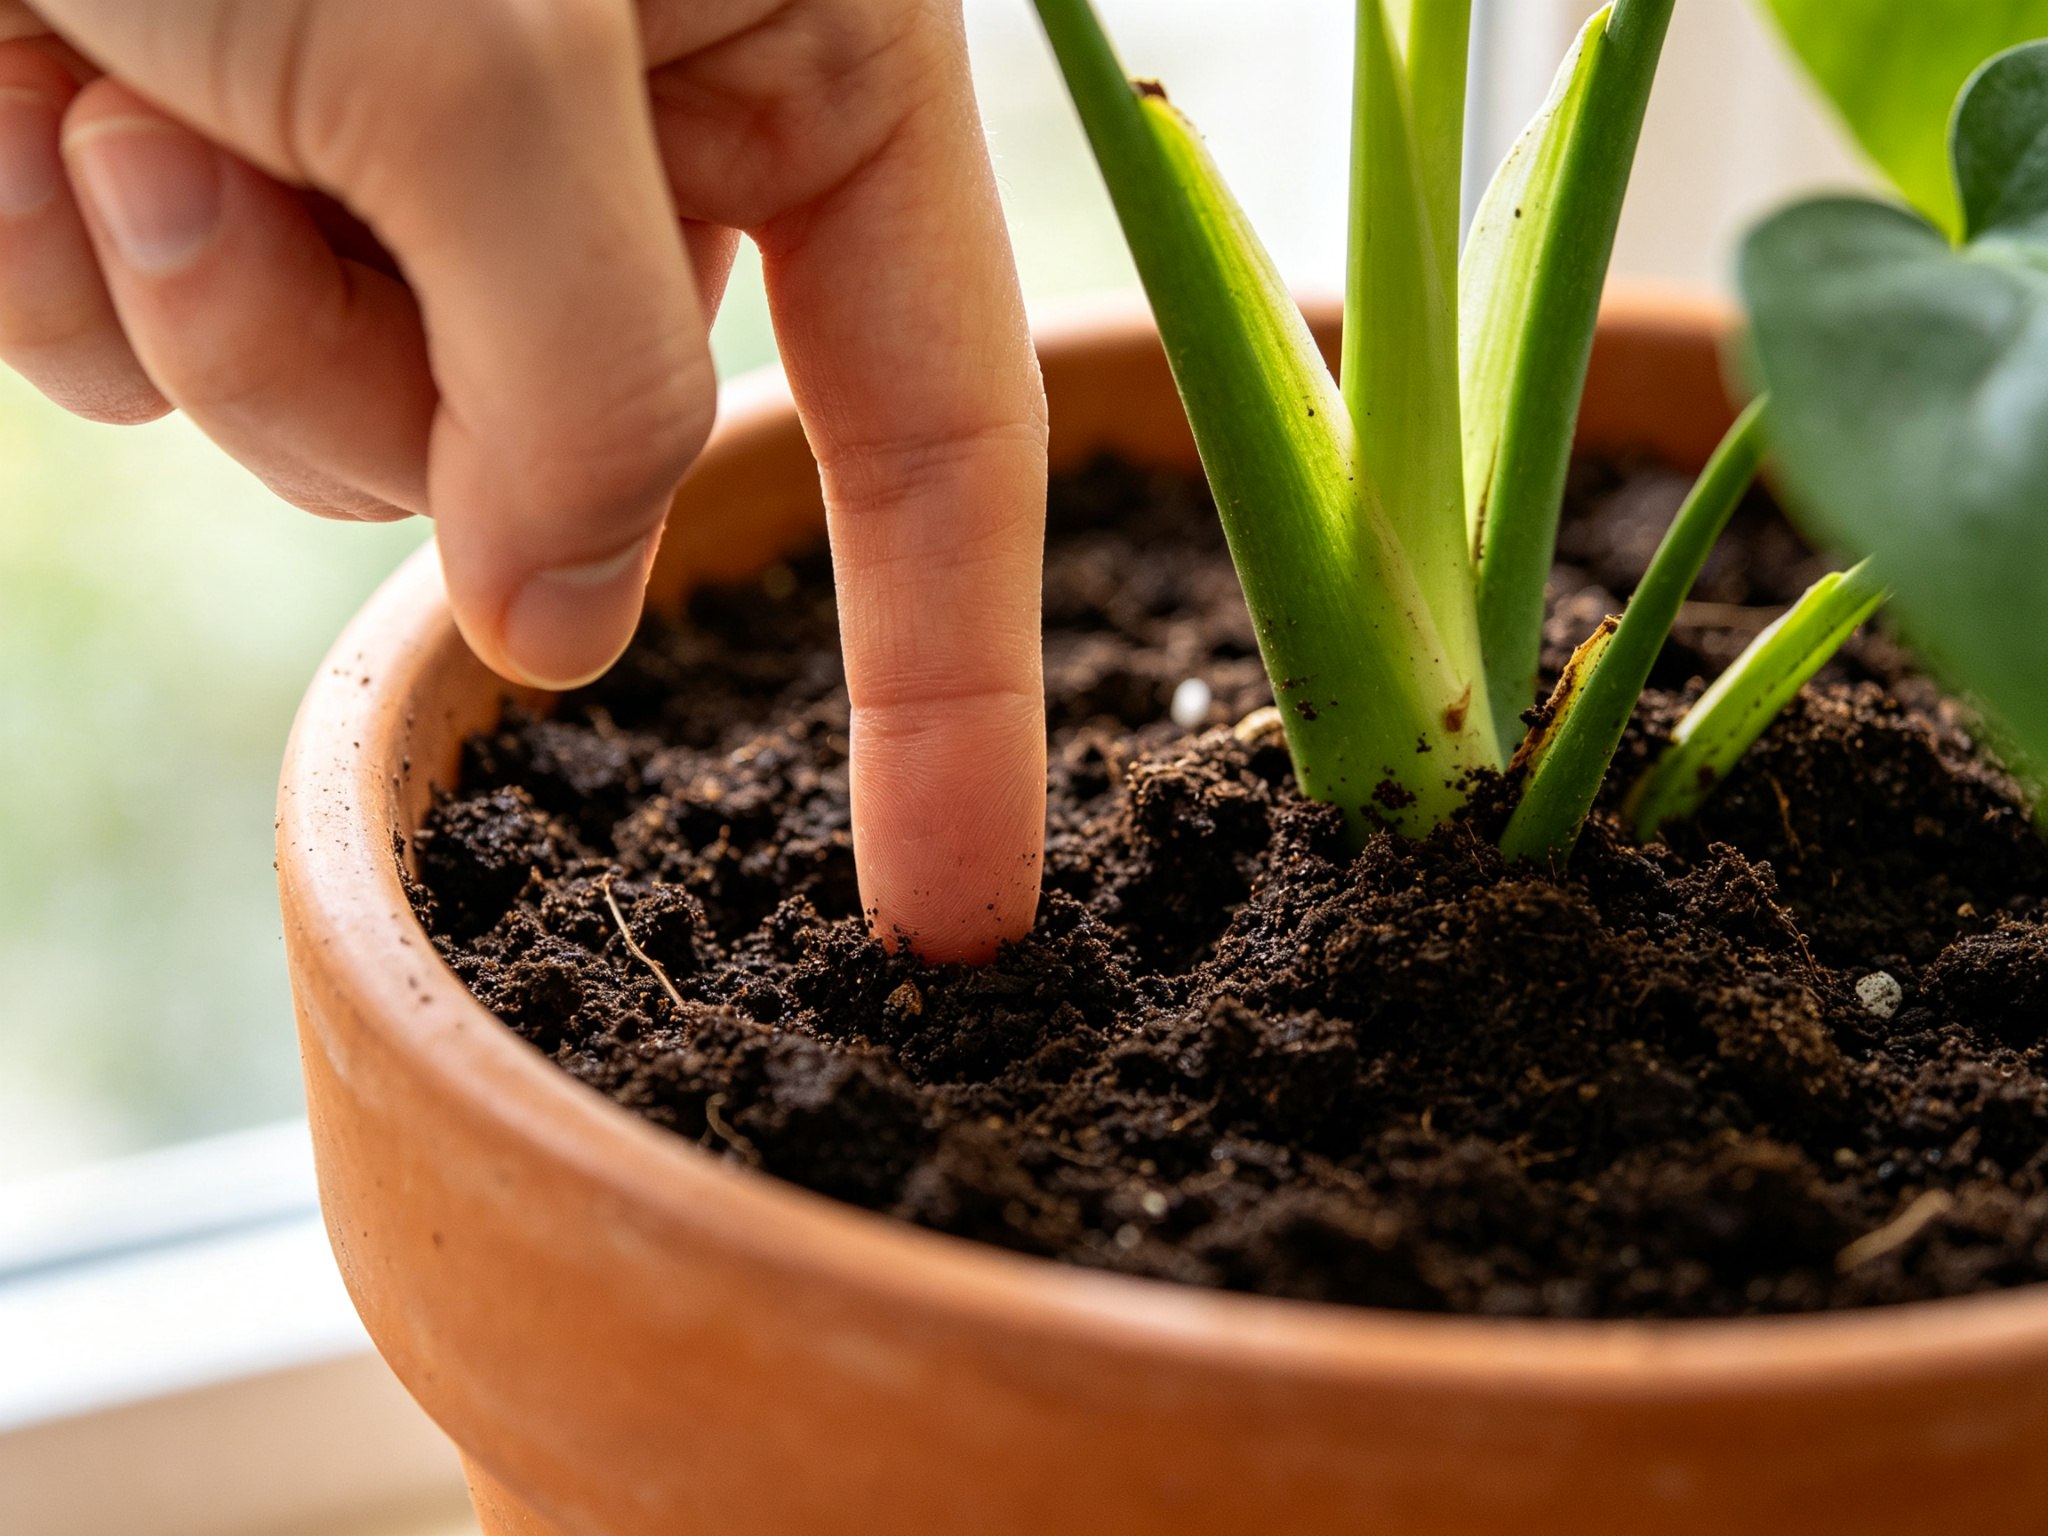
      <![CDATA[<h1 id="7-Grow-Lights-for-Indoor-Plants-3-Numbers-That-Matter"><a href="#7-Grow-Lights-for-Indoor-Plants-3-Numbers-That-Matter" class="headerlink" title="7 Grow Lights for Indoor Plants: 3 Numbers That Matter"></a>7 Grow Lights for Indoor Plants: 3 Numbers That Matter</h1><p><img src="https://img.673383.xyz/api/cfile/AgACAgUAAyEGAASo6uz_AANLaquGYoqP6YU4qCEXJ78RUi99IsoAAscWaxuHoWFVlleRVuw9dDcBAAMCAAN3AAM9BA" alt="A healthy potted houseplant on a wooden desk lit by a small LED grow light on an adjustable arm" title="A healthy potted houseplant on a wooden desk lit by a small LED grow light on an adjustable arm"></p><p>Shopping for the best grow lights for indoor plants usually starts in the wrong place: the wattage printed in the biggest type on the box. Wattage tells you what a light costs to run, not how much light reaches your plant. Two fixtures rated at the same wattage can deliver very different amounts of usable light, and the packaging won’t tell you which is which.</p><p>Then there’s the season. Day length falls from roughly 14 hours in June to about 9.5 in December at mid-latitudes, and the winter sun rides low enough that it barely reaches into a room. Even right up against a south-facing window, a plant gets around 1,500 foot-candles, against 10,000 or more outdoors on a clear summer day (University of Illinois Extension). That gap is the thing a grow light fills. Think of it as buying your windowsill a fake summer, not buying your plant a luxury.</p><h2 id="First-the-3-numbers-that-actually-matter"><a href="#First-the-3-numbers-that-actually-matter" class="headerlink" title="First, the 3 numbers that actually matter"></a>First, the 3 numbers that actually matter</h2><p>Three numbers decide whether a light works in your home. Everything else on the box is decoration.</p><p><strong>1. PPFD, or how much light lands on the leaves.</strong> PPFD (photosynthetic photon flux density, measured in µmol&#x2F;m²&#x2F;s) is the usable light arriving at one spot. Shade-tolerant plants like pothos and snake plant hold steady around 30 to 50 and grow properly from 80 to 150. Medium-light plants (monstera, fiddle leaf fig, calathea) want 150 to 250 for growth you can see. Succulents and cacti want 250 to 500.</p><p><strong>2. Coverage, or how much area gets that light.</strong> A bulb lights one pot. A bar lights a strip. A panel lights a square. Pick coverage first and intensity second, or you’ll pay for light that lands on the floor.</p><p><strong>3. Hours, which means a timer.</strong> PPFD multiplied by hours is what the plant actually banks, expressed as DLI in mol&#x2F;m²&#x2F;day; foliage houseplants sit around 4 to 8. That cuts both ways: a weaker light running longer can match a stronger one running briefly, and the hours only happen if something turns the light on. A timer isn’t an accessory here.</p><p>The number to ignore is watts. Watts measure electricity going in, not photons coming out, and “bigger is better” is the single most expensive mistake in this category.</p><p><img src="https://img.673383.xyz/api/cfile/AgACAgUAAyEGAASo6uz_AANMaquGZqbhIJnEcBmMCzQw4L3KdhUAAsgWaxuHoWFVTvLd4eJIWJ0BAAMCAAN5AAM9BA" alt="Three grow light types side by side: an E26 LED grow bulb, a clip-on gooseneck lamp, and a slim LED panel" title="Three grow light types side by side: an E26 LED grow bulb, a clip-on gooseneck lamp, and a slim LED panel"></p><h2 id="Three-signs-your-plants-need-a-grow-light"><a href="#Three-signs-your-plants-need-a-grow-light" class="headerlink" title="Three signs your plants need a grow light"></a>Three signs your plants need a grow light</h2><p>Before buying anything, check whether you need one at all.</p><ul><li><strong>Stretched internodes.</strong> The gap between leaves lengthens and the stem between them thins. Once the spacing runs about 50% longer than that plant’s normal habit, it’s visibly light-starved; at double the normal spacing, it’s etiolated and won’t recover its old shape.</li><li><strong>New leaves arriving smaller, thinner, and paler.</strong> New growth reflects the plant’s current energy budget. Under low light it can’t afford thick tissue, so the leaves come in limp and washed out.</li><li><strong>Variegation fading, or the whole plant leaning hard toward the window.</strong> A variegated pothos going solid green is manufacturing more chlorophyll to catch what little light there is. A hard lean is the plant trying to close the distance itself.</li></ul><p>One more indirect signal: a plant whose soil suddenly stays wet for two weeks is often reporting a light problem rather than a watering one, since low light slows everything the plant does. A <a href="https://www.amazon.com/dp/B0B7DQDRZC?tag=homegrownnook-20">basic soil moisture meter</a> helps you confirm that, with one caveat: cheap meters read electrical conductivity rather than water content, and fertilizer salts push the needle toward “wet.” Use one to back up the finger test, never to replace it.</p><p><img src="https://img.673383.xyz/api/cfile/AgACAgUAAyEGAASo6uz_AANNaquGanyUZFKpAAFMzitPE8ghdRpCAALJFmsbh6FhVfw8MZ4JttwzAQADAgADeQADPQQ" alt="A leggy houseplant leaning toward a dim winter window with long gaps between its leaves" title="A leggy houseplant leaning toward a dim winter window with long gaps between its leaves"></p><h2 id="Match-the-light-to-your-setup"><a href="#Match-the-light-to-your-setup" class="headerlink" title="Match the light to your setup"></a>Match the light to your setup</h2><p>Seven picks, grouped by the setup you actually have. Each is matched to a setup by shape and output class, and each has a real drawback, because every one of these is a compromise.</p><h3 id="One-or-two-plants-on-a-desk"><a href="#One-or-two-plants-on-a-desk" class="headerlink" title="One or two plants on a desk"></a>One or two plants on a desk</h3><p><strong><a href="https://www.amazon.com/dp/B0C3364WGY?tag=homegrownnook-20">full-spectrum E26 LED grow bulb</a>, 15 to 32 watts.</strong> It screws into a lamp you already own. No mounting, no new furniture, no drilling. Look for one that genuinely draws 15 watts or more, since the small decorative 9-watt bulbs don’t have the output to do anything. Drawback: one bulb lights one pot, wherever the socket happens to be, and the base gets warm enough that you shouldn’t wedge it against fabric or paper.</p><p><strong><a href="https://www.amazon.com/dp/B085CDPSMR?tag=homegrownnook-20">clip-on gooseneck lamp</a>, 10 to 24 watts.</strong> This is the pick for a single plant on a bookshelf or the corner of a desk, because the neck lets you aim light at the leaves rather than at the ceiling. Drawback: the clamp needs a lip about 2 inches thick or less, and past roughly 12 inches the beam has spread too far to matter.</p><h3 id="A-windowsill-with-three-to-five-pots"><a href="#A-windowsill-with-three-to-five-pots" class="headerlink" title="A windowsill with three to five pots"></a>A windowsill with three to five pots</h3><p><strong><a href="https://www.amazon.com/dp/B0B3CM9FYK?tag=homegrownnook-20">linkable T5 or T8 LED bar</a>, 20 to 24 watts per 2-foot bar.</strong> The connectors are the whole point. Two or three bars chain into one continuous strip, so an entire sill gets even light instead of one bright hotspot with dark ends. They mount under a shelf or along a window frame with the clips that come in the box. Drawback: bars are built to sit close, around 6 to 12 inches above the leaves, so a tall plant grows past the light unless you keep raising the whole rig.</p><p><strong><a href="https://www.amazon.com/dp/B0BKPF8D8G?tag=homegrownnook-20">short under-shelf bar</a> or a 1 to 2-foot flat panel.</strong> Flatter and tidier than a tube, and much easier to hide in a room you actually live in. Drawback: the coverage is a narrow strip, so pots parked at either end get noticeably less than the ones in the middle and you end up rotating them weekly.</p><h3 id="A-shelf-with-ten-or-more-plants"><a href="#A-shelf-with-ten-or-more-plants" class="headerlink" title="A shelf with ten or more plants"></a>A shelf with ten or more plants</h3><p><strong><a href="https://www.amazon.com/dp/B0185OLBPK?tag=homegrownnook-20">entry full-spectrum panel</a>, around 100 watts.</strong> This is the step up that covers a 2×2 foot area and hangs high enough (12 to 24 inches) that taller plants have room underneath. Drawback: you need that vertical clearance, the driver sits on top of the panel and gives off heat, and hanging it in a rental means solving for a ceiling joist or a freestanding frame.</p><p><strong>A mid-size panel, around 70 watts.</strong> Cheaper and cooler than a 100-watt panel, and enough output for foliage plants and seedlings across a single shelf. Drawback: less light per watt than newer fixtures, and older units ship without a dimmer. That’s fine for houseplants and limiting the day you start seeds.</p><p><img src="https://img.673383.xyz/api/cfile/AgACAgUAAyEGAASo6uz_AANOaquGbrUpucU8-UvaE2Wlfogxz1cAAsoWaxuHoWFVJ0pw_gs8ULYBAAMCAAN5AAM9BA" alt="A metal plant stand filled with houseplants lit by LED grow light bars mounted under each shelf" title="A metal plant stand filled with houseplants lit by LED grow light bars mounted under each shelf"></p><h3 id="The-one-that-crosses-setups"><a href="#The-one-that-crosses-setups" class="headerlink" title="The one that crosses setups"></a>The one that crosses setups</h3><p><strong>A linkable bar kit, four to six bars with a timer.</strong> Bought as a kit, you get the connectors, the hangers, and usually a timer in one box, which covers a windowsill now and a full shelf later. Drawback: it costs more up front than a single bar, and the seam where two bars meet is visibly dimmer than the rest of the run, so plan to put the hungriest plant in the middle.</p><p>If your goal is tomatoes rather than houseplants, the numbers change completely, because fruiting plants want several times this much light. The full 60-day <a href="/how-to-grow-cherry-tomatoes-at-home/">cherry tomato setup</a> spells out which of these lights works for fruit.</p><p>If you’re buying the shelf at the same time, measure it first. A stand with fixed 12-inch clearance won’t fit a panel that needs to hang 18 inches above the canopy, and a stand without a lip won’t take the clamp on a gooseneck lamp.</p><h2 id="Where-to-put-the-light"><a href="#Where-to-put-the-light" class="headerlink" title="Where to put the light"></a>Where to put the light</h2><p>Distance is where most setups quietly fail. Light falls off with the square of the distance, so moving a light twice as far away leaves the plant with roughly a quarter of the light.</p><ul><li><strong>Bulbs and clip-ons:</strong> 6 to 12 inches above the leaves.</li><li><strong>Bars:</strong> about 6 to 12 inches.</li><li><strong>Panels:</strong> 12 to 24 inches.</li></ul><p>Start at the far end of the range and move in over a week or two. Bleached patches or crisp brown edges mean back off. A plant that keeps stretching means come closer.</p><p>Run the light <strong>8 to 12 hours a day</strong> for foliage plants, on a timer. A <a href="https://www.amazon.com/dp/B00MVFF59S?tag=homegrownnook-20">mechanical outlet timer</a> costs a few dollars and clicks on whether or not you’re home; a digital one lets you set finer intervals and keeps its setting after a power cut. Either way, don’t run past 16 hours. Plants use the dark period, and Illinois Extension caps supplemental light right there.</p><h2 id="The-3-number-cheat-sheet"><a href="#The-3-number-cheat-sheet" class="headerlink" title="The 3-number cheat sheet"></a>The 3-number cheat sheet</h2><table><thead><tr><th>Light type</th><th>Watt range</th><th>Distance from leaves</th><th>Hours a day</th><th>Best for</th></tr></thead><tbody><tr><td>Full-spectrum E26 bulb</td><td>15–32 W</td><td>6–12 in</td><td>8–12</td><td>One plant on a desk</td></tr><tr><td>Clip-on gooseneck lamp</td><td>10–24 W</td><td>6–12 in</td><td>8–12</td><td>One plant on a shelf</td></tr><tr><td>Linkable bar (2 ft)</td><td>20–24 W each</td><td>6–12 in</td><td>8–12</td><td>Windowsill, 3–5 pots</td></tr><tr><td>Short under-shelf bar</td><td>20–40 W</td><td>6–12 in</td><td>8–12</td><td>Windowsill in a lived-in room</td></tr><tr><td>Mid-size panel</td><td>about 70 W</td><td>12–24 in</td><td>8–12</td><td>One shelf of houseplants</td></tr><tr><td>Entry panel</td><td>about 100 W</td><td>12–24 in</td><td>8–12</td><td>Ten or more plants, 2×2 ft</td></tr><tr><td>Linkable bar kit</td><td>4–6 bars</td><td>6–12 in</td><td>8–12</td><td>Windowsill now, shelf later</td></tr></tbody></table><p>Prices move around, and most of these go on sale more than once between now and December, so check the current listing rather than trusting a price in an article.</p><h2 id="FAQ"><a href="#FAQ" class="headerlink" title="FAQ"></a>FAQ</h2><p><strong>How far should a grow light be from houseplants?</strong><br>Bulbs and clip-ons sit 6 to 12 inches above the leaves, bars about 6 to 12 inches, and panels 12 to 24 inches. Double any of those distances and the plant gets roughly a quarter of the light, so moves of a few inches matter more than they look like they should.</p><p><strong>How many hours a day should a grow light be on?</strong><br>8 to 12 hours for foliage houseplants, and put it on a timer so it happens whether or not you’re home. Don’t push past 16 hours; plants need the dark period.</p><p><strong>Do I need a full-spectrum grow light for houseplants?</strong><br>You need light in the 400 to 700 nm range, and a full-spectrum white LED covers it. It’s also the version you can live with, since the red-and-blue panels make it genuinely hard to spot pests, pale leaves, or nutrient problems early.</p><p><strong>Can I use a regular LED bulb instead of a grow light?</strong><br>For one shade-tolerant plant getting through winter, a bright white LED around 5000K that draws 15 watts or more will hold it. It’s dimmer and less even than a purpose-built grow light. When the plant starts leaning toward the bulb, that’s your signal to upgrade.</p><h2 id="The-bottom-line"><a href="#The-bottom-line" class="headerlink" title="The bottom line"></a>The bottom line</h2><p>Three numbers: the PPFD at the leaves, the area that gets it, and the hours on a timer. Get those three right and the wattage takes care of itself.</p><p><em>Match the light to the shelf you actually own, not the one in the product photo.</em></p><p><em>Disclosure: Some links in this post are affiliate links. If you buy through them, I may earn a small commission at no extra cost to you. See the full <a href="/affiliate-disclosure/">affiliate disclosure</a>.</em></p>]]>
    </content>
    <id>https://homegrownnook.com/grow-lights-for-indoor-plants/</id>
    <link href="https://homegrownnook.com/grow-lights-for-indoor-plants/"/>
    <published>2026-09-17T13:00:00.000Z</published>
    <summary>The 3 numbers that actually matter when buying grow lights for indoor plants, plus 7 picks for your setup, from a $20 bulb to a shelf-filling panel.</summary>
    <title>7 Grow Lights for Indoor Plants: 3 Numbers That Matter</title>
    <updated>2026-09-17T21:00:00.000Z</updated>
  </entry>
  <entry>
    <author>
      <name>Sage</name>
    </author>
    <category term="Plant Library" scheme="https://homegrownnook.com/categories/plant-library/"/>
    <category term="Beginner Basics" scheme="https://homegrownnook.com/categories/plant-library/beginner-basics/"/>
    <category term="Houseplants" scheme="https://homegrownnook.com/categories/Houseplants/"/>
    <category term="indoor-plants" scheme="https://homegrownnook.com/tags/indoor-plants/"/>
    <category term="houseplant-care" scheme="https://homegrownnook.com/tags/houseplant-care/"/>
    <category term="fall-care" scheme="https://homegrownnook.com/tags/fall-care/"/>
    <category term="watering" scheme="https://homegrownnook.com/tags/watering/"/>
    <category term="humidity" scheme="https://homegrownnook.com/tags/humidity/"/>
    <content>
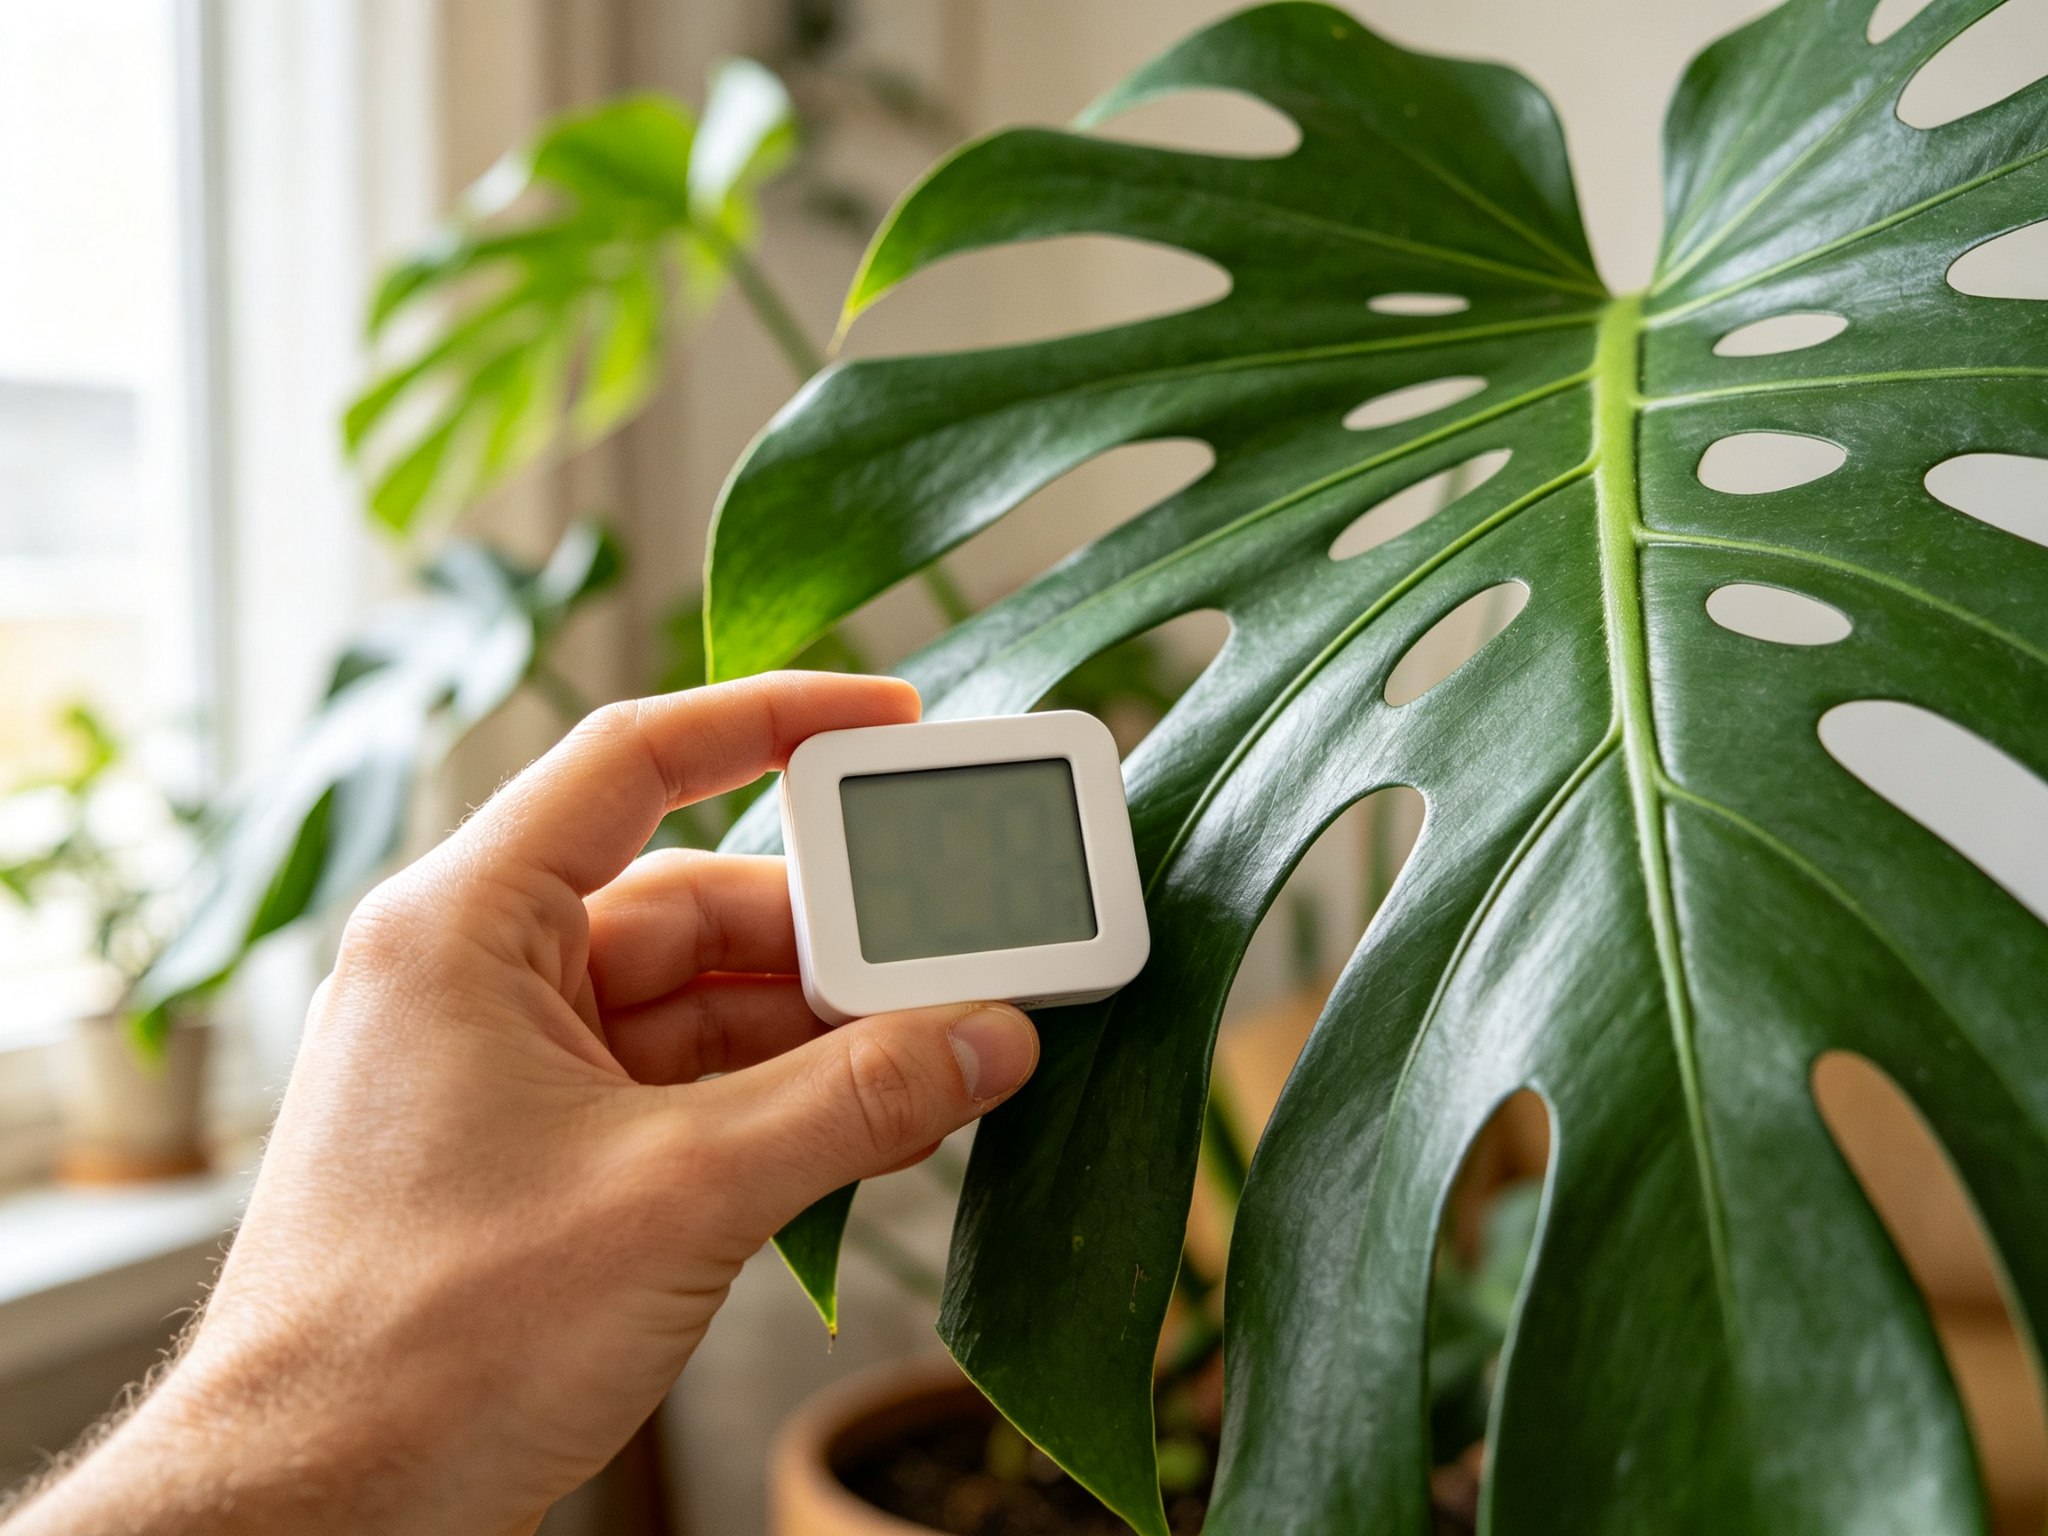
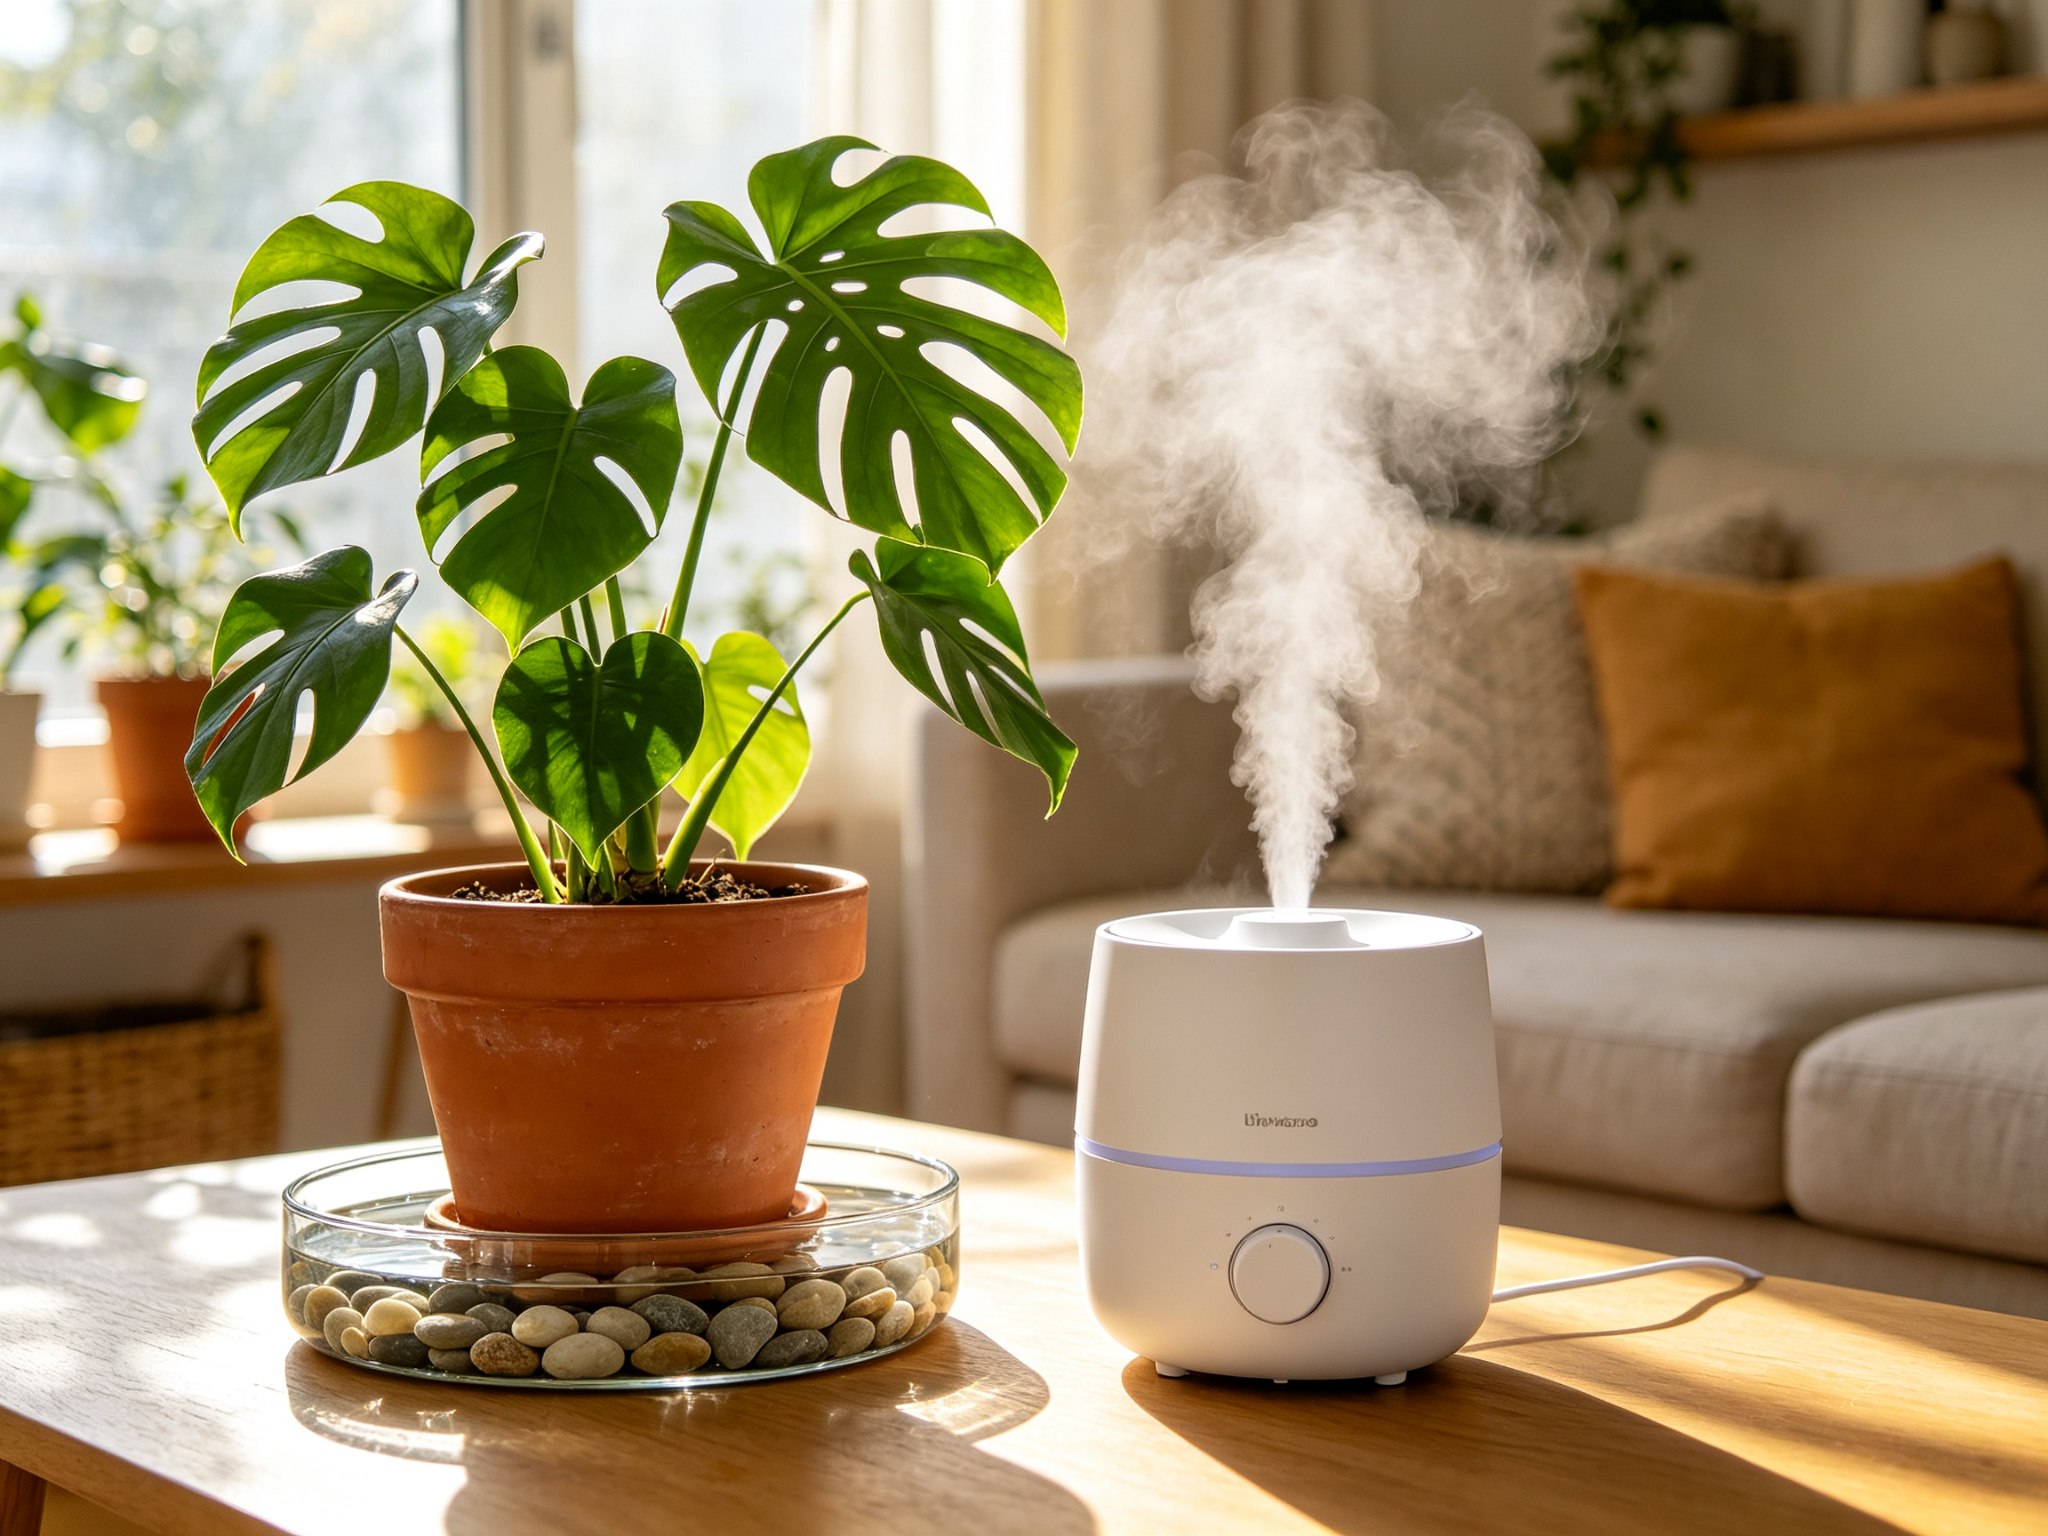
      <![CDATA[<h1 id="Fall-Houseplant-Care-7-Things-to-Stop-Doing-Before-November"><a href="#Fall-Houseplant-Care-7-Things-to-Stop-Doing-Before-November" class="headerlink" title="Fall Houseplant Care: 7 Things to Stop Doing Before November"></a>Fall Houseplant Care: 7 Things to Stop Doing Before November</h1><p><img src="https://img.673383.xyz/api/cfile/AgACAgUAAyEGAASo6uz_AANBaqj7Y2EBJ6dRUlvKpHpYgwaOmlgAAsQQaxsta0hVFlIyLEHJiIUBAAMCAAN3AAM9BA" alt="A row of potted houseplants on a bright windowsill in autumn light" title="A row of potted houseplants on a bright windowsill in autumn light"></p><p>Fall houseplant care is mostly subtraction. Light fades, growth slows, and the routine that kept your plants alive in July starts working against them by mid-October.</p><p>That’s the shape of a fall houseplant care checklist worth keeping: water less, feed nothing, chase the light, get ahead of dry air before the furnace does, and inspect every plant on its way inside. Seven changes, all of them done before November.</p><p>Most houseplants that die between October and March don’t die of neglect. They drown, burn at the roots, or get eaten by pests that hitched a ride indoors. Here’s what to stop doing, in the order it matters most.</p><h2 id="Why-fall-changes-your-houseplant-routine"><a href="#Why-fall-changes-your-houseplant-routine" class="headerlink" title="Why fall changes your houseplant routine"></a>Why fall changes your houseplant routine</h2><p>Three things shift indoors at once. Light goes first: days get shorter, the sun sits lower, and the light coming through a window loses intensity faster than it loses hours. A plant that was happy in a June window can be sitting in shade by Thanksgiving.</p><p>Then the heat comes on and the air dries out. Most houseplants come from places that hold 40 to 60 percent humidity, and a heated house in January sits well below that, so moisture leaves the leaves faster than roots replace it.</p><p>Growth slows last, and that’s the part people miss. A slower plant drinks less, uses less fertilizer, and recovers from mistakes more slowly. Care that had slack in summer has none in fall, and all three problems have the same answer: do less, and check before you act.</p><h2 id="Stop-watering-on-your-summer-schedule"><a href="#Stop-watering-on-your-summer-schedule" class="headerlink" title="Stop watering on your summer schedule"></a>Stop watering on your summer schedule</h2><p>Overwatering kills more houseplants than cold, pests, and neglect combined, and fall is when the odds turn against you. Soil that dried out in four days in July can take ten to fourteen days in November.</p><p>Drop the calendar. Push a finger two inches into the soil, past the second knuckle. Damp or cool at that depth means wait. Dry all the way down means water slowly until it runs out of the drainage hole, then empty the saucer.</p><p>Lifting the pot is faster. Heft it right after a thorough watering, then again a week later. The difference is bigger than you expect, and after a month your hand answers before your finger does.</p><p>Here’s roughly how the rhythm shifts for common indoor plants, assuming average room temperatures and a spot near a window:</p><table><thead><tr><th>Plant</th><th>Summer</th><th>Once the heat is on</th></tr></thead><tbody><tr><td>Croton, calathea, ferns</td><td>every 3 to 4 days</td><td>about once a week</td></tr><tr><td>Pothos, philodendron, schefflera</td><td>about once a week</td><td>every 10 to 14 days</td></tr><tr><td>Snake plant, ZZ plant, Chinese evergreen</td><td>about every 2 weeks</td><td>every 2 to 3 weeks</td></tr><tr><td>Succulents and cacti</td><td>every 10 to 14 days</td><td>about once a month, or when leaves start to soften</td></tr></tbody></table><p>Treat that as a starting point, not a plan. The finger and the pot outrank any table, including this one.</p><p>A <a href="https://link.amazon/B00pXneVx">moisture meter</a> earns its place for the big pots you can’t reach into, and it helps to know what you’re buying: a cheap one reads electrical conductivity, not water. Fertilizer salts push the needle toward “wet,” so it can talk you out of watering a plant that’s genuinely dry. Use it to confirm the finger test, not to replace it.</p><p>Use room-temperature water, since cold tap water shocks roots; a jug left out overnight fixes that for free. Then watch the other signals: yellowing lower leaves, soil that stays dark for a week, and the first fungus gnat on a sticky trap all mean the same thing. You’re watering too often.</p><p><img src="https://img.673383.xyz/api/cfile/AgACAgUAAyEGAASo6uz_AANCaqj7Z-B7YieiDU2GpDZ8Dag_ZEoAAsUQaxsta0hV_0xLGmP61IgBAAMCAAN5AAM9BA" alt="Testing soil moisture two inches down with a fingertip before watering" title="Testing soil moisture two inches down with a fingertip before watering"></p><h2 id="Stop-fertilizing-by-late-fall"><a href="#Stop-fertilizing-by-late-fall" class="headerlink" title="Stop fertilizing by late fall"></a>Stop fertilizing by late fall</h2><p>When to stop fertilizing houseplants has one clean answer for nearly everything on your shelf: taper through September and stop by mid-October. Growers in warm rooms sometimes stretch it to the end of October if a plant is still pushing new leaves, but that’s the outer edge.</p><p>Fertilizer feeds growth, and there isn’t much growth left to feed. Extra nutrients don’t wait in the pot for spring; they build up as salts, and salts burn root tips. A plant that looks stalled in December often has a salt problem, not a food problem.</p><p>Two exceptions. Winter bloomers such as Christmas cactus, poinsettia, African violets, and most orchids do real work in the dark months, so they get a dilute feed at a quarter to half strength while they’re in bud. Anything under a grow light running twelve or more hours a day stays active enough for a light feed every six to eight weeks (how far to hang that light is covered in our <a href="/grow-lights-for-indoor-plants/">grow lights for indoor plants guide</a>).</p><p>Slow-release granules are the riskier fall choice, because their release rate tracks soil temperature, not the calendar. A warm living room in December keeps feeding a plant that stopped growing in October, and there’s no dial to turn down. A <a href="https://www.amazon.com/dp/B0D4JHN28P?tag=homegrownnook-20">liquid feed</a> diluted to half strength does the same job with a dial on it.</p><p>One more thing before the bottle goes away: flush the pots. Run water through until it drains freely and you’ll wash out the salt that a summer of feeding left behind.</p><h2 id="Move-plants-to-their-brightest-windows"><a href="#Move-plants-to-their-brightest-windows" class="headerlink" title="Move plants to their brightest windows"></a>Move plants to their brightest windows</h2><p>Summer told you where the light was. That map goes stale around the equinox.</p><p>Recheck each spot with the back of your hand. If you can’t feel the sun’s warmth on a bright afternoon, the plant is living on borrowed light. South and west windows win from fall through spring, east is next, north is last. The plants that limped through summer in the shade are usually the ones that need to move.</p><p>Give each pot a quarter turn once a week. Plants lean toward light, and a weekly turn keeps a tall one from growing into a permanent tilt.</p><p>Then clean the glass and clean the leaves. Dust on a leaf blocks light from reaching the leaf surface, and a film on the window does the same thing an inch earlier. Five minutes with a damp cloth buys more light than any lamp you could order today.</p><p>A closed curtain traps cold air between the glass and the fabric, so once the outdoor temperature drops below freezing, pull plants back off the sill at night.</p><h2 id="Raise-humidity-before-the-heat-comes-on"><a href="#Raise-humidity-before-the-heat-comes-on" class="headerlink" title="Raise humidity before the heat comes on"></a>Raise humidity before the heat comes on</h2><p>Most people get here in January, when the tips are already brown. Go in October instead.</p><p>Most houseplants want 40 to 60 percent relative humidity. Heated air routinely falls below that, and the thin-leaved plants complain first: calathea, ferns, peace lilies, spider plants. Crisp brown edges come next, then curling leaves and a growth stall that looks like disease and isn’t. Those same brown edges are what nearly killed my monstera one September, and the <a href="/monstera-fall-care-story/">full fall rescue story</a> walks through the fixes that brought it back.</p><p>Grouping plants is free and it works. Leaves release moisture, and a cluster builds a pocket of humid air around itself. The effect is biggest with several plants in a small room with low airflow, which is usually where they end up anyway. Keep the group clear of vents and radiators, since those dry the air exactly where the leaves are.</p><p>A pebble tray adds a little. Fill a tray two to three inches deep with pebbles, add water to just below the top of the stones, and set the pots on top so their bases stay above the waterline. A pot sitting in water is a rot problem, not a humidity fix.</p><p>For a real number, run a <a href="https://www.amazon.com/dp/B013IJPTFK?tag=homegrownnook-20">small humidifier</a> close to the plants rather than across the room, for several hours a day. Put an inexpensive digital hygrometer at canopy height so you’re measuring instead of guessing. Two honest drawbacks before you buy: the tank needs refilling most days, and tap water leaves a fine white mineral dust on leaves and furniture, so plan on distilled or filtered water. In a small sealed room it can also push humidity high enough to invite mold, which is the other reason the hygrometer matters as much as the machine.</p><p><img src="https://img.673383.xyz/api/cfile/AgACAgUAAyEGAASo6uz_AANDaqj7bLF2PCu0vhOixsezgYvvqYwAAsYQaxsta0hV17yMkmeyV6QBAAMCAAN5AAM9BA" alt="A small humidifier and a digital hygrometer beside potted houseplants" title="A small humidifier and a digital hygrometer beside potted houseplants"></p><p><img src="https://img.673383.xyz/api/cfile/AgACAgUAAyEGAASo6uz_AANEaqj7bxjWCsXwc9uZZjxe6f498xsAAscQaxsta0hVZ_wKnaMHggcBAAMCAAN5AAM9BA" alt="Houseplants grouped close together on a shelf to hold humidity around the leaves" title="Houseplants grouped close together on a shelf to hold humidity around the leaves"></p><h2 id="Check-for-pests-before-they-move-in"><a href="#Check-for-pests-before-they-move-in" class="headerlink" title="Check for pests before they move in"></a>Check for pests before they move in</h2><p>If a plant spent the summer outside, its deadline is a temperature, not a date. Bring it in when nighttime lows settle in the low 50s. Many houseplants show damage in the mid-40s and nearly all die below freezing. Succulents and cacti get a little more leeway, down to roughly 45 to 50 degrees, and <a href="/bring-succulents-indoors/">the full version of that move lives here</a>.</p><p>What rides along is the reason to hurry. Mealybugs tuck into leaf joints, spider mites hide on the undersides of leaves, and fungus gnats arrive as larvae in the top inch of soil. Outdoors, rain and predators keep them in check. Indoors, nothing does.</p><p>Run the fall houseplant pest check outside, before the pot crosses the threshold:</p><ol><li>Rinse the whole plant, pot included, and let the foliage dry completely.</li><li>Inspect the undersides of the leaves, the leaf joints, and the soil surface. White cottony tufts, fine webbing, and pale stippled leaves are the three you’re hunting for.</li><li>Wipe the rim, the saucer, and the drainage holes, where scale and ants tend to sit.</li><li>Keep the plant away from your other houseplants for three to four weeks. Most problems announce themselves in that window, and one plant parked in a hallway beats an infestation across a shelf.</li></ol><p>Then keep looking every time you water. Warm, dry air is exactly what spider mites want, which is the other reason to fix humidity in October.</p><h2 id="The-7-step-fall-checklist"><a href="#The-7-step-fall-checklist" class="headerlink" title="The 7-step fall checklist"></a>The 7-step fall checklist</h2><table><thead><tr><th>#</th><th>Stop doing this</th><th>Do this instead</th></tr></thead><tbody><tr><td>1</td><td>Watering on the summer schedule</td><td>Check two inches down or lift the pot; water less often, but thoroughly</td></tr><tr><td>2</td><td>Feeding</td><td>Last feed by mid-October; dilute feed only for winter bloomers</td></tr><tr><td>3</td><td>Leaving plants in their summer spot</td><td>Move to the brightest window and turn each pot a quarter turn weekly</td></tr><tr><td>4</td><td>Ignoring dry air</td><td>Group plants, add a pebble tray, run a humidifier, watch a hygrometer</td></tr><tr><td>5</td><td>Letting outdoor plants walk in unchecked</td><td>Rinse, inspect, then quarantine three to four weeks</td></tr><tr><td>6</td><td>Leaving leaves against cold glass or a vent</td><td>Pull plants back at night; keep foliage off radiators and doors</td></tr><tr><td>7</td><td>Repotting because you have a free afternoon</td><td>Wait for spring growth, when roots can recover</td></tr></tbody></table><p>Every line is a subtraction. Fall rewards a light hand, and the plants that suffer most are usually the ones that got the most attention.</p><h2 id="FAQ"><a href="#FAQ" class="headerlink" title="FAQ"></a>FAQ</h2><p><strong>When should I bring houseplants inside for winter?</strong><br>When nighttime lows settle in the low 50s, which is the trigger Iowa State and University of Minnesota extensions both cite. Most houseplants show damage in the mid-40s and nearly all die below freezing. Don’t wait for the first frost; the damage shows up days later.</p><p><strong>How often should I water houseplants in fall?</strong><br>A working rule of thumb is 25 to 50 percent less often than in summer, decided by the soil rather than the calendar. Something watered weekly in July usually wants water every 10 to 14 days by November.</p><p><strong>Should I fertilize houseplants in fall?</strong><br>Taper through September and stop by mid-October for most plants. Winter bloomers are the exception: Christmas cactus, poinsettia, African violets, and orchids want a dilute feed at a quarter to half strength while they’re in bud.</p><p><strong>What temperature is too cold for houseplants?</strong><br>Below 50 degrees is where tropical houseplants start to struggle, the mid-40s causes visible damage, and below freezing kills most of them. Succulents and cacti handle 45 to 50 degrees better, especially when the soil is dry.</p><p><em>Most of fall care is deciding not to do something. Start with the watering can.</em></p><p><em>Disclosure: Some links in this post are affiliate links. If you buy through them, I may earn a small commission at no extra cost to you. See the full <a href="/affiliate-disclosure/">affiliate disclosure</a>.</em></p>]]>
    </content>
    <id>https://homegrownnook.com/fall-houseplant-care-checklist/</id>
    <link href="https://homegrownnook.com/fall-houseplant-care-checklist/"/>
    <published>2026-09-15T20:02:40.000Z</published>
    <summary>A 7-step fall houseplant checklist: water less, stop feeding, move to brighter windows, raise humidity, and check for pests before winter kills the leaves.</summary>
    <title>Fall Houseplant Care: 7 Things to Stop Doing Before November</title>
    <updated>2026-09-17T16:00:00.000Z</updated>
  </entry>
  <entry>
    <author>
      <name>Sage</name>
    </author>
    <category term="Plant Library" scheme="https://homegrownnook.com/categories/plant-library/"/>
    <category term="Beginner Basics" scheme="https://homegrownnook.com/categories/plant-library/beginner-basics/"/>
    <category term="Succulents &amp; Cacti" scheme="https://homegrownnook.com/categories/Succulents-Cacti/"/>
    <category term="succulents" scheme="https://homegrownnook.com/tags/succulents/"/>
    <category term="succulent-care" scheme="https://homegrownnook.com/tags/succulent-care/"/>
    <category term="seasonal-gardening" scheme="https://homegrownnook.com/tags/seasonal-gardening/"/>
    <category term="fall-gardening" scheme="https://homegrownnook.com/tags/fall-gardening/"/>
    <category term="indoor-plants" scheme="https://homegrownnook.com/tags/indoor-plants/"/>
    <content>
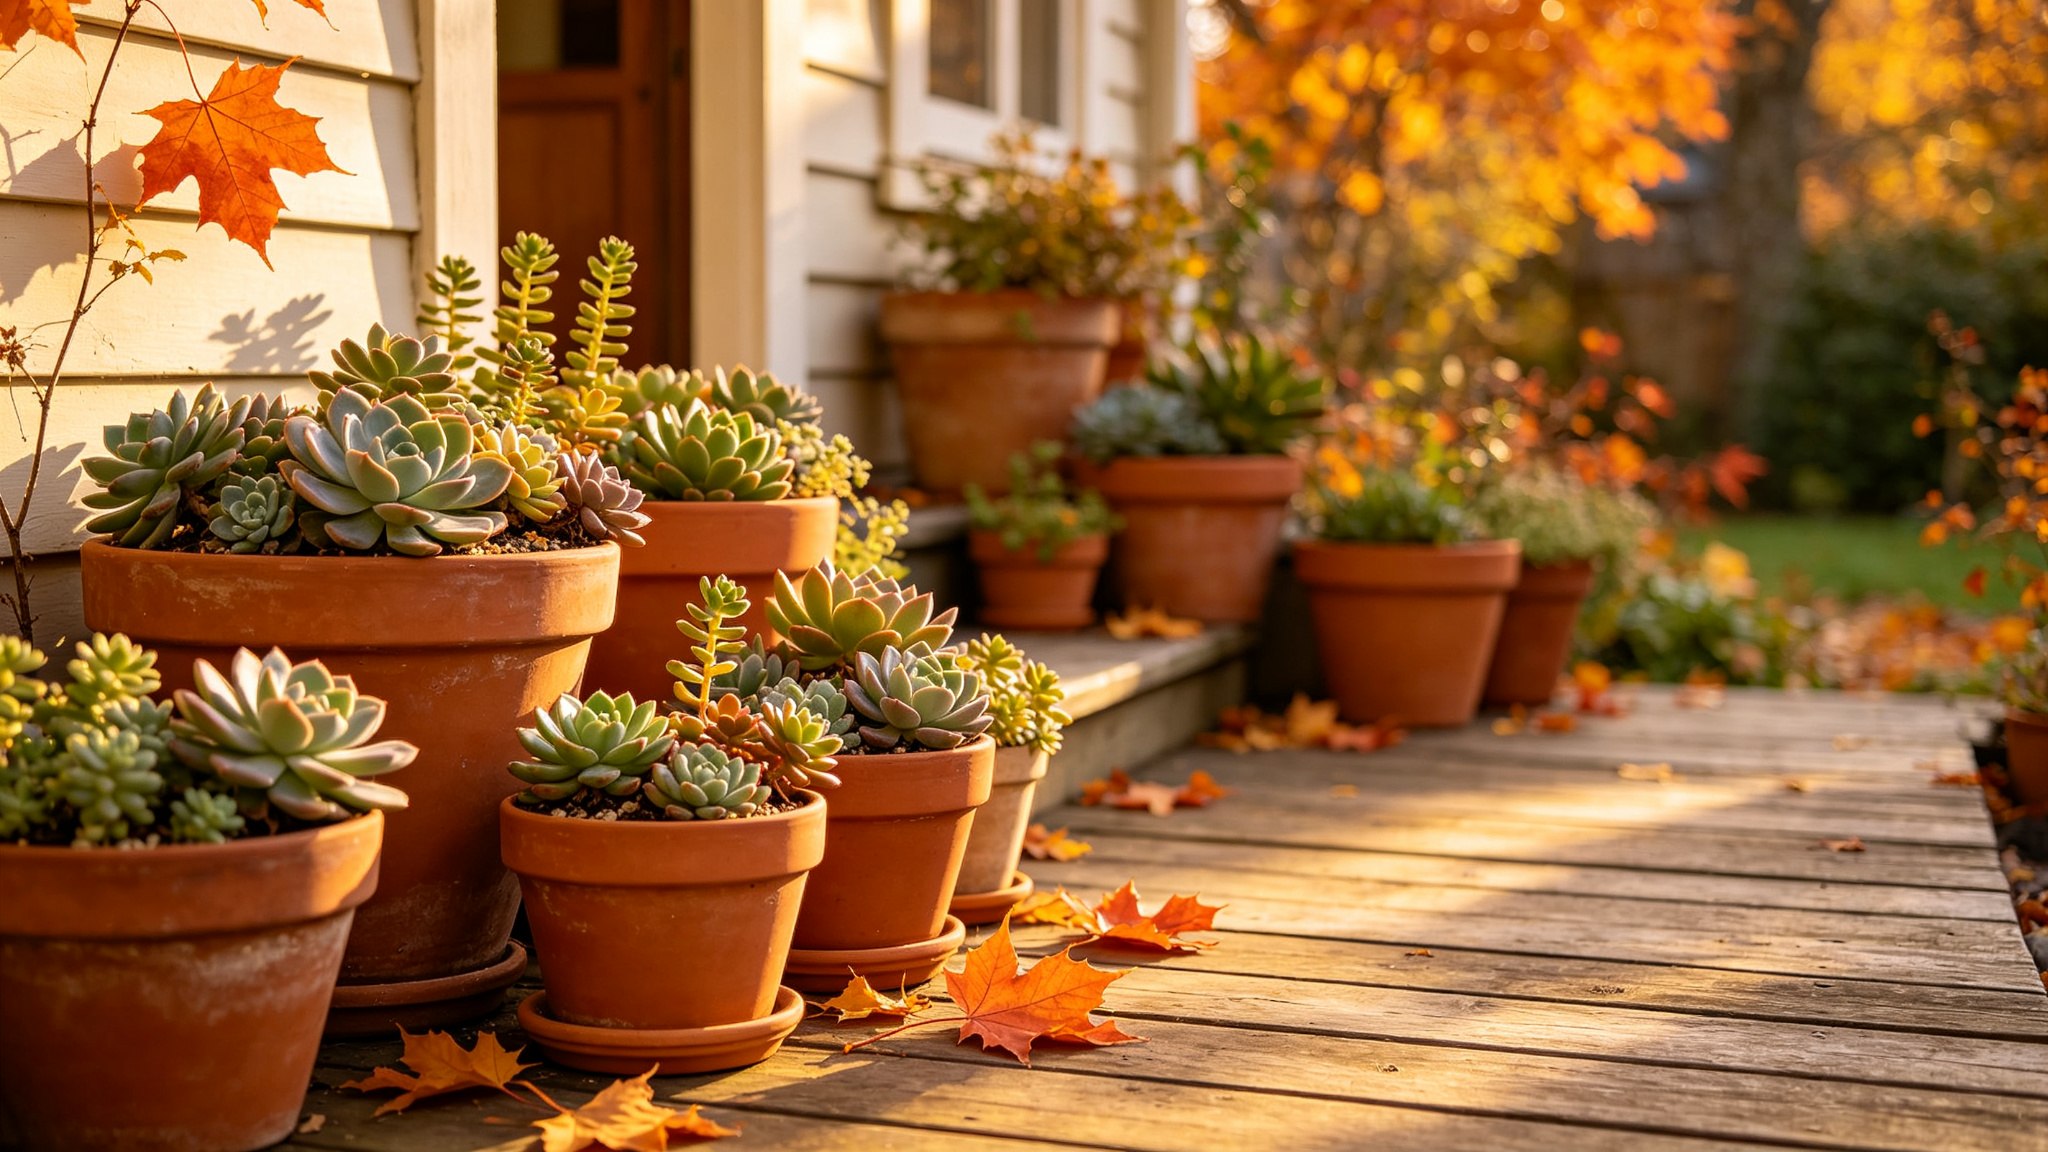
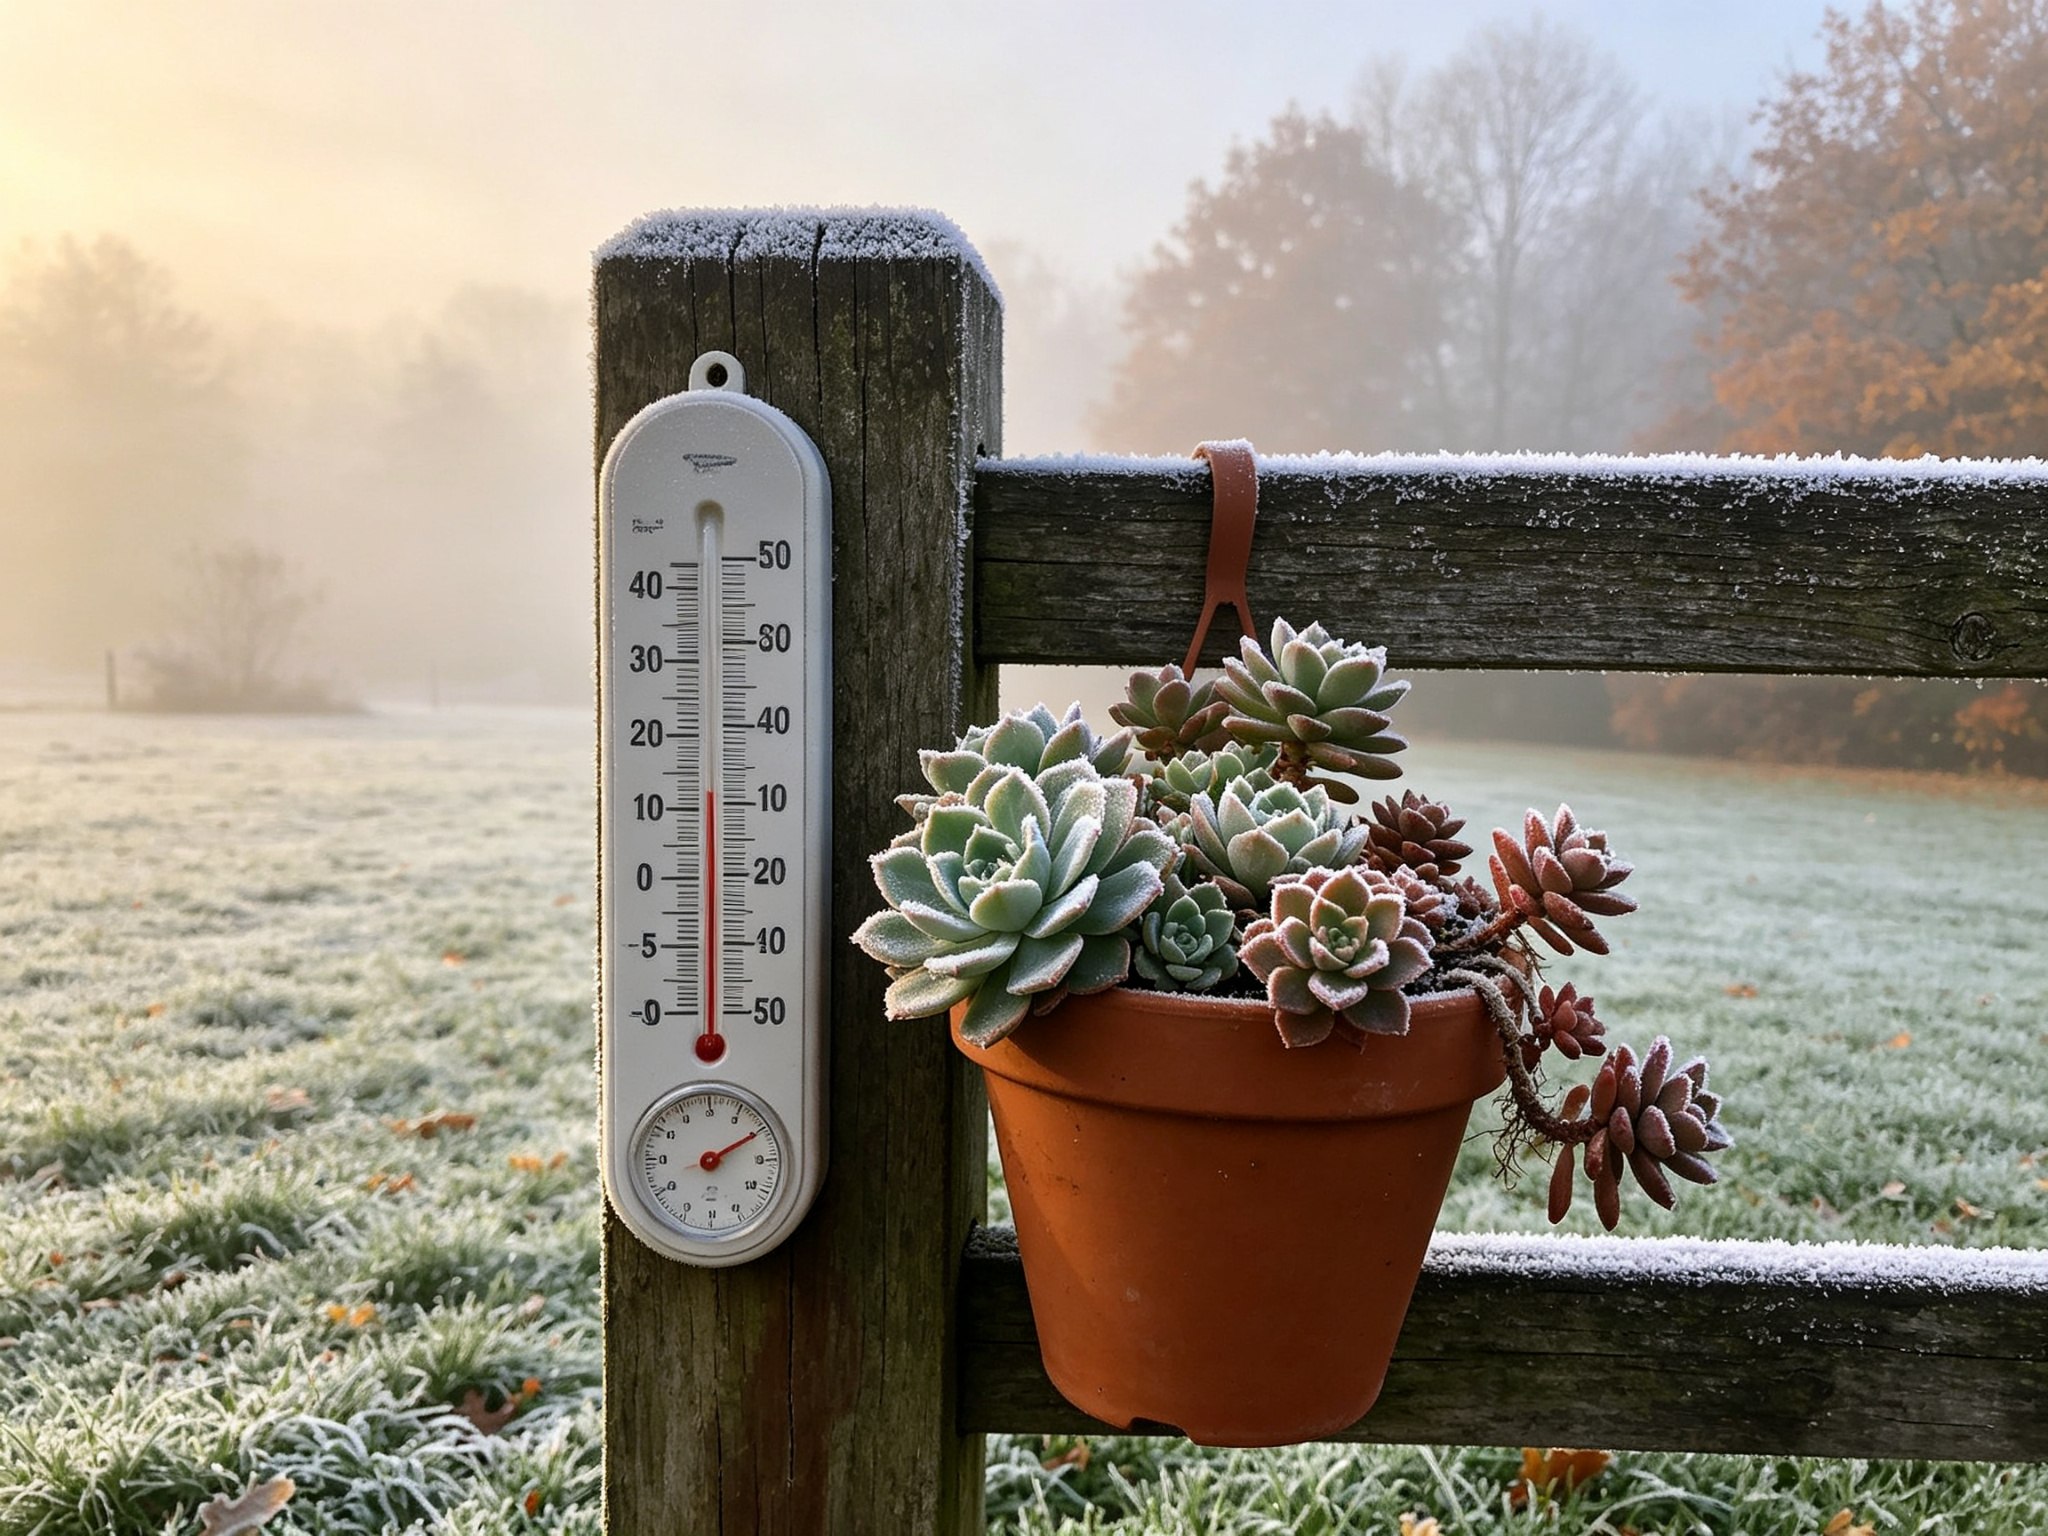
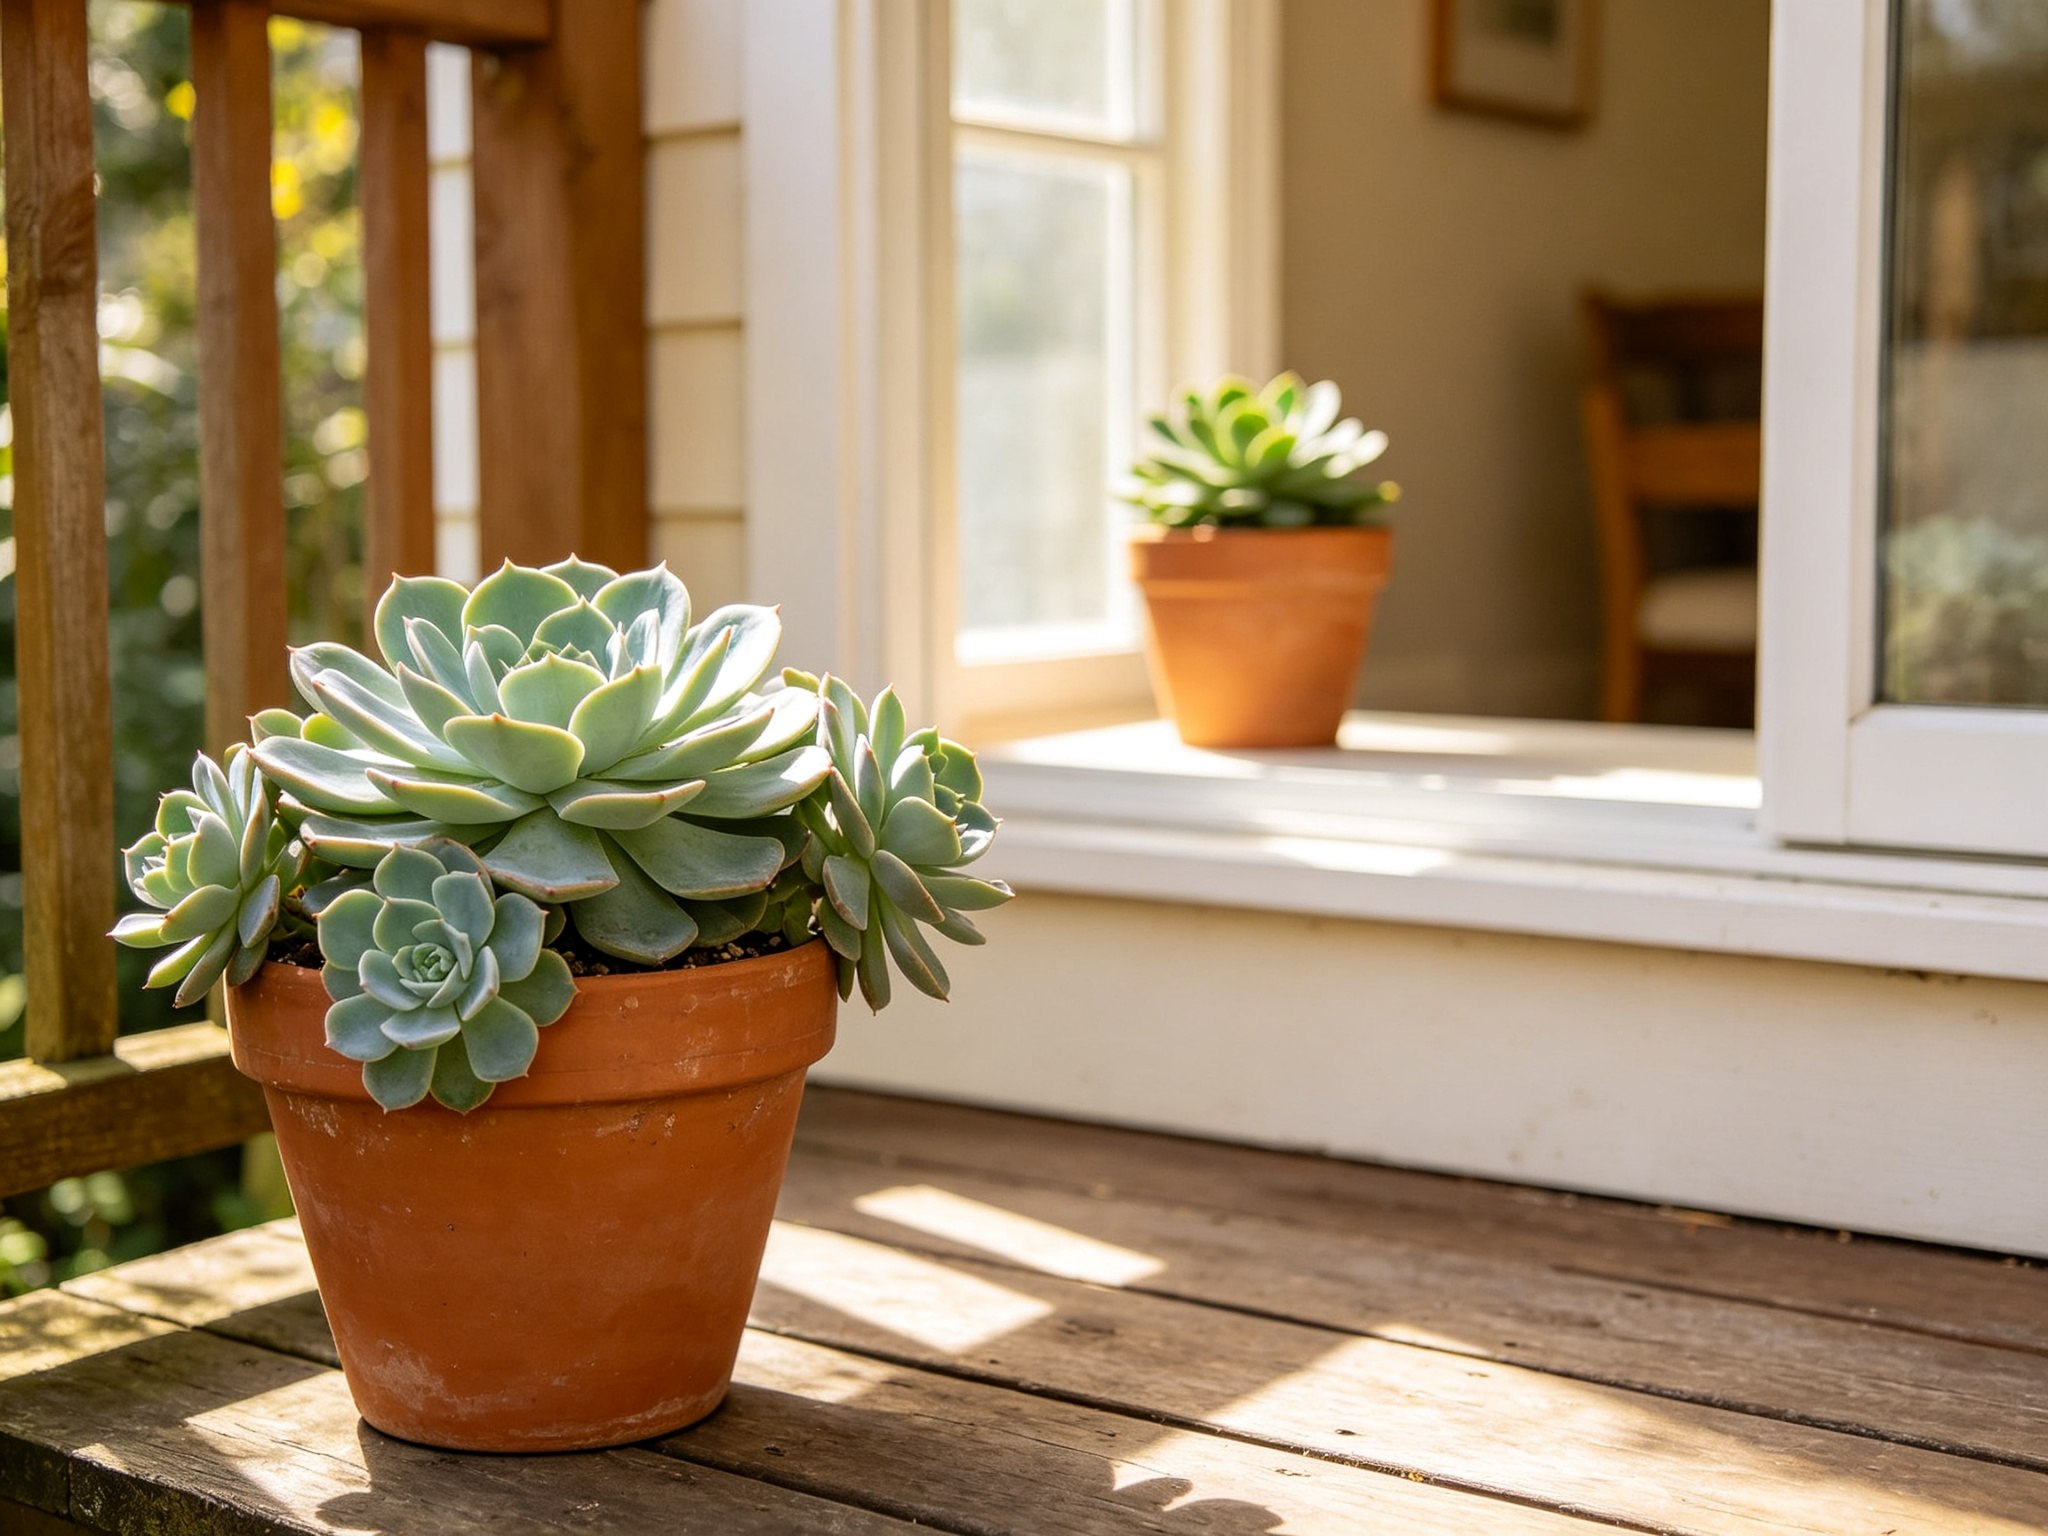
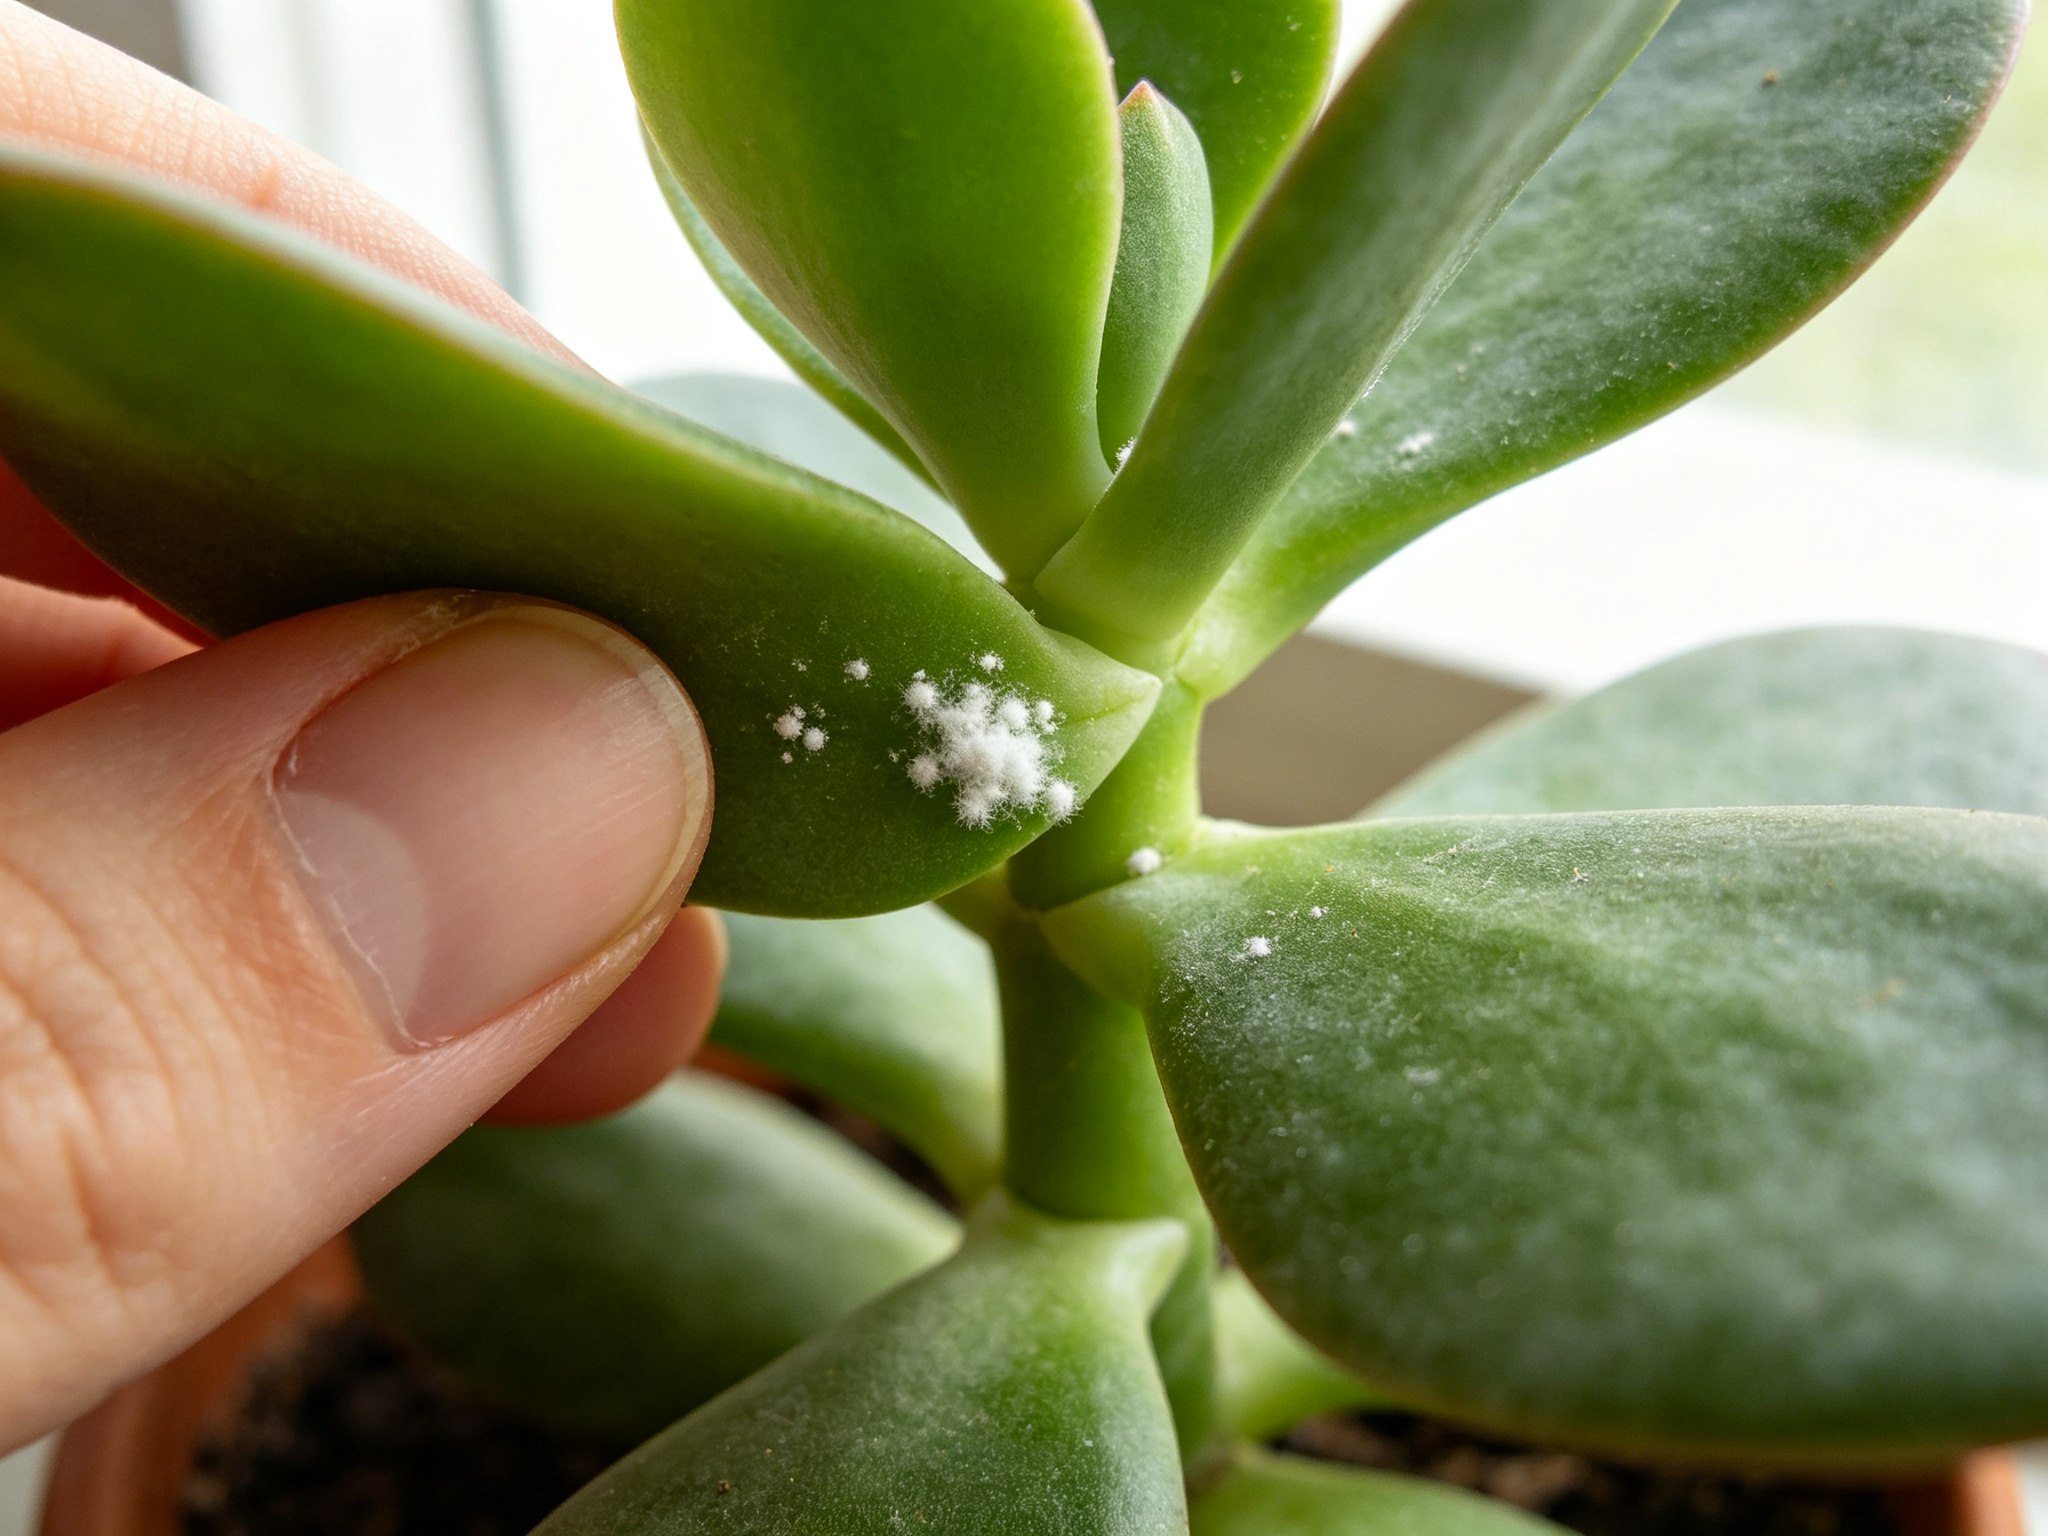
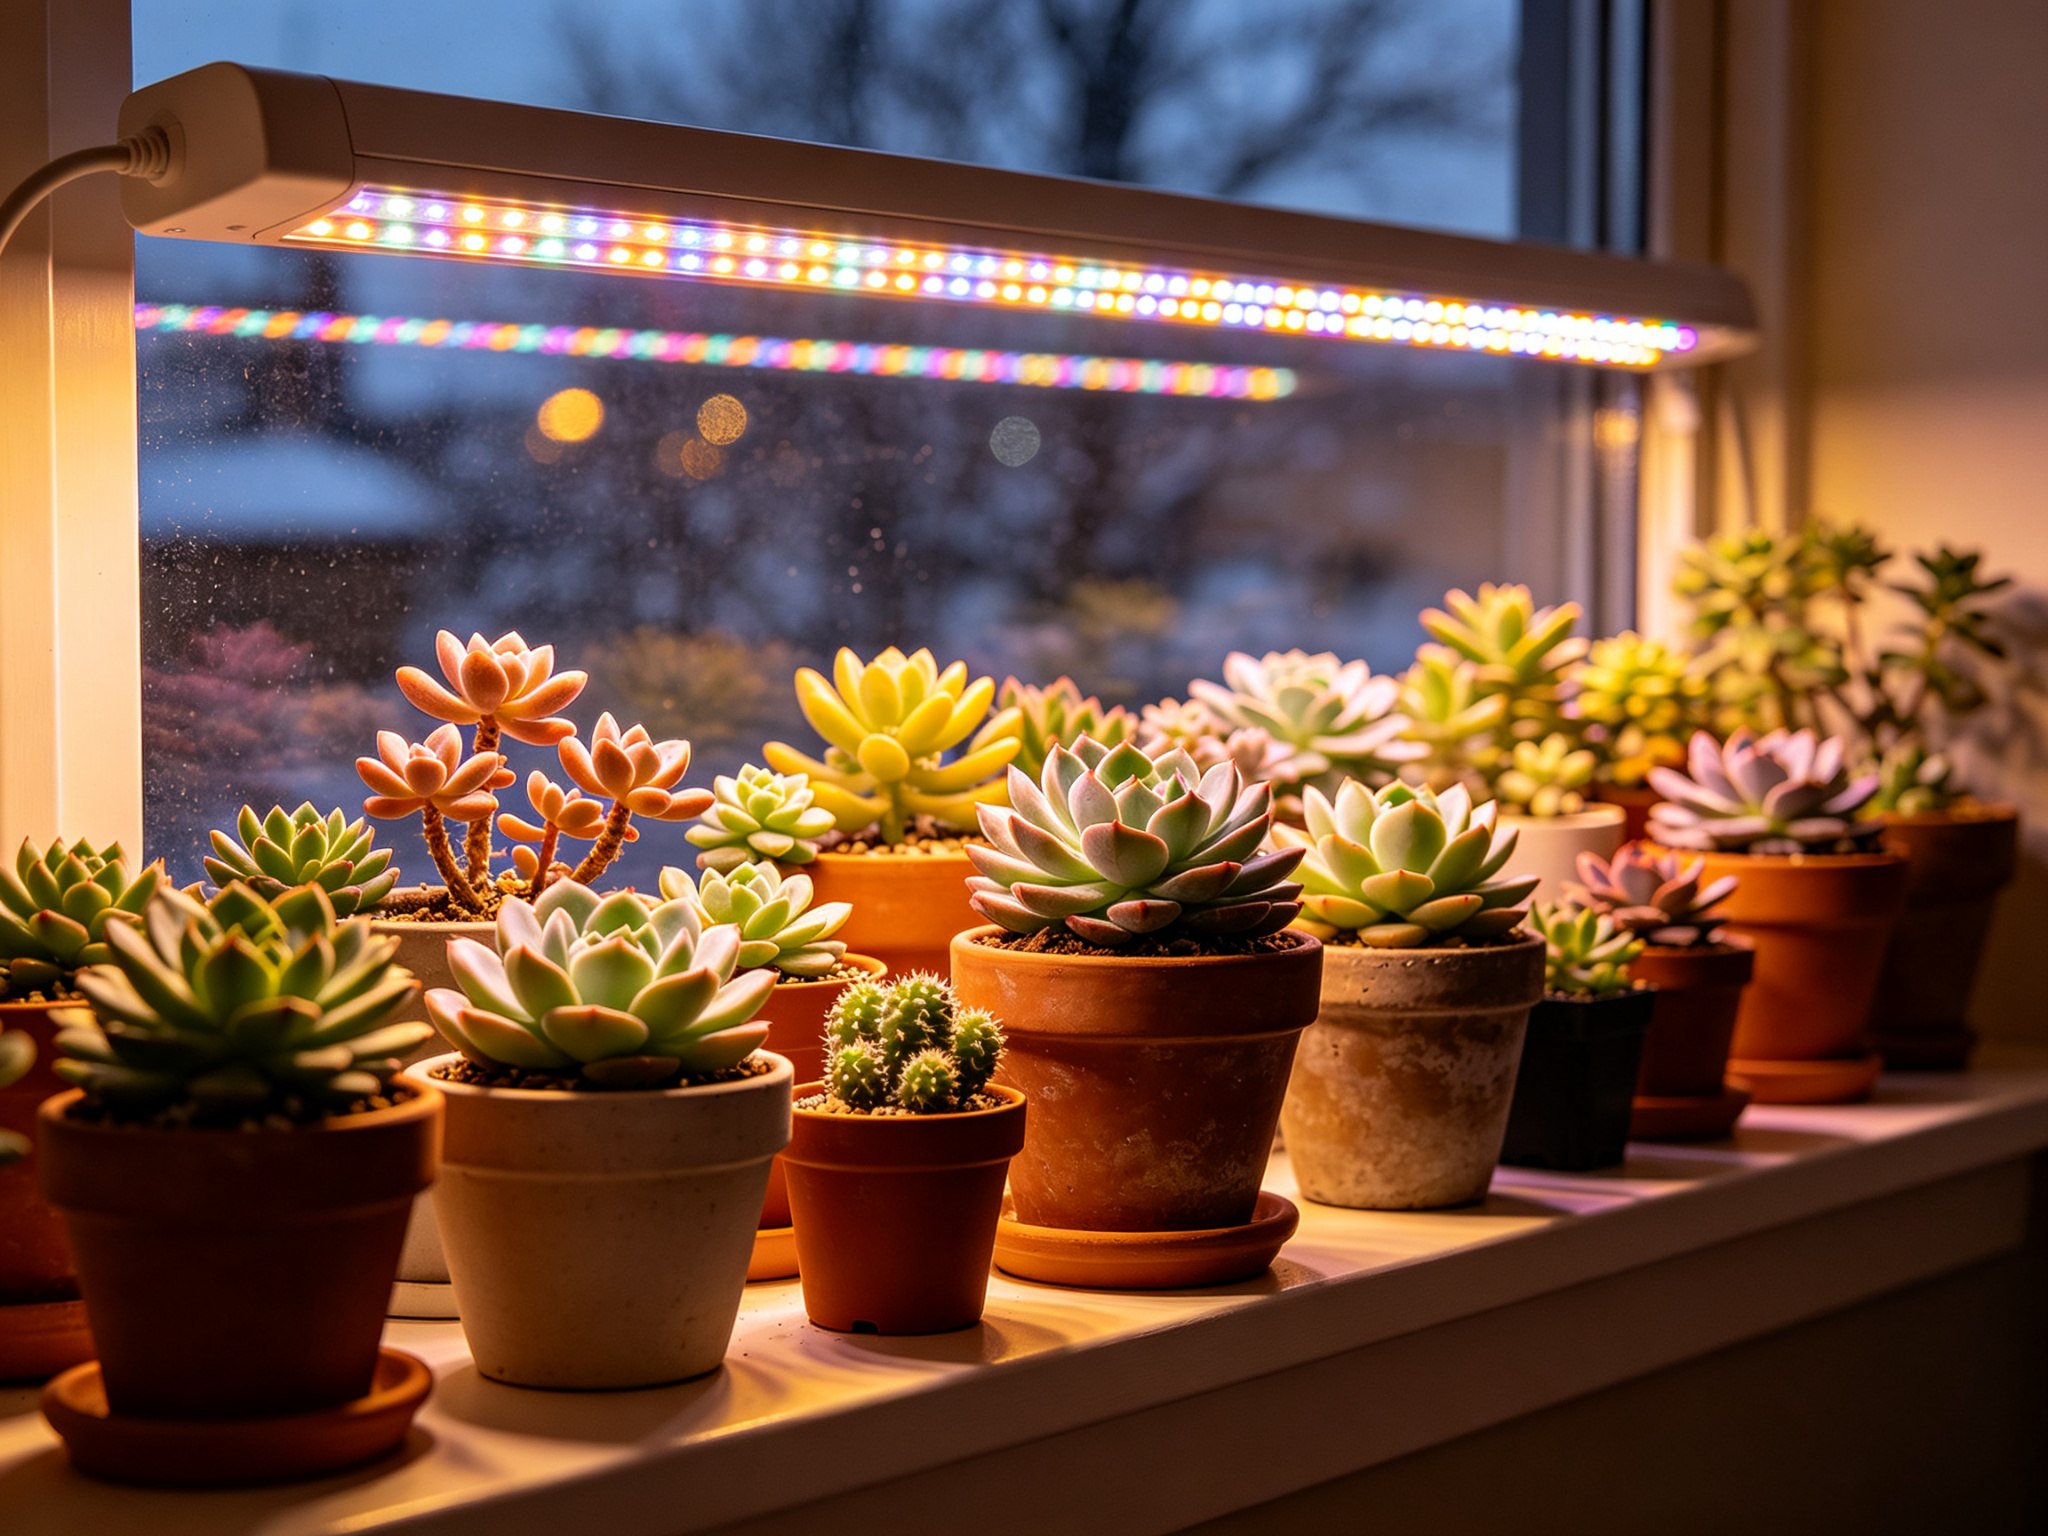
      <![CDATA[<h1 id="Fall-Checklist-Bring-Succulents-Indoors-Before-It’s-Too-Late"><a href="#Fall-Checklist-Bring-Succulents-Indoors-Before-It’s-Too-Late" class="headerlink" title="Fall Checklist: Bring Succulents Indoors Before It’s Too Late"></a>Fall Checklist: Bring Succulents Indoors Before It’s Too Late</h1><p>If your succulents spent summer outside, there’s a question you can’t afford to get wrong: when to bring succulents indoors. Get it right and they sail through winter. Get it wrong and you’ll find a bowl of mush on the patio after the first hard frost — because most succulents die from the cold in a single night, not from a slow decline.</p><p>The good news is the timing isn’t a guess. It’s a temperature, and it’s the same one across every serious grower I’ve read: start the move when nighttime lows consistently dip below 50°F (10°C), and get the tender types inside before 40°F (4°C). Here’s the full fall checklist, in order, with the exact triggers and the steps people skip.</p><p><img src="https://img.673383.xyz/api/cfile/AgACAgUAAyEGAASo6uz_AAM7aqijdOER-HDTcpSGUysFA5pjVIkAAjIQaxsta0hVYJwlHDF2a94BAAMCAAN3AAM9BA" alt="Potted succulents on a wooden porch in autumn"></p><h2 id="Why-the-move-inside-matters-and-when-it’s-too-late"><a href="#Why-the-move-inside-matters-and-when-it’s-too-late" class="headerlink" title="Why the move inside matters (and when it’s too late)"></a>Why the move inside matters (and when it’s too late)</h2><p>Succulents store water in their leaves, and that’s exactly what makes them cold-vulnerable. When temperatures approach freezing, ice crystals can form inside those water-storing cells and rupture them from within. The damage often doesn’t show for days — the plant looks fine on the porch, then collapses into translucent mush in the kitchen a week later.</p><p>Tender succulents — Echeverias, many Sedums, most Crassulas, Kalanchoes — can survive a single brief dip if the soil is dry, but repeated exposure or anything below freezing is a gamble with real stakes. That’s why the rule is to move before the frost, not during it.</p><h2 id="The-temperature-triggers-that-decide-the-move"><a href="#The-temperature-triggers-that-decide-the-move" class="headerlink" title="The temperature triggers that decide the move"></a>The temperature triggers that decide the move</h2><p>Here’s the decision table to save. It’s the same guidance the big growers publish, tightened into one place:</p><table><thead><tr><th>Nighttime low</th><th>What to do</th></tr></thead><tbody><tr><td>Above 50°F (10°C)</td><td>Safe to stay outside. Keep enjoying the sun.</td></tr><tr><td>Consistently 50–40°F (10–4°C)</td><td><strong>Start the transition.</strong> Bring tender succulents in overnight, put them back out by day.</td></tr><tr><td>Below 40°F (4°C)</td><td><strong>Bring soft succulents inside for good.</strong> Echeveria, most Sedums, Crassulas, Kalanchoes.</td></tr><tr><td>Below 32°F (0°C)</td><td>Emergency zone. Anything not cold-hardy that’s still outside is at serious risk.</td></tr></tbody></table><p>Two practical notes. First, check a sustained seven-day forecast rather than a single night — one cold dip followed by warmth isn’t the same as a steady drop. Second, if your succulents stayed dry, they tolerate cold better than wet ones; a plant sitting in damp soil is the first to freeze.</p><p><img src="https://img.673383.xyz/api/cfile/AgACAgUAAyEGAASo6uz_AAM9aqijec5KRC5ZFHm8sni3DDz8T-QAAjQQaxsta0hVyI57_b1dkVkBAAMCAAN3AAM9BA" alt="An outdoor thermometer beside potted succulents on a frosty fall morning"></p><h2 id="Which-succulents-must-come-inside-and-which-can-tough-it-out"><a href="#Which-succulents-must-come-inside-and-which-can-tough-it-out" class="headerlink" title="Which succulents must come inside (and which can tough it out)"></a>Which succulents must come inside (and which can tough it out)</h2><p>Not all succulents are equal in the cold, and this is where most guides lose people.</p><p><strong>Must come inside (tender):</strong> Echeveria, most Sedums, Crassula (jade plants), Kalanchoe, Haworthia, Gasteria, Aloe (especially sensitive to cold), and any tropical succulent. This is the majority of what people keep in pots.</p><p><strong>Can often stay out (cold-hardy):</strong> Hens and chicks (Sempervivum) and some hardy Sedum species can survive outdoors through winter in many zones, especially in a spot with excellent drainage and some shelter. But “can” isn’t “must” — if they’re in a small pot above ground, roots freeze much faster than they would in the ground. When in doubt, bring them in or move the pot against the house.</p><p>When you’re deciding, it’s safer to assume a plant is tender unless you know it’s hardy. A week of indoor time costs you nothing; a night at 28°F costs you the plant.</p><h2 id="The-7-to-10-day-transition"><a href="#The-7-to-10-day-transition" class="headerlink" title="The 7 to 10 day transition"></a>The 7 to 10 day transition</h2><p>Moving a succulent straight from full sun into a dim living room is a shock, and shocked succulents drop leaves and stretch. The fix is a slow handoff:</p><ol><li><strong>Check the forecast and pick a window</strong> — a stretch of mild nights, ideally before it consistently hits the 50–40°F zone.</li><li><strong>Bring them in overnight, back out by day</strong> for 7 to 10 days. This eases them into lower light and higher humidity without a sudden change.</li><li><strong>Pick the permanent spot</strong> — your brightest window, south- or west-facing. Most succulents want four to six hours of bright direct light indoors, and they’ll tell you they’re not getting it by stretching.</li><li><strong>Don’t water during the transition.</strong> Let the roots dry out; wet roots plus a new environment is a recipe for rot. Resume your normal (reduced) indoor watering rhythm once they’ve settled, usually after a week or two.</li><li><strong>If winter light is short in your space</strong>, set up a grow light before the stretching starts — a full-spectrum LED six to twelve inches above the plants for 12 to 14 hours a day holds them over (see our <a href="/grow-lights-for-indoor-plants/">grow lights for indoor plants guide</a> for the distance and hours math).</li></ol><p><img src="https://img.673383.xyz/api/cfile/AgACAgUAAyEGAASo6uz_AAM-aqijfezBmSrg9fEgCuitmdiZpWwAAjUQaxsta0hVLHFgUDH4TcgBAAMCAAN3AAM9BA" alt="An echeveria on the porch transitioning to the windowsill indoors"></p><h2 id="Check-for-hitchhikers-before-you-bring-them-in"><a href="#Check-for-hitchhikers-before-you-bring-them-in" class="headerlink" title="Check for hitchhikers before you bring them in"></a>Check for hitchhikers before you bring them in</h2><p>This is the step everyone skips, and it’s how indoor succulent collections get mealybugs. Succulents that spent summer outside pick up passengers: mealybugs hiding in the leaf axils, aphids on new growth, ants, spiders, and the occasional slug.</p><p>Before any pot crosses the threshold:</p><ol><li><strong>Look under the leaves and at the soil surface</strong> for white cottony tufts, tiny crawlers, or webbing.</li><li><strong>Check the drainage holes and saucer</strong> — pests like to ride along in the root zone.</li><li><strong>Quarantine new arrivals</strong> for about two weeks away from your other plants, even if they look clean.</li><li><strong>If you find mealybugs</strong>, dab them with a cotton swab dipped in 70% isopropyl alcohol, and treat the soil if you suspect root mealybugs. A full rescue routine is worth its own guide, and it works.</li></ol><p>Ants aren’t just a nuisance — they farm mealybugs for honeydew, so if you see ants, look harder for the real problem.</p><p><img src="https://img.673383.xyz/api/cfile/AgACAgUAAyEGAASo6uz_AAM_aqijgUY9uHBlG4ClL2X6sq3EuQ8AAjYQaxsta0hV3r5WhYdHTykBAAMCAAN3AAM9BA" alt="White cottony mealybug tufts in a succulent leaf axil"></p><h2 id="Adjust-watering-and-light-for-indoor-winter-conditions"><a href="#Adjust-watering-and-light-for-indoor-winter-conditions" class="headerlink" title="Adjust watering and light for indoor winter conditions"></a>Adjust watering and light for indoor winter conditions</h2><p>Once everything’s inside, the care changes more than people expect:</p><ul><li><strong>Water less.</strong> Indoors, soil dries much slower than it did outside in the sun. Most succulents want water only when the soil is bone dry all the way through — often once a month or less in winter. When in doubt, wait. Overwatering in winter is the number-one indoor killer.</li><li><strong>Give them the best window you have.</strong> They’ll survive lower light but they’ll stretch for it. Four to six hours of bright direct light is the target.</li><li><strong>Stop fertilizing.</strong> Dormant succulents don’t need food until spring.</li><li><strong>Keep them off cold glass.</strong> A leaf pressed against a freezing window pane can damage tissue even inside a warm room.</li></ul><h2 id="Troubleshooting-what-to-expect-after-the-move"><a href="#Troubleshooting-what-to-expect-after-the-move" class="headerlink" title="Troubleshooting: what to expect after the move"></a>Troubleshooting: what to expect after the move</h2><p><strong>Dropped leaves.</strong> Usually shock from a sudden change. The plant should settle in a couple of weeks; just don’t water it until it does.</p><p><strong>Pale, stretched growth.</strong> Not enough light indoors. Move it to a brighter window or add a grow light. The stretched section won’t thicken, but new growth will come in normal.</p><p><strong>Translucent or mushy leaves.</strong> Overwatering or cold damage. If it’s water, let the soil dry out completely and cut way back. If the plant froze, remove the damaged leaves and hope the core survived.</p><p><strong>Fine white webs or cottony tufts a few weeks later.</strong> Pests you missed at the door. Isolate the plant and treat it now — don’t wait for it to spread.</p><p><img src="https://img.673383.xyz/api/cfile/AgACAgUAAyEGAASo6uz_AANAaqijhHCWP61-RKaXud9VcF_8NqIAAjcQaxsta0hVbL2jwXY20aQBAAMCAAN3AAM9BA" alt="Succulents on a windowsill under an LED grow light in winter"></p><h2 id="FAQ"><a href="#FAQ" class="headerlink" title="FAQ"></a>FAQ</h2><p><strong>What temperature should I bring succulents inside?</strong><br>Start the transition when nighttime temperatures consistently dip below 50°F (10°C). Soft succulents like Echeverias should be inside before it hits 40°F (4°C); anything below freezing is a serious risk.</p><p><strong>Can succulents stay outside in winter?</strong><br>Cold-hardy types like hens and chicks (Sempervivum) can survive outdoors in many zones, but tender succulents — Echeveria, most Sedums, Kalanchoe, jade — must come inside before frost.</p><p><strong>How do I transition succulents from outside to inside?</strong><br>Move them in for the night and back out during the day for 7 to 10 days, then bring them in full-time to a bright window. Check for pests first, and hold off watering until they adjust.</p><p><strong>Do succulents need grow lights indoors?</strong><br>Most need four to six hours of bright direct light. If your best window faces north or winter days are short, a full-spectrum LED grow light six to twelve inches above the plants for 12 to 14 hours a day keeps them from stretching.</p><p><strong>Why is my succulent mushy after bringing it inside?</strong><br>Most likely overwatering or cold damage. Let the soil dry out completely, cut watering way back, and remove any translucent leaves.</p><h2 id="Your-fall-checklist-the-short-version"><a href="#Your-fall-checklist-the-short-version" class="headerlink" title="Your fall checklist (the short version)"></a>Your fall checklist (the short version)</h2><ul><li><input disabled="" type="checkbox"> Watch the seven-day forecast; start when nights consistently dip below 50°F</li><li><input disabled="" type="checkbox"> Bring tender succulents inside for good before 40°F</li><li><input disabled="" type="checkbox"> Transition over 7–10 days: nights inside, days outside</li><li><input disabled="" type="checkbox"> Inspect leaves, soil surface, and drainage holes for pests; quarantine new arrivals</li><li><input disabled="" type="checkbox"> Land them in your brightest window; set up a grow light if light is short</li><li><input disabled="" type="checkbox"> Don’t water during the transition, then cut to a reduced winter rhythm</li><li><input disabled="" type="checkbox"> Stop fertilizing until spring</li></ul><p>Do it in this order and your succulents will come through winter looking exactly like they did in September. Skip the temperature check and you’re rolling the dice with the frost.</p><p>New to succulents entirely? Start with the <a href="/easy-succulents-beginners/">11 easiest succulents for beginners</a>, then come back to this checklist when the season turns.</p>]]>
    </content>
    <id>https://homegrownnook.com/bring-succulents-indoors/</id>
    <link href="https://homegrownnook.com/bring-succulents-indoors/"/>
    <published>2026-09-15T13:53:31.000Z</published>
    <summary>The exact temperature triggers for moving succulents indoors, which varieties tough it out, and the pest check to do first.</summary>
    <title>Fall Checklist: Bring Succulents Indoors Before It's Too Late</title>
    <updated>2026-09-15T13:53:31.000Z</updated>
  </entry>
  <entry>
    <author>
      <name>Sage</name>
    </author>
    <category term="Plant Library" scheme="https://homegrownnook.com/categories/plant-library/"/>
    <category term="Beginner Basics" scheme="https://homegrownnook.com/categories/plant-library/beginner-basics/"/>
    <category term="Succulents &amp; Cacti" scheme="https://homegrownnook.com/categories/Succulents-Cacti/"/>
    <category term="succulents" scheme="https://homegrownnook.com/tags/succulents/"/>
    <category term="succulent-care" scheme="https://homegrownnook.com/tags/succulent-care/"/>
    <category term="indoor-plants" scheme="https://homegrownnook.com/tags/indoor-plants/"/>
    <category term="houseplants" scheme="https://homegrownnook.com/tags/houseplants/"/>
    <category term="beginner-gardening" scheme="https://homegrownnook.com/tags/beginner-gardening/"/>
    <content>
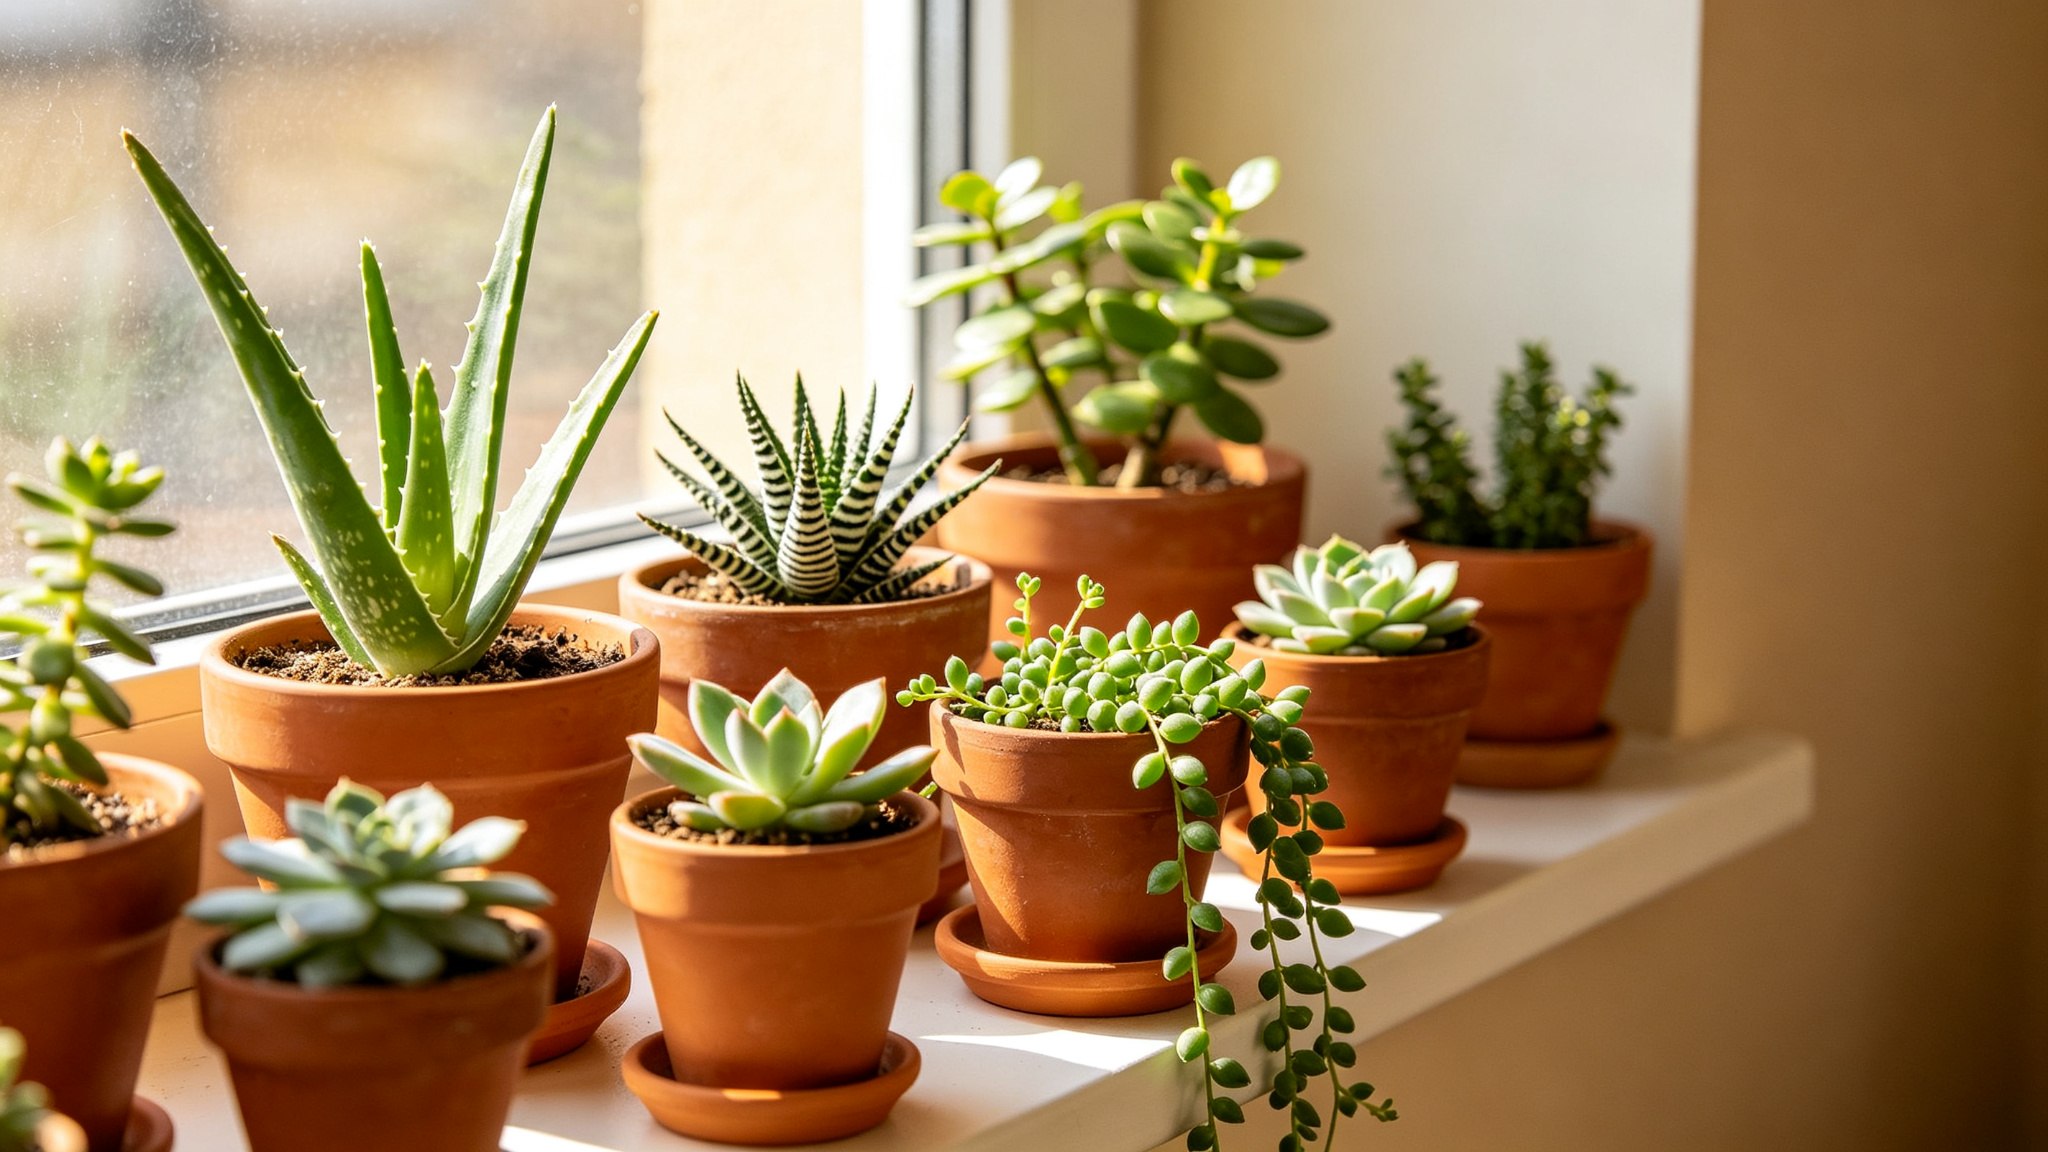
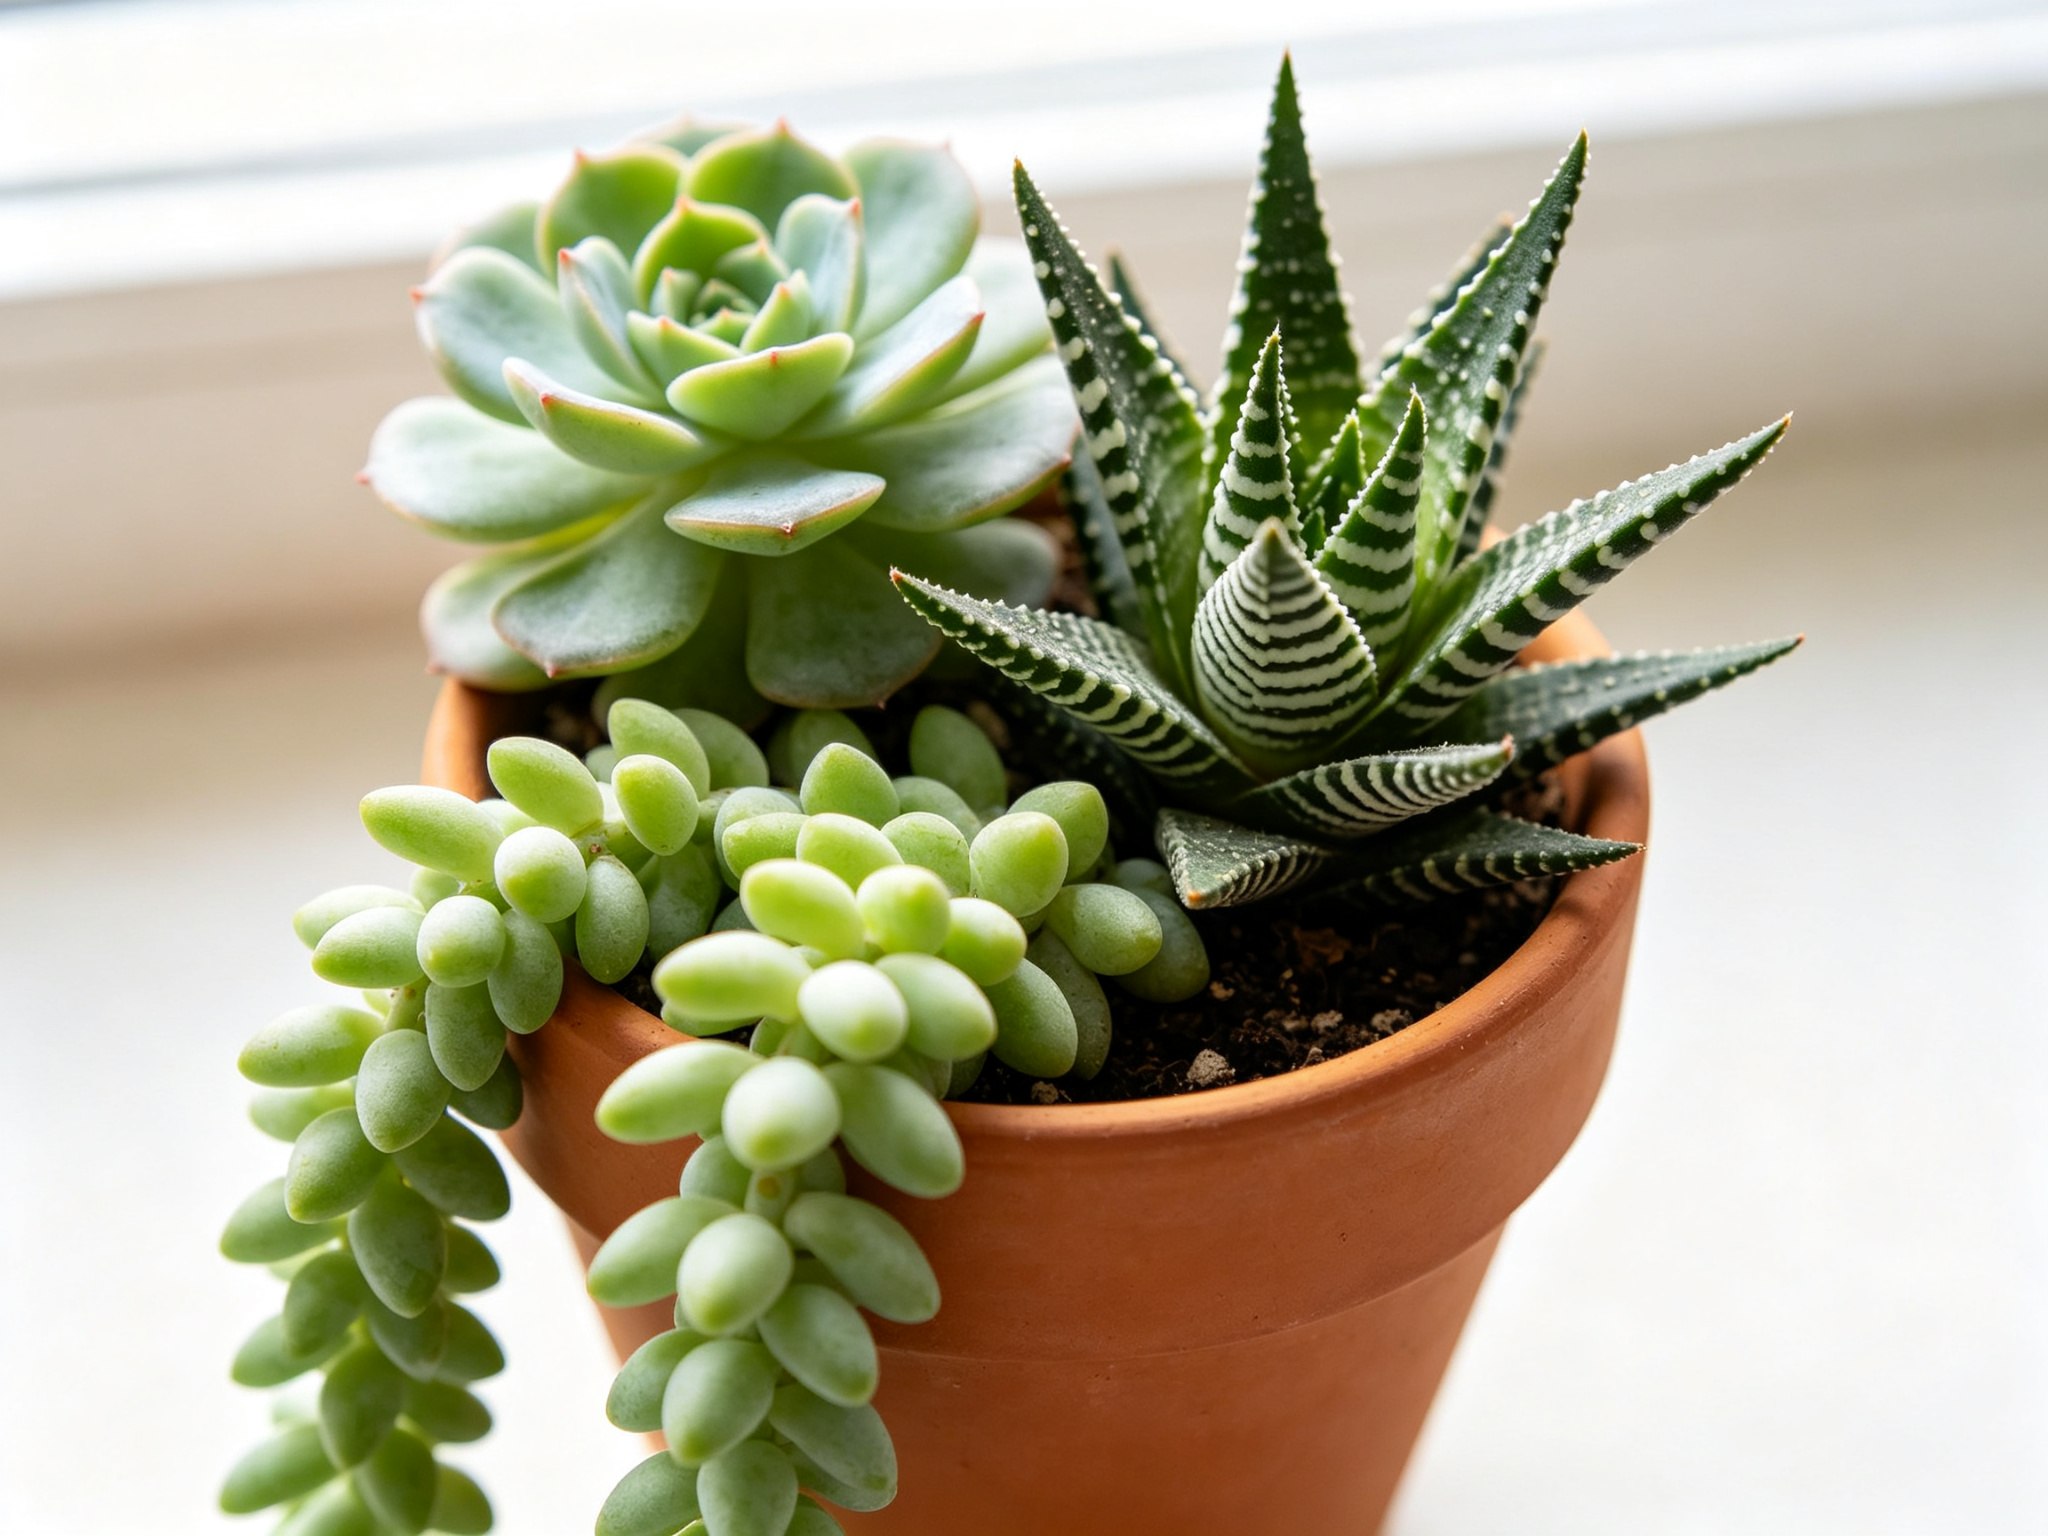
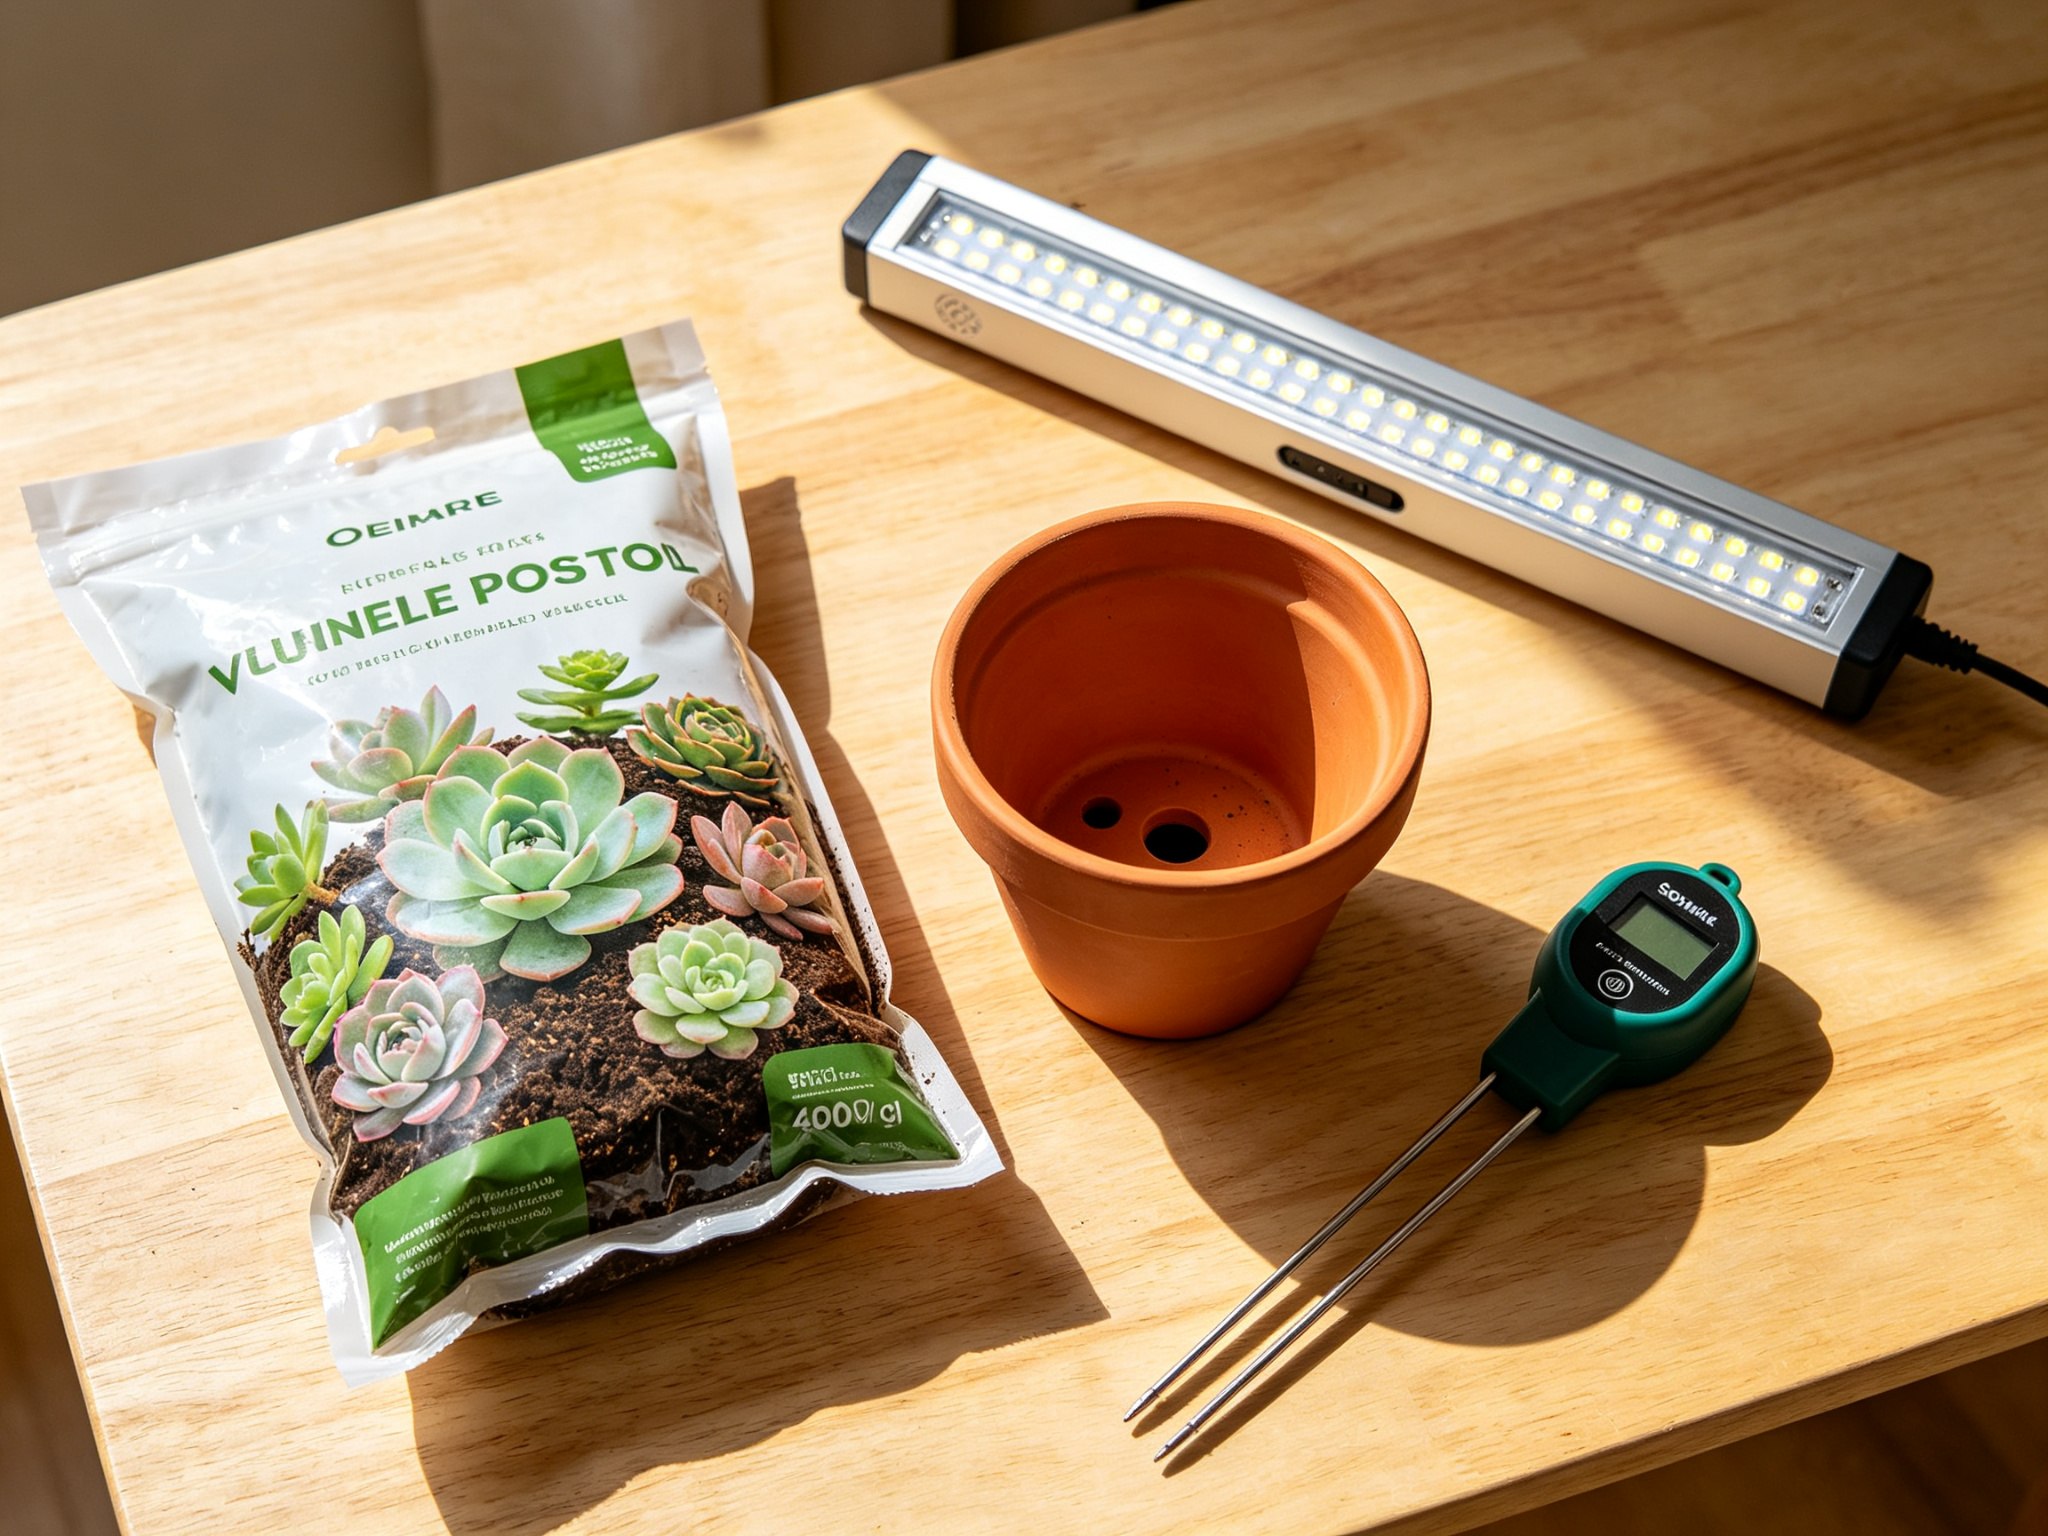
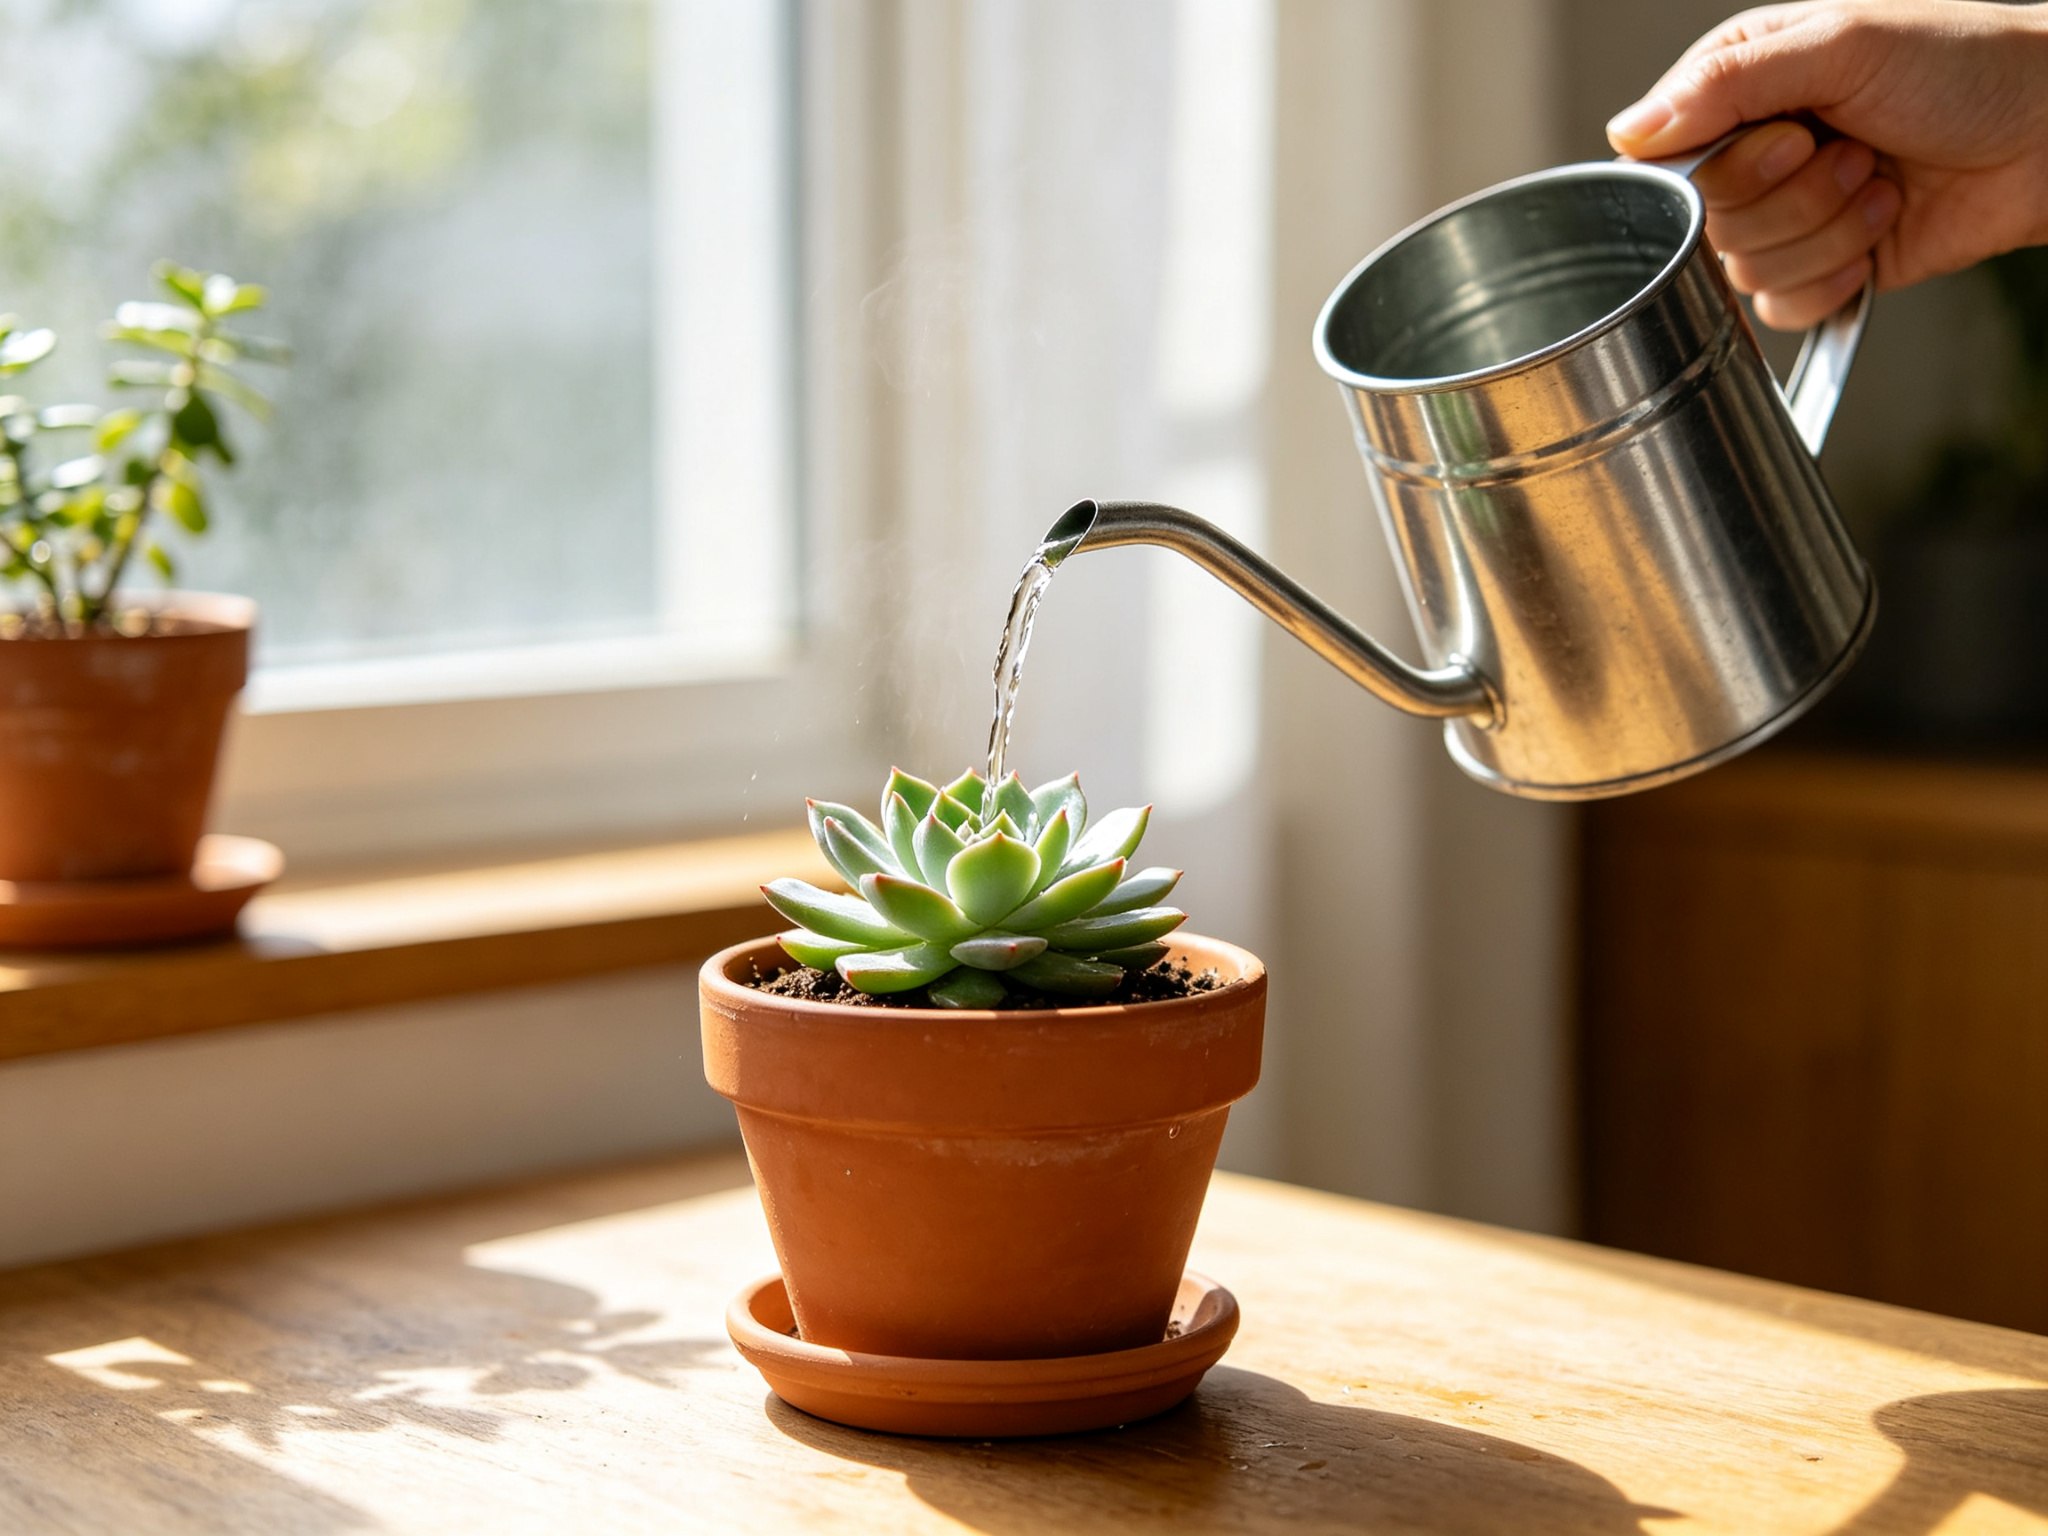
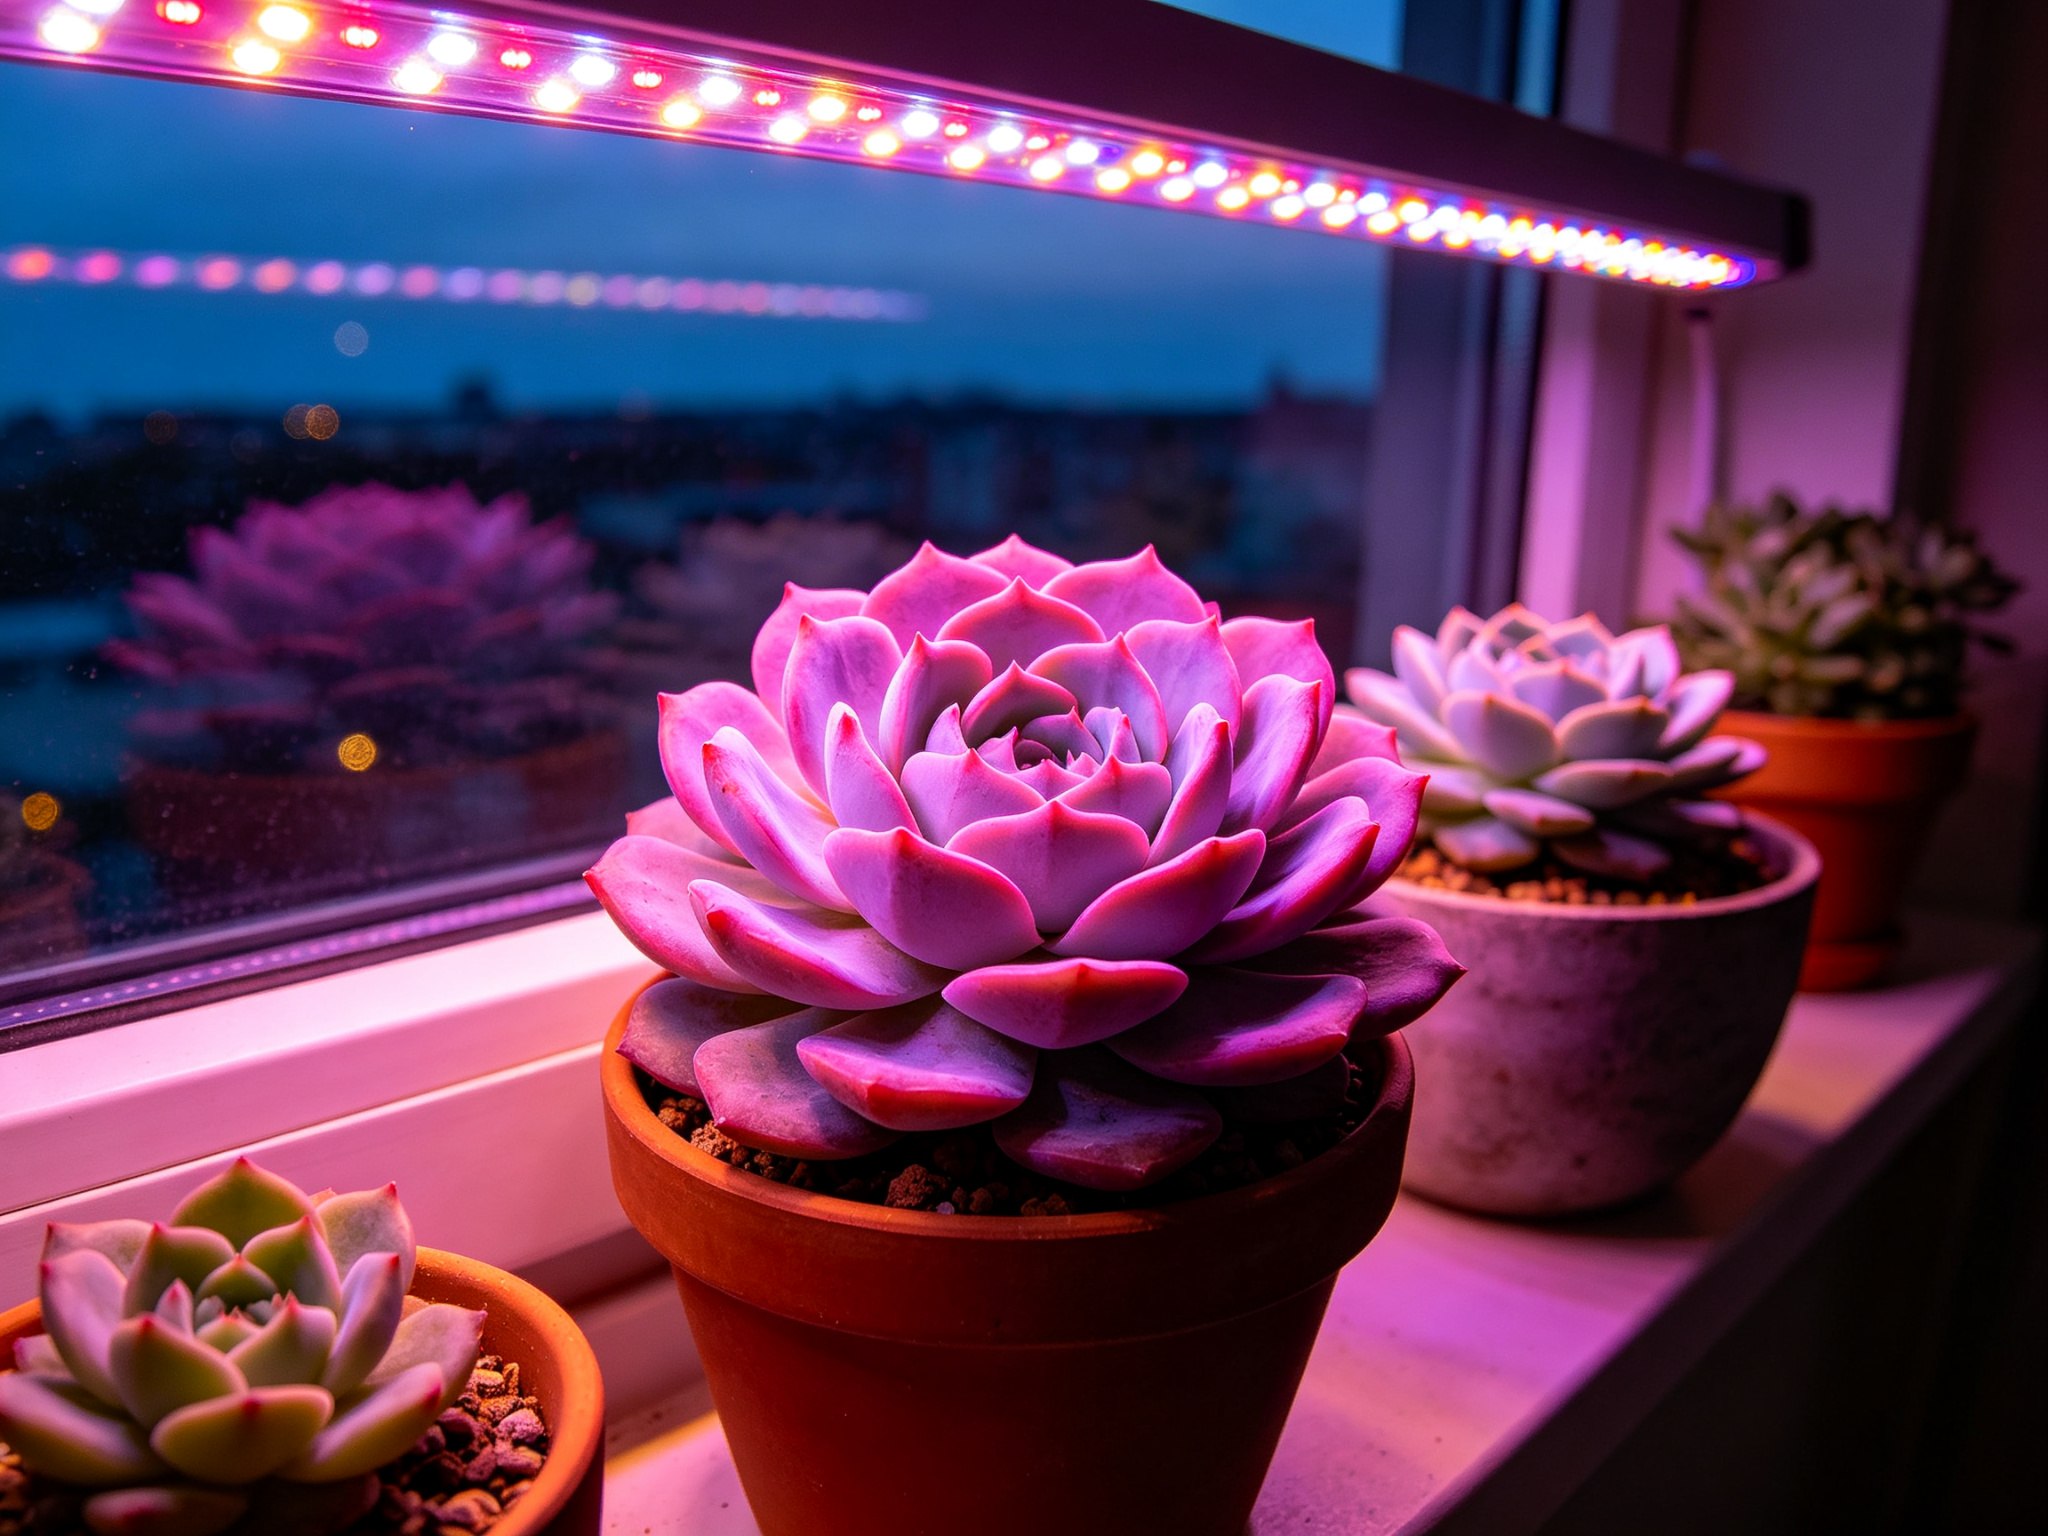
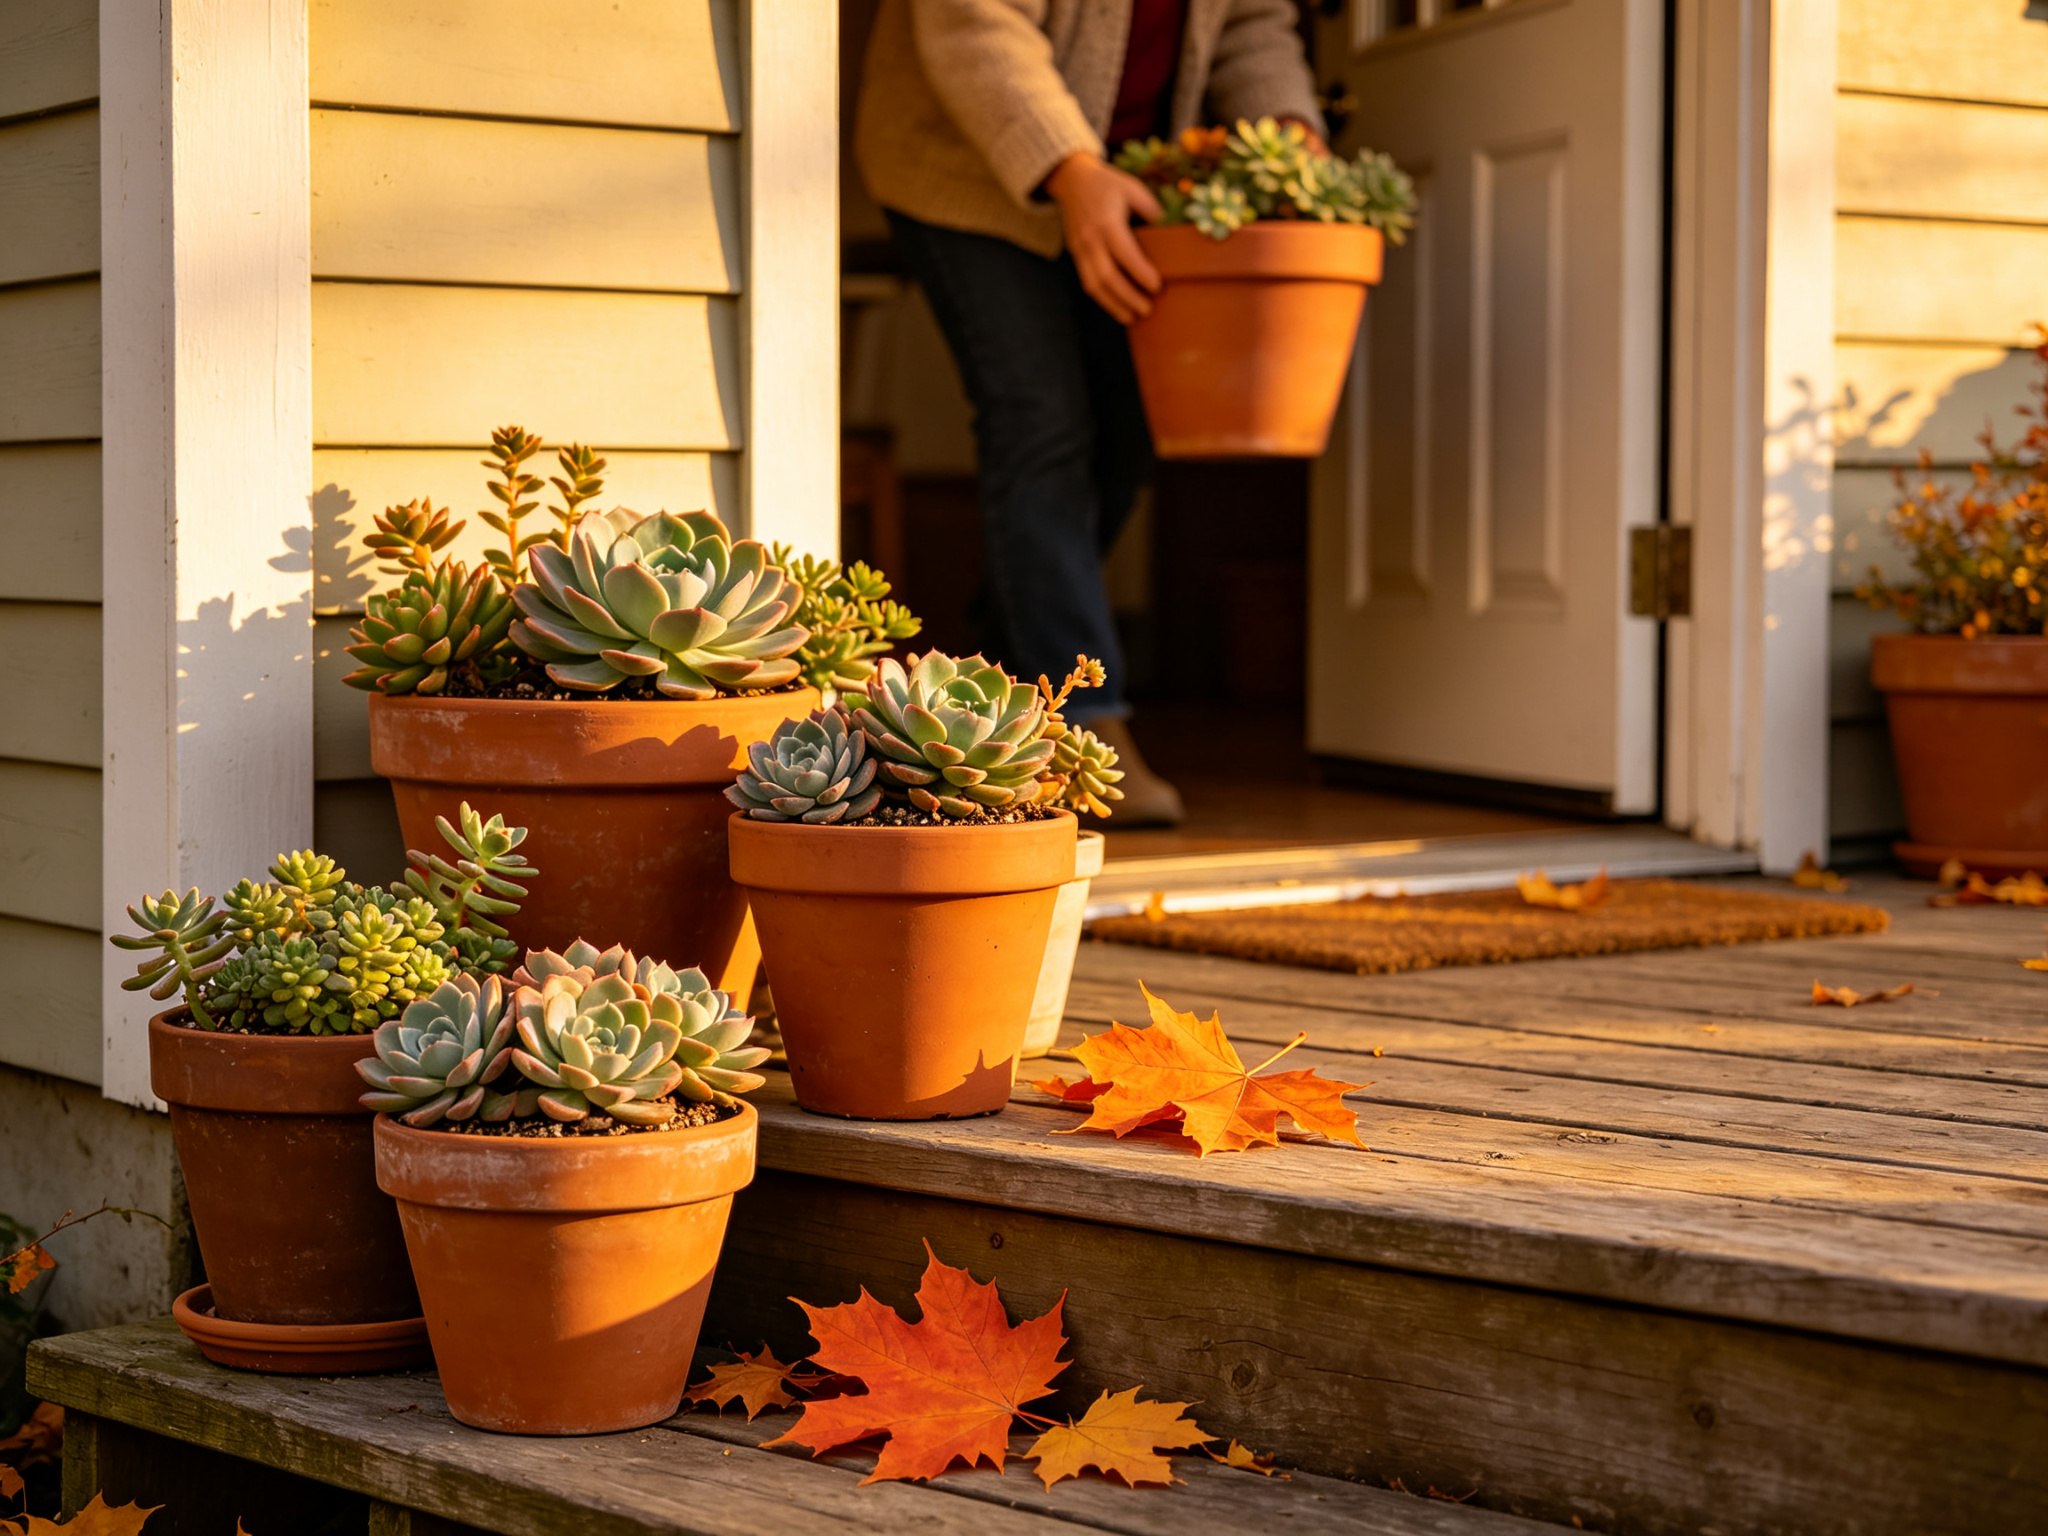
      <![CDATA[<h1 id="11-Easy-Succulents-That-Almost-Water-Themselves"><a href="#11-Easy-Succulents-That-Almost-Water-Themselves" class="headerlink" title="11 Easy Succulents That (Almost) Water Themselves"></a>11 Easy Succulents That (Almost) Water Themselves</h1><p>If you’ve ever searched for the best succulents for beginners, you’ve seen the same list a hundred times: “10 easy succulents!” “15 low-maintenance varieties!” And then you brought one home, watered it every Sunday like a good plant parent, and watched it turn to mush anyway.</p><p>Here’s the part most lists leave out. Easy succulents are not plants that need nothing. They’re plants that need very few things — exactly four, in fact — and the moment you give them those four things, they genuinely do almost water themselves.</p><p>This is the fall edition, because right now, before the temperatures drop, is the best time in the whole year to set up a succulent collection. This is the setup I’d hand to anyone who’s killed one already.</p><p><img src="https://img.673383.xyz/api/cfile/AgACAgUAAyEGAASo6uz_AAM2aqijYTSWsifG-Mebw6MfC-4mSf4AAi0Qaxsta0hVjJIFXJj0ftEBAAMCAAN3AAM9BA" alt="A windowsill collection of beginner succulents in terracotta pots"></p><h2 id="What-“almost-water-themselves”-actually-means"><a href="#What-“almost-water-themselves”-actually-means" class="headerlink" title="What “almost water themselves” actually means"></a>What “almost water themselves” actually means</h2><p>Most people kill succulents the same way they kill cacti: with kindness. The plant is built to store water in its leaves, so it needs far less than you think. When the soil is bone dry and you water it deeply, then leave it alone until it’s bone dry again, the plant does the rest. That rhythm — soak, dry, ignore — is the whole secret, and it’s why these are the lowest-maintenance houseplants you can buy.</p><p>The other part of the promise is light. Easy succulents tolerate a lot, but “easy” dies quietly in a dark corner. Give any plant on this list a bright windowsill, the right soil, a pot with a hole, and the discipline to water less, and it will outlive your patience for it.</p><h2 id="The-11-easiest-succulents-to-keep-alive"><a href="#The-11-easiest-succulents-to-keep-alive" class="headerlink" title="The 11 easiest succulents to keep alive"></a>The 11 easiest succulents to keep alive</h2><p>These aren’t ranked by beauty — they’re ranked by how much neglect they’ll forgive. Pick two or three to start; the whole point is a collection that doesn’t babysit you back.</p><p><strong>1. Aloe vera.</strong> The classic starter succulent, and deservedly so. It wants bright, indirect light — a south-facing windowsill is perfect — and water every two to three weeks. Forget it for a month and it shrugs. Bonus: the gel inside the leaves genuinely helps with minor burns, which makes it the one houseplant people actually use. It’s sensitive to cold, so it comes inside early in fall.</p><p><strong>2. Zebra Haworthia (Haworthiopsis fasciata).</strong> The number-one recommendation from growers who need something easy. It’s happy on a desk or a north-ish windowsill, needs less light than most succulents, and tolerates irregular watering. The white ridges on the leaves are fun to rub, which sounds silly until you own one.</p><p><strong>3. Burro’s Tail (Sedum morganianum).</strong> A trailing succulent with plump, blue-green leaves that look like little grapes. It’s one of the most forgiving plants I know: it bounces back from both underwatering and overwatering, and it can go several weeks without a drink. It does want bright light, and its leaves fall off if you bump it, so put it somewhere you won’t brush past it daily.</p><p><strong>4. Jade Plant (Crassula ovata).</strong> The old friend of the succulent world. Jade is patient and communicates clearly: when it’s thirsty, the plump leaves go slightly soft and wrinkly. Water it deeply, let it dry completely, repeat. Over years it grows a thick, woody trunk that makes it look like a tiny tree — which is why it’s the succulent people keep for decades.</p><p><img src="https://img.673383.xyz/api/cfile/AgACAgUAAyEGAASo6uz_AAM3aqijZsNjDIZMDAq2peUUlZOY_boAAi4Qaxsta0hVb2ZLHvZKMcoBAAMCAAN3AAM9BA" alt="A jade plant, zebra haworthia, and burro&#39;s tail in a small terracotta pot"></p><p><strong>5. Gasteria.</strong> The underrated workhorse. Rough, tongue-shaped leaves, extremely tolerant of lower light, and it barely notices missed waterings. If your apartment only has one decent window and it’s already claimed by something else, this is the plant that still thrives.</p><p><strong>6. Haworthia cooperi.</strong> A small, translucent-leaved Haworthia that’s even more forgiving than the zebra. Bright indirect light, water when dry, ignore otherwise. It stays tiny, which makes it perfect for a desk or a shelf.</p><p><strong>7. Ghost Plant (Graptopetalum paraguayense).</strong> Pale, dusty-looking rosettes that tolerate a surprising amount of bad treatment. It stretches in low light without dying, which is more than most succulents can say. Give it sun and it flushes pink at the edges.</p><p><strong>8. Panda Plant (Kalanchoe tomentosa).</strong> Soft, fuzzy silver-green leaves with brown spots. It wants bright light and very little water, and it’s one of the most tactile plants on this list. If you have pets, double-check toxicity before buying — but it’s a lovely beginner plant either way.</p><p><strong>9. Hens and Chicks (Sempervivum).</strong> The outlier on this list: it’s cold-hardy, so in many zones it can actually stay outdoors through winter. Indoors, it’s an easy, sun-hungry rosette that produces little offsets (“chicks”) around the mother plant. It needs more direct sun than most indoor spots provide, so give it your brightest window or a grow light.</p><p><strong>10. Stonecrop (Sedum).</strong> The creeping, ground-cover cousin of burro’s tail. Tough, fast to grow, and forgiving of both heat and drought. Some varieties handle cold too, which makes them a flexible choice for people who aren’t sure what their space can support.</p><p><strong>11. Echeveria.</strong> The one on this list that asks for a little more — and the one that makes a collection look curated. Rosette-shaped, and the colorful types (lilac, blue-green, pink-tipped) need strong light to hold their color. In a bright south window they’re easy; in winter, they’re the plant that most needs a grow light, which is exactly why this one earns its place here.</p><h2 id="The-4-things-you-need-to-keep-them-alive"><a href="#The-4-things-you-need-to-keep-them-alive" class="headerlink" title="The 4 things you need to keep them alive"></a>The 4 things you need to keep them alive</h2><p>Everything above collapses into four purchases. Get these right and the plants do the rest.</p><p><strong>1. Succulent soil.</strong> Regular potting soil holds water, which is the opposite of what these plants want. A <a href="https://www.amazon.com/dp/B0799NMGPC?tag=homegrownnook-20">bagged succulent and cactus mix</a>, ideally one you cut with perlite or pumice, drains fast and lets roots breathe. This is the single cheapest insurance policy in houseplant care.</p><p><strong>2. A <a href="https://www.amazon.com/dp/B08HCX2D9V?tag=homegrownnook-20">pot with a drainage hole</a>.</strong> Non-negotiable. A succulent in a sealed decorative pot is a succulent standing in a puddle; the rot just hasn’t started yet. <a href="https://www.amazon.com/dp/B0B4HVN7DZ?tag=homegrownnook-20">Unglazed terracotta</a> is best for beginners because moisture escapes through the walls too, and the pot should be only slightly wider than the root ball — a 4-inch plant wants a 4- or 5-inch pot, not a 10-inch one.</p><p><strong>3. A grow light (for winter and dark rooms).</strong> Most succulents need four to six hours of bright light a day. If your windows face north, or winter days are short, a <a href="https://link.amazon/B005NF0GQ">full-spectrum LED grow light</a> closes the gap. For the colorful Echeverias, look for full-spectrum lights around 5000–6500K, mounted 6 to 12 inches above the plant, running 12 to 14 hours a day on a timer.</p><p><strong>4. A soil moisture meter or a long-spout watering can.</strong> One of these, not both. A <a href="https://link.amazon/B00pXneVx">cheap moisture meter</a> takes the guesswork out of “is it dry yet?” — water only when it reads dry. A long-spout can is the alternative: it lets you water the soil, not the leaves, and it makes the deep soak easy to aim.</p><p><img src="https://img.673383.xyz/api/cfile/AgACAgUAAyEGAASo6uz_AAM4aqijagWxLY0alEBRSBpgXA84KksAAi8Qaxsta0hVeLFZ9zm30xgBAAMCAAN3AAM9BA" alt="Succulent care essentials: soil, terracotta pot, grow light, and moisture meter"></p><h2 id="The-watering-trick-behind-“almost-water-themselves”"><a href="#The-watering-trick-behind-“almost-water-themselves”" class="headerlink" title="The watering trick behind “almost water themselves”"></a>The watering trick behind “almost water themselves”</h2><p>Forget the calendar. Succulent watering is a moisture test, not a schedule. Water deeply until water runs out the drainage holes, then wait until the soil is completely dry before watering again. Not “mostly dry” — dry, all the way through the pot.</p><p>The test that works is a wooden chopstick. Push it two to four inches into the soil, leave it a minute, pull it out. Clean and dry crumbs? Water. Damp soil stuck to the wood? Wait.</p><p>As a rough rhythm for most homes:</p><table><thead><tr><th>Season</th><th>Watering</th><th>Notes</th></tr></thead><tbody><tr><td>Spring &amp; summer</td><td>Every 2–3 weeks</td><td>Soak fully each time</td></tr><tr><td>Fall</td><td>Every 3–4 weeks</td><td>Taper off as days shorten</td></tr><tr><td>Winter</td><td>Once a month or less</td><td>Often skip entirely</td></tr></tbody></table><p>Two hard rules. Never mist a succulent — humidity invites rot, and these plants have no use for it. And never water on a fixed weekly rhythm just because it’s convenient. That single habit accounts for most succulent deaths.</p><p><img src="https://img.673383.xyz/api/cfile/AgACAgUAAyEGAASo6uz_AAM5aqijb5_ltGPv5p-qa15raP7RA9gAAjAQaxsta0hVBbUU9pq8B_8BAAMCAAN3AAM9BA" alt="A long-spout watering can watering a succulent in a terracotta pot"></p><h2 id="Light-why-your-windowsill-decides-everything"><a href="#Light-why-your-windowsill-decides-everything" class="headerlink" title="Light: why your windowsill decides everything"></a>Light: why your windowsill decides everything</h2><p>A succulent that isn’t getting enough light tells you clearly, just slowly. It grows taller and thinner than it should, and the leaves fade toward pale green. That stretching is permanent — it won’t thicken back up once conditions improve.</p><p>Aim for four to six hours of bright direct light. South-facing is the goal; west is next best. If your best window faces north, either pick the low-light-tolerant plants on this list (zebra haworthia, gasteria, haworthia cooperi) or budget for a grow light (see our <a href="/grow-lights-for-indoor-plants/">grow lights for indoor plants guide</a> for what to look for).</p><p>That’s also the honest answer to “succulents for low light apartments”: the plant selection matters more than the apartment. Match the plant to the light you actually have, and the whole hobby gets easier.</p><h2 id="What-changes-in-fall"><a href="#What-changes-in-fall" class="headerlink" title="What changes in fall"></a>What changes in fall</h2><p>Fall is when the “almost water themselves” promise gets tested, because the plants are heading into dormancy. Three things to do now:</p><ol><li><strong>Bring tender succulents in before the cold.</strong> If yours spent summer outside, start the move when nighttime temperatures consistently dip below 50°F — soft succulents like Echeveria should be inside before it hits 40°F. Here’s the <a href="/bring-succulents-indoors/">full fall checklist for that move</a>.</li><li><strong>Set up the grow light early.</strong> If your succulents live indoors year-round, shorter fall days mean less light. Start running a grow light before the stretching starts, not after.</li><li><strong>Stop fertilizing.</strong> Dormant succulents don’t need food, and fertilizer salts build up in soil that isn’t being flushed. Resume in spring.</li></ol><p><img src="https://img.673383.xyz/api/cfile/AgACAgUAAyEGAASo6uz_AAM6aqijco_y6ovmDwExS-1GMvBU1lwAAjEQaxsta0hVRwdrPgNdmsABAAMCAAN3AAM9BA" alt="A lilac-pink Echeveria glowing under a full-spectrum grow light at dusk"></p><h2 id="What-to-buy-for-your-first-succulent-setup"><a href="#What-to-buy-for-your-first-succulent-setup" class="headerlink" title="What to buy for your first succulent setup"></a>What to buy for your first succulent setup</h2><p>If you’re starting from zero, this is the shopping list I’d hand to a friend. A beginner-friendly succulent combo pack (three to six plants) covers the collection; a single showpiece like a variegated or crested Echeveria adds the collector’s thrill. Pair them with a bag of succulent mix, a terracotta pot or two with drainage, a full-spectrum grow light for winter, and a moisture meter. Add slow-release succulent fertilizer for spring, and a long-spout watering can if you skipped the meter.</p><p>That’s a complete first setup — the plants, the soil, the pots, the light, and the watering tools — in one order, usually for $40 to $90 depending on how fancy the pots get.</p><h2 id="FAQ"><a href="#FAQ" class="headerlink" title="FAQ"></a>FAQ</h2><p><strong>What are the easiest succulents to keep alive?</strong><br>Aloe vera, zebra haworthia, jade plant, and burro’s tail top the list. They tolerate missed waterings, bounce back from neglect, and thrive on a bright windowsill.</p><p><strong>How often do I water indoor succulents?</strong><br>Only when the soil is bone dry all the way through — usually every two to three weeks in the growing season, once a month or less in winter. Use the soak-and-dry method and a chopstick or moisture meter to check.</p><p><strong>Do succulents need grow lights indoors?</strong><br>Most need four to six hours of bright direct light. If your windows face north or winter days are short, a full-spectrum LED grow light six to twelve inches above the plant for 12 to 14 hours a day closes the gap.</p><p><strong>Why is my succulent growing tall and skinny?</strong><br>That’s etiolation — not enough light. The stretched growth won’t reverse, but moving the plant to a brighter window or adding a grow light will make new growth come in compact and normal.</p><p><strong>Do succulents need to come inside for winter?</strong><br>Tender succulents do. Start the transition when nights consistently drop below 50°F, and get soft types inside before 40°F. Cold-hardy exceptions like hens and chicks can often stay out.</p><p><img src="https://img.673383.xyz/api/cfile/AgACAgUAAyEGAASo6uz_AAM8aqijd-cmrl9tWLWti2nj_5hKgvMAAjMQaxsta0hVlrUCXJUg0BsBAAMCAAN3AAM9BA" alt="Potted succulents on patio steps in autumn, one being carried indoors"></p><h2 id="The-short-version-your-buying-checklist"><a href="#The-short-version-your-buying-checklist" class="headerlink" title="The short version (your buying checklist)"></a>The short version (your buying checklist)</h2><p>If you read nothing else, take these five things to the store. A succulent that matches the light you actually have. A bag of succulent mix, plus <a href="https://link.amazon/B03AAtOwy">perlite</a> to loosen it. An unglazed terracotta pot with a drainage hole, only slightly wider than the root ball. A moisture meter or a wooden chopstick. And a commitment to water less than feels right.</p><p>Start with the soil and the pot — they solve most beginner problems before the plant even goes in. If light is your limiting factor, spend your money there and pick up a grow light before you buy a fifth succulent for a windowsill that can’t support one.</p><p>The plants will handle the rest. They’re patient, they forgive almost everything except too much water, and once you’ve got the four things right, they really do almost water themselves.</p><p><em>Disclosure: Some links in this post are affiliate links. If you buy through them, I may earn a small commission at no extra cost to you. See the full <a href="/affiliate-disclosure/">affiliate disclosure</a>.</em></p>]]>
    </content>
    <id>https://homegrownnook.com/easy-succulents-beginners/</id>
    <link href="https://homegrownnook.com/easy-succulents-beginners/"/>
    <published>2026-09-15T13:53:24.000Z</published>
    <summary>The 11 easiest succulents to keep alive indoors, plus the 4 things every beginner needs: the right soil, pot, light, and watering habit. Fall edition.</summary>
    <title>11 Easy Succulents That (Almost) Water Themselves</title>
    <updated>2026-09-17T16:00:00.000Z</updated>
  </entry>
  <entry>
    <author>
      <name>Sage</name>
    </author>
    <category term="Stories" scheme="https://homegrownnook.com/categories/stories/"/>
    <category term="Edibles &amp; Vegetables" scheme="https://homegrownnook.com/categories/Edibles-Vegetables/"/>
    <category term="Plant Diaries" scheme="https://homegrownnook.com/categories/stories/plant-diaries/"/>
    <category term="microgreens" scheme="https://homegrownnook.com/tags/microgreens/"/>
    <category term="indoor-gardening" scheme="https://homegrownnook.com/tags/indoor-gardening/"/>
    <category term="kitchen-garden" scheme="https://homegrownnook.com/tags/kitchen-garden/"/>
    <category term="vegetable-gardening" scheme="https://homegrownnook.com/tags/vegetable-gardening/"/>
    <content>
      <![CDATA[<h1 id="Growing-Microgreens-at-Home-37-to-1-60-per-Tray"><a href="#Growing-Microgreens-at-Home-37-to-1-60-per-Tray" class="headerlink" title="Growing Microgreens at Home: $37 to $1.60 per Tray"></a>Growing Microgreens at Home: $37 to $1.60 per Tray</h1><p><img src="https://img.673383.xyz/api/cfile/AgACAgUAAyEGAASo6uz_AAMwaqgHJhFpr21svQlDe0o_aJFNlJEAAlYWaxsta0BV56jx2UP7P9ABAAMCAAN5AAM9BA" alt="A 10x20 tray packed with broccoli microgreens on a kitchen counter beside a bright window"></p><p>I bought the same two-ounce clamshell of broccoli microgreens from my grocery store for eleven straight weeks. It cost $5.49. That’s $2.75 an ounce for a garnish.</p><p>So I put $37 into a shelf setup and started counting. Twelve days later I cut 11.5 ounces off one tray for $1.60 in seed and medium. I also threw a whole tray in the trash, which is the part most guides skip.</p><p>This is for anyone growing microgreens at home on a counter or shelf, with no yard and a budget under $50. The numbers come from published seed pricing, a greenhouse yield trial, and my three trays.</p><h2 id="Who-this-is-for-and-who-should-skip-it"><a href="#Who-this-is-for-and-who-should-skip-it" class="headerlink" title="Who this is for (and who should skip it)"></a>Who this is for (and who should skip it)</h2><p>If you rent, if your only window faces north, or if you want food instead of a plant you show guests, this fits. A 10x20 tray needs eighteen inches of shelf.</p><p>Skip it if you want a Sunday-only chore. These trays need a daily look for eight to twelve days, mostly to check moisture and airflow. Skip it too if you’re hoping to halve your grocery bill. One tray yields about 11.5 ounces, a large salad or a week of garnishes.</p><h2 id="Why-I-started-counting-11-5-ounces-for-1-60"><a href="#Why-I-started-counting-11-5-ounces-for-1-60" class="headerlink" title="Why I started counting: 11.5 ounces for $1.60"></a>Why I started counting: 11.5 ounces for $1.60</h2><p>Grocery microgreens sell for $4 to $6 per 1.5-to-2-ounce container, so you’re paying $2 to $3 an ounce. The price is high because the stuff keeps for days.</p><p>The growing side looks nothing like it. Broccoli microgreens take 13 grams of seed to fill a 10x20 tray, and those 13 grams produce 11.5 ounces at first true leaf, about twelve and a half days after sowing. Seed lists between $12 and $28 a pound, which puts seed cost at $0.35 to $0.85 per tray, with medium running $0.50 to $1.60.</p><p>Stack it up: about $1.60 to grow, $23 to $34 to buy. That gap is why I kept going, and it’s bounded, because the savings only exist if you cut the tray.</p><h2 id="The-37-setup-what-actually-went-in-the-cart"><a href="#The-37-setup-what-actually-went-in-the-cart" class="headerlink" title="The $37 setup: what actually went in the cart"></a>The $37 setup: what actually went in the cart</h2><p>I bought three things and deliberately skipped a fourth.</p><p>A five-pack of 10x20 trays with domes came to $17. A <a href="https://link.amazon/B0g6gPruP">coco coir brick</a> was $12, enough medium for roughly eight trays. A bag of broccoli microgreen seed was $8. Trays and domes: a five-pack of 10x20 trays with humidity domes runs about $17.</p><p>Microgreens kits are the fourth thing, and skipping them saved the most. They run $25 to $45 and bundle a shallow tray with a few grams of seed at several times the per-gram price. Buy the parts separately instead.</p><p><img src="https://img.673383.xyz/api/cfile/AgACAgUAAyEGAASo6uz_AAMxaqgHKs2cqTHaFcveSLButsRVp7YAAlcWaxsta0BVNyUUj5GwwSkBAAMCAAN5AAM9BA" alt="A stack of black 10x20 trays, a clear humidity dome, a coco coir brick, and a bag of seed on a kitchen counter"></p><h2 id="Day-1-13-grams-of-seed-that-looks-like-not-nearly-enough"><a href="#Day-1-13-grams-of-seed-that-looks-like-not-nearly-enough" class="headerlink" title="Day 1: 13 grams of seed that looks like not nearly enough"></a>Day 1: 13 grams of seed that looks like not nearly enough</h2><p>This is where most first trays go wrong, including mine. Weigh out 13 grams of broccoli seed and look at it in the bowl. It looks absurd against a 10x20 tray, and the instinct is to double it.</p><p>Don’t. Sow densely but evenly, close enough that you can barely see the medium, and not so thick that seeds pile up. Piling blocks airflow, and blocked airflow sets up every mold problem that follows.</p><p>Fill the tray with an inch of medium, level it, press it down, then scatter the seed evenly and press it into contact. Mist it and cover it. That’s the whole procedure for learning how to grow microgreens from seed: even spacing, firm contact, moisture without puddles. Seed: a bag of broccoli microgreen seed runs about $8 and sows a dozen trays.</p><p><img src="https://img.673383.xyz/api/cfile/AgACAgUAAyEGAASo6uz_AAMyaqgHL9HiE0Jqw_URaMY8yT5lV1YAAlgWaxsta0BVgN2zKB_oUM0BAAMCAAN5AAM9BA" alt="Broccoli microgreen seed scattered evenly across moist dark growing medium in a black tray"></p><h2 id="Days-1-to-4-the-blackout-period-I-almost-skipped"><a href="#Days-1-to-4-the-blackout-period-I-almost-skipped" class="headerlink" title="Days 1 to 4: the blackout period I almost skipped"></a>Days 1 to 4: the blackout period I almost skipped</h2><p>Cover the tray with a second tray or a dome, add a little weight, and leave it in the dark for two to four days. This is the blackout period, and it mimics being buried. Seeds germinate evenly and the seedlings stretch toward light, which builds longer stems.</p><p>I skipped it on my first tray because I wanted to see green, and got a patchy stand with thin stems and maybe 60 percent of the yield. Two to four days, then pull the cover the moment most of the tray has shoots.</p><p>Temperature matters more than people expect. Most varieties want 65 to 75°F, and below 65°F the cycle roughly doubles, which eats the advantage of a fast crop.</p><p>Two tools are worth owning here. A cheap kitchen scale keeps you from eyeballing seed weight, and a fine mist sprayer keeps the surface damp without soaking it. That pair: a digital kitchen scale and a fine mist sprayer, together under $20.</p><p><img src="https://img.673383.xyz/api/cfile/AgACAgUAAyEGAASo6uz_AAMzaqgHMssUbE22AAHawT979QxMj5GGAAJZFmsbLWtAVegskDBWwoXHAQADAgADeQADPQQ" alt="A seedling tray covered by an inverted tray and a small weight, resting on a dim shelf"></p><h2 id="Days-5-to-12-light-airflow-and-cutting-at-the-first-true-leaf"><a href="#Days-5-to-12-light-airflow-and-cutting-at-the-first-true-leaf" class="headerlink" title="Days 5 to 12: light, airflow, and cutting at the first true leaf"></a>Days 5 to 12: light, airflow, and cutting at the first true leaf</h2><p>Once the cover comes off, the tray wants 12 to 16 hours of light a day. On a bright south-facing sill you can skip equipment entirely, though you’ll rotate the tray daily or it will lean. In a dark apartment, a small <a href="https://www.amazon.com/dp/B0B3CM9FYK?tag=homegrownnook-20">full-spectrum LED</a> held 6 to 12 inches above the canopy is the difference between a dense green carpet and pale, stretched stems (the <a href="/grow-lights-for-indoor-plants/">grow lights guide</a> explains the distance and hours math).</p><p>Airflow matters as much as light. A <a href="https://link.amazon/B0f6GHtCF">small fan</a> on its lowest setting, blowing across the trays rather than into them, keeps the canopy dry and strengthens stems.</p><p>Cut when the first true leaves appear, above the medium line, with clean scissors. Radish is ready in 6 to 8 days, sunflower and mustard in 8 to 10, broccoli around 12. Cilantro and basil take 18 to 21 days and are a bad first tray. Cut a day early rather than a day late, since brassicas turn bitter once they mature.</p><p>The light: a small full-spectrum LED with a <a href="https://www.amazon.com/dp/B00MVFF59S?tag=homegrownnook-20">timer</a>, $25 to $40, is enough for one shelf. One warning: a bright panel in a small apartment at night is genuinely unpleasant, and a model without a timer means you’ll forget to shut it off.</p><p><img src="https://img.673383.xyz/api/cfile/AgACAgUAAyEGAASo6uz_AAM0aqgHNQ4Gw6SY_pdbuXRZlCh-Ri4AAloWaxsta0BVtshNzmZao5YBAAMCAAN5AAM9BA" alt="A slim LED grow light bar suspended above a dense canopy of broccoli microgreens"></p><h2 id="Three-trays-I-threw-out-and-what-each-mistake-cost-me"><a href="#Three-trays-I-threw-out-and-what-each-mistake-cost-me" class="headerlink" title="Three trays I threw out, and what each mistake cost me"></a>Three trays I threw out, and what each mistake cost me</h2><p>Mistake one was top watering. I poured from a measuring cup, which displaced seed, carved channels into the medium, and left a patchy stand. Cost: one tray, about $1.60 in seed and medium, plus twelve days.</p><p>Mistake two was overseeding. I roughly doubled the rate on tray two because the surface looked empty. By day six the canopy held enough humidity at the base for mold. Cost: another tray, and three weeks of not growing anything because I assumed my apartment was the problem.</p><p>Mistake three was harvesting late on the first successful tray. I waited for it to look fuller, and the broccoli went bitter and tough. Cost: half a tray I didn’t want to eat.</p><h2 id="The-four-rules-I-follow-now"><a href="#The-four-rules-I-follow-now" class="headerlink" title="The four rules I follow now"></a>The four rules I follow now</h2><p>Bottom water, always. Set the drainage tray in an inch of water and let the medium wick it up. The surface stays dry, which keeps mold off, and roots grow down toward the moisture.</p><p>Weigh the seed. 13 grams for broccoli in a 10x20. A scale settles it in five seconds.</p><p>Airflow before moisture. If a tray looks off, add air before you adjust water.</p><p>One species per tray. Different species finish at different times, so a mixed tray means cutting half of it early or letting the other half go bitter. Mix in the bowl after harvest.</p><p>Medium is the rule nobody mentions. Garden soil compacts and stays wet, so start from a coir brick that rehydrates airy. A 650-gram coir brick runs about $12 and makes enough medium for roughly eight trays.</p><p>Here’s what each variety costs, at the seed densities that fill a 10x20 tray:</p><table><thead><tr><th>Variety</th><th>Seed per tray</th><th>Cost per tray</th><th>Days to cut</th><th>Yield</th></tr></thead><tbody><tr><td>Radish</td><td>1 oz</td><td>about $1.35</td><td>6 to 8</td><td>8 to 12 oz</td></tr><tr><td>Sunflower (black oil)</td><td>2.5 oz</td><td>about $1.50</td><td>8 to 10</td><td>12 to 18 oz</td></tr><tr><td>Pea shoots</td><td>3 oz</td><td>about $2.00</td><td>10 to 13</td><td>10 to 14 oz</td></tr><tr><td>Broccoli</td><td>13 g</td><td>about $1.60</td><td>11 to 13</td><td>11.5 oz</td></tr><tr><td>Cilantro</td><td>1.5 oz</td><td>about $1.70</td><td>18 to 21</td><td>8 to 12 oz</td></tr></tbody></table><p>Two safety notes that aren’t optional. Never grow microgreens from nightshades, since tomato, pepper, and eggplant seedlings contain glycoalkaloids in their cotyledons. Sunflower seed has to be the black oil type, not striped confectionery seed, which germinates poorly.</p><p><img src="https://img.673383.xyz/api/cfile/AgACAgUAAyEGAASo6uz_AAM1aqgHOSrERASeFb6N14xvxbfKDnwAAlsWaxsta0BV_9_TGnlVEKYBAAMCAAN5AAM9BA" alt="A small bowl of freshly cut broccoli microgreens resting on a digital kitchen scale"></p><h2 id="FAQ"><a href="#FAQ" class="headerlink" title="FAQ"></a>FAQ</h2><p><strong>Are microgreens the same as sprouts?</strong></p><p>No. Sprouts germinate in water in a jar, and you eat the seed and root along with the shoot. Microgreens grow in a medium under light and you cut above the soil line, leaving the seed behind. That’s why cut microgreens carry a lower food-safety risk.</p><p><strong>Do microgreens regrow after cutting?</strong></p><p>Mostly no. Broccoli and sunflower are cut once and done, because the growing point leaves with the harvest. Pea shoots and wheatgrass sometimes give a weak second cut.</p><p><strong>Do I need a grow light for microgreens?</strong></p><p>Not always. A bright south-facing window grows most varieties if you rotate the tray daily. If your best window gets weak light, or if it’s January, a small LED running 12 to 16 hours a day will outgrow the sill every time.</p><p><strong>Why is my microgreen tray fuzzy and white underneath?</strong></p><p>Check whether it’s mold or root hairs first. Root hairs are an even white fuzz hugging the roots just after the blackout, and they vanish when you mist the tray. Real mold is gray or colored, spreads across the medium instead of the roots, and smells musty. If it’s mold, toss the tray.</p><h2 id="If-you-only-do-one-thing"><a href="#If-you-only-do-one-thing" class="headerlink" title="If you only do one thing"></a>If you only do one thing</h2><p>Buy broccoli microgreen seed, a five-pack of 10x20 trays, and a coco coir brick, then sow one tray and nothing else. That’s about $37, and it tells you inside two weeks whether you’ll stick with this.</p><p>The exception: if your only free spot is a dark corner with no window, add a small LED with a timer on day one. Without it you’ll get pale, leggy stems and conclude that microgreens don’t work indoors, when the real problem was light. Start with a bag of broccoli microgreen seed. Once the trays are running, the same light setup doubles for <a href="/how-to-grow-cherry-tomatoes-at-home/">cherry tomatoes indoors</a>.</p><p><em>Disclosure: Some links in this post are affiliate links. If you buy through them, I may earn a small commission at no extra cost to you. See the full <a href="/affiliate-disclosure/">affiliate disclosure</a>.</em></p>]]>
    </content>
    <id>https://homegrownnook.com/growing-microgreens-at-home/</id>
    <link href="https://homegrownnook.com/growing-microgreens-at-home/"/>
    <published>2026-09-15T02:43:32.000Z</published>
    <summary>My first three trays cost $37; each tray now runs $1.60 and cuts in 8 to 12 days. What worked, what molded, and the one upgrade I'd buy again.</summary>
    <title>Growing Microgreens at Home: $37 to $1.60 per Tray</title>
    <updated>2026-09-17T16:00:00.000Z</updated>
  </entry>
  <entry>
    <author>
      <name>Sage</name>
    </author>
    <category term="Plant Library" scheme="https://homegrownnook.com/categories/plant-library/"/>
    <category term="Beginner Basics" scheme="https://homegrownnook.com/categories/plant-library/beginner-basics/"/>
    <category term="Edibles &amp; Vegetables" scheme="https://homegrownnook.com/categories/Edibles-Vegetables/"/>
    <category term="container-gardening" scheme="https://homegrownnook.com/tags/container-gardening/"/>
    <category term="grow-lights" scheme="https://homegrownnook.com/tags/grow-lights/"/>
    <category term="indoor-gardening" scheme="https://homegrownnook.com/tags/indoor-gardening/"/>
    <category term="vegetable-gardening" scheme="https://homegrownnook.com/tags/vegetable-gardening/"/>
    <category term="cherry-tomatoes" scheme="https://homegrownnook.com/tags/cherry-tomatoes/"/>
    <content>
      <![CDATA[<h1 id="How-to-Grow-Cherry-Tomatoes-Indoors-60-Days-No-Yard"><a href="#How-to-Grow-Cherry-Tomatoes-Indoors-60-Days-No-Yard" class="headerlink" title="How to Grow Cherry Tomatoes Indoors: 60 Days, No Yard"></a>How to Grow Cherry Tomatoes Indoors: 60 Days, No Yard</h1><p><img src="https://img.673383.xyz/api/cfile/AgACAgUAAyEGAASo6uz_AAMkaqV9tm2B8ZOK1VoROOSxIE76qNwAAuQSaxt3OjFV5WyL1QcZYrABAAMCAAN3AAM9BA" alt="A dwarf cherry tomato plant fruiting in a fabric grow bag on a kitchen shelf under a hanging LED panel"></p><p>Store-bought cherry tomatoes have gotten expensive and bland at the same time, which is a bad combination. Container growing looks like the obvious way out, right up until the plant spends three months getting tall and green and refuses to make a single tomato.</p><p>How to grow cherry tomatoes indoors comes down to four things: a variety bred for small containers, more light than any window will give you, a pot big enough to survive one missed watering, and about thirty seconds of flower-tapping every morning. Miss any one of them and you get foliage instead of fruit. That’s where most first attempts stall out.</p><p>The setup below fits in an apartment. No yard, no grow tent, no countertop hydroponic tower with proprietary pods. One shelf, one light, one plant to start.</p><p>Budget around $70 if you start from seed, or closer to $40 if you buy a nursery seedling and skip the first month.</p><h2 id="What-You-Need-Before-You-Start"><a href="#What-You-Need-Before-You-Start" class="headerlink" title="What You Need Before You Start"></a>What You Need Before You Start</h2><p>Here’s the full list:</p><ul><li>One dwarf or micro-dwarf cherry variety, either seeds or a nursery seedling</li><li>A <a href="https://link.amazon/B005NF0GQ">full-spectrum LED panel or bar</a> rated at 30 watts or more for a single plant</li><li>A <a href="https://link.amazon/B03tKXGa4">5-gallon fabric grow bag</a>, with drainage holes</li><li><a href="https://www.amazon.com/dp/B082BPL2ZF?tag=homegrownnook-20">Soilless potting mix</a>, never garden soil</li><li><a href="https://www.amazon.com/dp/B0FKS8HL6H?tag=homegrownnook-20">Liquid tomato fertilizer</a> near 5-10-10, for after the flowers open</li><li>Something to move the air, like a <a href="https://link.amazon/B0f6GHtCF">small clip-on fan</a> on its lowest setting</li><li>A way to check moisture. A finger works fine; A <a href="https://link.amazon/B00pXneVx">soil moisture meter</a> is worth it if you’d rather not guess.</li></ul><p>Run two checks before planting anything. Put the light where the top of the plant will be in six weeks and confirm you can hold it 12 inches above the canopy. Then confirm you can reach the plant every morning for two minutes. If either answer is no, wait until it’s yes. A tomato getting 80 percent of what it needs will still drop its flowers.</p><h2 id="Step-1-Pick-a-Variety-That-Fruits-Indoors"><a href="#Step-1-Pick-a-Variety-That-Fruits-Indoors" class="headerlink" title="Step 1: Pick a Variety That Fruits Indoors"></a>Step 1: Pick a Variety That Fruits Indoors</h2><p>Variety does more work here than any other single choice. A standard indeterminate like Sungold or Sweet 100 runs 6 to 8 feet and will take over a windowsill. Micro-dwarf and compact determinate types stay under 18 inches and ripen in 55 to 70 days from sprout.</p><p>Names worth hunting for: Tiny Tim, Micro Tom, Red Robin, Patio Princess, and Tumbling Tom if you’d rather grow in a hanging basket. All five were selected for container life, so they handle tighter roots and lower light better than a slicing tomato will.</p><p>Dwarf cherry tomato seeds cost a few dollars a packet and give you far more say over variety than whatever the garden center happens to stock. The tradeoff is seed count: micro-dwarf packets often hold only 10 to 15 seeds, so a patchy germination rate actually hurts. Sow three or four per cell and thin to the strongest.</p><p>Checkpoint: the first true leaves show up 10 to 14 days after sowing, and flower buds appear around week six.</p><p><img src="https://img.673383.xyz/api/cfile/AgACAgUAAyEGAASo6uz_AAMlaqV9vFfAHVJinf-FaAIBjEjKcoMAAuYSaxt3OjFV9cPqXXwk3NsBAAMCAAN5AAM9BA" alt="Cherry tomato seedlings at the two-true-leaf stage in cell trays on a windowsill"></p><h2 id="Step-2-Get-the-Light-Right"><a href="#Step-2-Get-the-Light-Right" class="headerlink" title="Step 2: Get the Light Right"></a>Step 2: Get the Light Right</h2><p>This is where indoor tomatoes die. A south-facing window peaks somewhere between 100 and 500 µmol&#x2F;m²&#x2F;s around midday and falls off hard on either side of that. Cherry tomatoes need sustained light well above the bottom of that range, held for 14 to 16 hours a day, before they’ll hold onto a flower cluster.</p><p>Hang a full-spectrum LED grow light about 12 inches above the top leaves and run it 14 to 16 hours on a <a href="https://www.amazon.com/dp/B00MVFF59S?tag=homegrownnook-20">cheap mechanical timer</a>. Raise the fixture an inch a week as the plant grows rather than setting it once and walking away. A piece of white foam board taped behind and beside the pot bounces roughly 30 percent more light back into the lower leaves, where the fruit clusters form.</p><p>One caveat on cheap panels: the wattage printed on the box usually counts the power supply, not the diodes, so a “40W” light may deliver far less at 12 inches than you’d expect. Blurple red-blue units grow fine but make yellowing leaves and spider mites nearly impossible to spot. Spend a little more for a white full-spectrum panel you can inspect a plant under (see our <a href="/grow-lights-for-indoor-plants/">grow lights for indoor plants guide</a> for the three specs that actually matter).</p><p>Checkpoint: a stocky stem, dark green leaves, and the first flower cluster within six to eight weeks. A thin stem with long gaps between leaf nodes means the light sits too far away or runs too few hours.</p><p><img src="https://img.673383.xyz/api/cfile/AgACAgUAAyEGAASo6uz_AAMmaqV9wSxbuGc-CdocYxIlg3Lk8TcAAucSaxt3OjFV1cYvZ-DMM3UBAAMCAAN5AAM9BA" alt="A full-spectrum LED panel hung about a foot above a young tomato plant, with a white reflector behind it"></p><h2 id="Step-3-Choose-the-Right-Pot-and-Soil"><a href="#Step-3-Choose-the-Right-Pot-and-Soil" class="headerlink" title="Step 3: Choose the Right Pot and Soil"></a>Step 3: Choose the Right Pot and Soil</h2><p>Go bigger than feels necessary. Five gallons is the floor for a cherry tomato, and a 10-gallon fabric bag buys you a buffer against one hot afternoon and one forgotten morning. Whatever you choose needs drainage holes and a tray under it.</p><p>Use soilless potting mix, the fluffy peat or coco blend with <a href="https://link.amazon/B03AAtOwy">perlite</a> in it. Garden soil compacts inside a container, smothers the roots, and carries pests you don’t want in the kitchen.</p><p>Plant deep. Bury two-thirds of the seedling stem at transplant time, because tomatoes root along any buried stem and you’ll end up with a much stronger base. One plant per pot, even though the seedling looks absurdly small going in.</p><p>A fabric grow bag is the usual pick: cheap, air-prunes roots so they branch instead of circling, and folds flat into a closet over winter. The catch is that fabric dries out fast in a heated room and leaves a damp ring on a wood floor, so budget for a tray.</p><p>Checkpoint: water should reach the drainage holes within a few seconds of hitting the surface. If it pools and sits, the mix is too heavy.</p><p><img src="https://img.673383.xyz/api/cfile/AgACAgUAAyEGAASo6uz_AAMnaqV9xlcfGaXTOr9OrbFuNExiIgMAAugSaxt3OjFVT3dJO4zaXO8BAAMCAAN5AAM9BA" alt="A 5-gallon fabric grow bag of peat and perlite mix with a tomato seedling planted deep"></p><h2 id="Step-4-Water-and-Feed-on-a-Schedule"><a href="#Step-4-Water-and-Feed-on-a-Schedule" class="headerlink" title="Step 4: Water and Feed on a Schedule"></a>Step 4: Water and Feed on a Schedule</h2><p>Water when the top inch of soil feels dry, not on a calendar. Push a finger in to the first knuckle. In a 5-gallon bag in a warm room that works out to roughly every other day; in a small plastic pot on a sunny shelf it may be daily.</p><p>Then water deeply, until it runs out the bottom, and dump the saucer 30 minutes later. Roots sitting in water rot. Swinging between bone dry and soaked is what causes blossom end rot, the dark leathery patch on the bottom of the fruit, because the plant can’t move calcium through the fruit without steady water. It isn’t a shortage of calcium in the soil.</p><p>Hold the fertilizer until the first flowers open. From there, feed at half the label rate every 10 to 14 days with something high in phosphorus and potassium, like a 5-10-10. Too much nitrogen early gives you a gorgeous bushy plant that won’t set fruit, which is the second most common letdown after weak light.</p><p>A liquid tomato fertilizer is cheap and easy to dose, and it smells like a pond. Pour it at full strength on a young plant and you’ll burn the root tips, setting yourself back a couple of weeks.</p><p>Checkpoint: the soil surface looks dry and slightly cracked right before you water, and a wilted plant perks back up within an hour.</p><h2 id="Step-5-Hand-Pollinate-So-Flowers-Set-Fruit"><a href="#Step-5-Hand-Pollinate-So-Flowers-Set-Fruit" class="headerlink" title="Step 5: Hand-Pollinate So Flowers Set Fruit"></a>Step 5: Hand-Pollinate So Flowers Set Fruit</h2><p>Tomato flowers self-pollinate, but the pollen only drops when something shakes the flower. Outside, wind and bees handle it. Indoors, nothing does, so unpollinated blossoms turn yellow and drop.</p><p>Every morning, tap each flower cluster with a finger, or press an electric toothbrush against the stem behind it for a second or two. Mid-morning works best, once humidity drops and the pollen loosens. Aim for 40 to 60 percent humidity and keep air moving with a small clip-on fan on low, pointed at a wall instead of straight at the plant. A fan aimed directly at the leaves dries them out and knocks a young seedling sideways.</p><p>Checkpoint: a pollinated flower sheds its yellow petals within two or three days and leaves a small green bead at the base. No bead after a week means no tomato.</p><p><img src="https://img.673383.xyz/api/cfile/AgACAgUAAyEGAASo6uz_AAMoaqV9zJhbOzny6SO2Abxqve0bjz0AAukSaxt3OjFVp4VcxuB_xeMBAAMCAAN5AAM9BA" alt="Cherry tomato blossoms with tiny green fruit just beginning to form"></p><h2 id="When-Things-Go-Wrong-Five-Fixes"><a href="#When-Things-Go-Wrong-Five-Fixes" class="headerlink" title="When Things Go Wrong: Five Fixes"></a>When Things Go Wrong: Five Fixes</h2><table><thead><tr><th>What you see</th><th>Usual cause</th><th>Fix</th></tr></thead><tbody><tr><td>Tall thin stem, long gaps between leaves</td><td>Not enough light</td><td>Drop the fixture to 6 inches and run 16 hours</td></tr><tr><td>Flowers open, then drop</td><td>No pollination, or a room above 85°F or below 55°F</td><td>Tap clusters daily; move the plant off the vent or away from cold glass</td></tr><tr><td>Lower leaves yellowing</td><td>Overwatering, or nitrogen shortage</td><td>Let the top two inches dry before watering; start feeding at half strength</td></tr><tr><td>Dark sunken patch on the bottom of the fruit</td><td>Uneven watering</td><td>Switch to the finger test, keep moisture steady</td></tr><tr><td>Fine webbing or sticky leaves</td><td>Spider mites or aphids</td><td>Rinse the plant down, then insecticidal soap, weekly for three weeks</td></tr></tbody></table><p>Nearly every indoor tomato problem traces back to light or water. Check those two before buying anything else (the <a href="/container-gardening-mistakes/">container gardening mistakes</a> post covers the watering half in detail).</p><h2 id="Small-Space-and-Budget-Variations"><a href="#Small-Space-and-Budget-Variations" class="headerlink" title="Small-Space and Budget Variations"></a>Small-Space and Budget Variations</h2><p><strong>Countertop, single plant.</strong> Micro Tom in a 1-gallon pot under a 20-watt clip lamp. You’ll pick a handful at a time, which is plenty for salads.</p><p><strong>Balcony with real sun.</strong> Skip the panel, use a 10-gallon bag, and add a windbreak if you’re above the third floor. Watering becomes the entire job.</p><p><strong>Cheapest route.</strong> Buy a $5 nursery seedling in spring rather than starting seeds. You give up the variety choice and skip four weeks plus the germination gamble.</p><p><strong>Hydroponic countertop unit.</strong> Genuinely convenient, and it takes water and feeding off your plate. It runs three to five times the cost per tomato, and you’re locked into the manufacturer’s seed pods.</p><p><img src="https://img.673383.xyz/api/cfile/AgACAgUAAyEGAASo6uz_AAMpaqV9zwe-NQ3YhAfuLuVFunn8ygUAAuoSaxt3OjFVQYOqTqZw_1wBAAMCAAN5AAM9BA" alt="A micro-dwarf cherry tomato plant fruiting in a small terracotta pot on a kitchen counter"></p><h2 id="FAQ"><a href="#FAQ" class="headerlink" title="FAQ"></a>FAQ</h2><h3 id="Can-you-grow-cherry-tomatoes-indoors-without-a-grow-light"><a href="#Can-you-grow-cherry-tomatoes-indoors-without-a-grow-light" class="headerlink" title="Can you grow cherry tomatoes indoors without a grow light?"></a>Can you grow cherry tomatoes indoors without a grow light?</h3><p>Not reliably. Even a bright south window usually delivers usable light for only a few hours a day, and the intensity falls off fast on either side of noon. Most cherry tomato varieties need sustained light well above that to hold a flower cluster, so a window alone tends to give you leaves instead of fruit. A basic full-spectrum LED panel is the fix.</p><h3 id="How-long-do-cherry-tomatoes-take-to-produce-fruit-indoors"><a href="#How-long-do-cherry-tomatoes-take-to-produce-fruit-indoors" class="headerlink" title="How long do cherry tomatoes take to produce fruit indoors?"></a>How long do cherry tomatoes take to produce fruit indoors?</h3><p>From seed, plan on 60 to 80 days to ripe fruit with dwarf varieties like Tiny Tim or Micro Tom. Starting from a nursery seedling cuts about four weeks off that. Flowers typically show up six to eight weeks after sprouting, and the first fruit follows three to five weeks later.</p><h3 id="Why-are-my-tomato-flowers-falling-off-without-fruit"><a href="#Why-are-my-tomato-flowers-falling-off-without-fruit" class="headerlink" title="Why are my tomato flowers falling off without fruit?"></a>Why are my tomato flowers falling off without fruit?</h3><p>Three causes cover nearly every case: too little light, no pollination, or a fertilizer too heavy on nitrogen. Indoors there’s no wind and no bees, so unpollinated blossoms drop within days. Tap the clusters each morning and check the light distance before you change anything else.</p><h3 id="How-often-should-I-water-an-indoor-cherry-tomato-plant"><a href="#How-often-should-I-water-an-indoor-cherry-tomato-plant" class="headerlink" title="How often should I water an indoor cherry tomato plant?"></a>How often should I water an indoor cherry tomato plant?</h3><p>Whenever the top inch of soil feels dry, which is not the same as every day. A 5-gallon fabric bag in a warm room wants water roughly every other day; a small plastic pot on a hot shelf may want it daily. Water until it drains, then empty the saucer.</p><h3 id="Do-I-need-to-hand-pollinate-indoor-tomatoes"><a href="#Do-I-need-to-hand-pollinate-indoor-tomatoes" class="headerlink" title="Do I need to hand-pollinate indoor tomatoes?"></a>Do I need to hand-pollinate indoor tomatoes?</h3><p>Yes, if you want fruit. The flowers self-pollinate, but the pollen needs vibration to release. Outdoors, wind and bees supply it. Indoors, a daily tap or a one-second buzz from an electric toothbrush does the same job.</p><h2 id="The-Bottom-Line-Start-With-One-Plant"><a href="#The-Bottom-Line-Start-With-One-Plant" class="headerlink" title="The Bottom Line: Start With One Plant"></a>The Bottom Line: Start With One Plant</h2><p>One plant, one 5-gallon bag, a full-spectrum LED grow light on a 14-hour timer, and thirty seconds of flower-tapping each morning. Give it 60 days and you’ll be picking cherry tomatoes in your own kitchen.</p><p>Skip this if you’re away more than three days at a stretch. Containers don’t forgive a dry week, and a self-watering pot buys you five days, not two.</p><p>Buy the light first. Everything else you can fix later.</p><p><em>Disclosure: Some links in this post are affiliate links. If you buy through them, I may earn a small commission at no extra cost to you. See the full <a href="/affiliate-disclosure/">affiliate disclosure</a>.</em></p>]]>
    </content>
    <id>https://homegrownnook.com/how-to-grow-cherry-tomatoes-at-home/</id>
    <link href="https://homegrownnook.com/how-to-grow-cherry-tomatoes-at-home/"/>
    <published>2026-09-13T13:00:00.000Z</published>
    <summary>Cherry tomatoes indoors fail on light, not luck. The 60-day plan: variety, pot size, light distance, and hand-pollination that sets fruit.</summary>
    <title>How to Grow Cherry Tomatoes Indoors: 60 Days, No Yard</title>
    <updated>2026-09-17T16:00:00.000Z</updated>
  </entry>
  <entry>
    <author>
      <name>Sage</name>
    </author>
    <category term="Stories" scheme="https://homegrownnook.com/categories/stories/"/>
    <category term="Succulents &amp; Cacti" scheme="https://homegrownnook.com/categories/Succulents-Cacti/"/>
    <category term="Plant Diaries" scheme="https://homegrownnook.com/categories/stories/plant-diaries/"/>
    <category term="beginner-gardening" scheme="https://homegrownnook.com/tags/beginner-gardening/"/>
    <category term="plant-stories" scheme="https://homegrownnook.com/tags/plant-stories/"/>
    <category term="killed-a-cactus" scheme="https://homegrownnook.com/tags/killed-a-cactus/"/>
    <category term="balcony-gardening" scheme="https://homegrownnook.com/tags/balcony-gardening/"/>
    <category term="tomato-plants" scheme="https://homegrownnook.com/tags/tomato-plants/"/>
    <content>
      <![CDATA[<h1 id="I-Killed-a-Cactus-and-Fell-in-Love-With-Balcony-Gardening"><a href="#I-Killed-a-Cactus-and-Fell-in-Love-With-Balcony-Gardening" class="headerlink" title="I Killed a Cactus, and Fell in Love With Balcony Gardening"></a>I Killed a Cactus, and Fell in Love With Balcony Gardening</h1><p><img src="https://img.673383.xyz/api/cfile/AgACAgUAAyEGAASo6uz_AAMYaqOzFi3S1gWh6ZY9neqy95xmNPUAAqcUaxt3OiFVawJzNJBSfYABAAMCAAN3AAM9BA" alt="A small rented apartment balcony with three young tomato plants in terracotta pots at golden morning light"></p><p>Nobody starts a balcony garden expecting to kill a cactus. I did. But let me back up, because the cactus came late in the story, and by then I was already an expert at killing other things.</p><p>The balcony came with the apartment. It was small — about the size of a bathtub, with a rusted railing and a view of the parking lot. I had no plans for it. Then, one warm Saturday in spring, I walked out of the hardware store with three little tomato plants in flimsy plastic pots, and I carried them up three flights of stairs like they were made of glass, and I set them down and stood there, hands on my hips, absolutely radiant with confidence.</p><p>I had a garden now. That was the whole plan. The plan did not extend much further.</p><h2 id="The-Drowning"><a href="#The-Drowning" class="headerlink" title="The Drowning"></a>The Drowning</h2><p>Everything I knew about plants could fit on one hand: they need water. That felt like enough. So I watered my tomatoes every single day, because that’s what a responsible gardener does. Every evening I came home, filled a cup, and gave each plant a generous drink. Sometimes I watered them twice, if I’d had a long day and it felt soothing.</p><p>The soil turned to soup. I didn’t know what soup looked like in soil. I just thought, good, it’s very hydrated.</p><p><img src="https://img.673383.xyz/api/cfile/AgACAgUAAyEGAASo6uz_AAMZaqOzG9J5zOo9U696awVac3Rb7Y0AAqgUaxt3OiFVx7hT4Xy-JzUBAAMCAAN3AAM9BA" alt="A struggling tomato seedling with yellowing drooping leaves in soaking wet soil in a terracotta pot"></p><p>The tomatoes knew. Within two weeks, the leaves started yellowing at the edges, curling like tiny umbrellas in the rain. I googled “yellow tomato leaves” and got thirty different answers, none of which mentioned the cup of water I was pouring into each pot every evening. Then a cloud of tiny flies appeared — fungus gnats, I’d learn later — drifting up from the pots whenever I touched them. The soil had a smell. I was standing on a balcony-sized swamp, and my tomato plants were drowning.</p><p>The first one went quietly. The leaves drooped, the stem softened, and one morning it just lay over the soil like it had given up mid-argument. I tried to revive it. I watered it.</p><h2 id="The-Drought"><a href="#The-Drought" class="headerlink" title="The Drought"></a>The Drought</h2><p>I learned my lesson. I did. I learned it so hard that I swung the whole way to the other side.</p><p>Fine, I thought. Plants need water, but they don’t need THAT much water. Clearly I had been overdoing it. So I stopped. Completely.</p><p>For two weeks, I did not touch the remaining tomatoes. I walked past the balcony with my hands in my pockets, refusing to be manipulated by a vegetable. The plants, for their part, began to die of thirst in a very pointed, passive-aggressive way. The leaves curled inward, crisp at the edges. The soil pulled away from the sides of the pots, shrinking into a hard little puck.</p><p>When I finally broke and went out there, the second tomato plant was basically a brown stick with an attitude problem.</p><h2 id="The-Wrong-Soil"><a href="#The-Wrong-Soil" class="headerlink" title="The Wrong Soil"></a>The Wrong Soil</h2><p>This, I decided, was the soil’s fault. The soil was wrong. I’d bought whatever was cheapest — a bag that said, I’m not making this up, “Garden Soil.” I assumed garden soil was for gardening, and I was technically right. It’s for gardening in the ground. In a pot, garden soil turns into something between cement and regret, and the roots sit in it like someone waiting for a bus that was cancelled.</p><p>So I bought new soil. The expensive one, with the smiling plant on the bag. I repotted the survivor — the last tomato, a scrawny cherry tomato that had clearly decided to outlast me out of spite. I gave it drainage, <a href="https://www.amazon.com/dp/B082BPL2ZF?tag=homegrownnook-20">better soil</a>, and the exact right amount of water, which I determined by sticking my finger in the dirt and looking at it thoughtfully.</p><p>It was, I have to say, the best it had ever looked. For about a week.</p><h2 id="The-Cactus"><a href="#The-Cactus" class="headerlink" title="The Cactus"></a>The Cactus</h2><p>By early summer, I was tired of failing at a plant that grows in practically every country on earth. So I bought a cactus.</p><p>A cactus. The plant that survives on neglect. The plant that lives in deserts, where the strategy is literally “do less.” The plant that you have to actively work at killing. Everyone knows you can’t kill a cactus.</p><p>I gave it a lovely pot with no drainage holes — I still didn’t fully understand drainage — and I watered it every few days, because after the drought I was terrified of underwatering anything. (The <a href="/how-to-grow-cactus-at-home/">cactus care guide</a> explains why that sealed pot was a death sentence, in case you’d rather learn it the cheap way.) I moved it around the balcony so it would have a nice view. I checked on it constantly. I loved it, deeply and fatally.</p><p><img src="https://img.673383.xyz/api/cfile/AgACAgUAAyEGAASo6uz_AAMaaqOzH8akD2UWuLrV-9zJZkd_THUAAqoUaxt3OiFVMYMZoHQ0QXgBAAMCAAN3AAM9BA" alt="A small cactus leaning sideways in a terracotta pot on a balcony, its base turning soft and yellowish"></p><p>Cacti, as it turns out, do not want to be loved like that. They want to be forgotten. Mine went soft at the base, then yellow, then started leaning over like it had been at a party too long. Within a month it was a sad, mushy memory in a pot with no drainage, and I had become part of a very small, very dumb club: people who killed a cactus.</p><p>It takes real effort to kill a cactus. I put in the effort. I was determined and consistent, and I achieved a result that genuinely impressed people.</p><h2 id="The-Tomato"><a href="#The-Tomato" class="headerlink" title="The Tomato"></a>The Tomato</h2><p>You would think, at this point, that I would have given up. The balcony had seen one drowned tomato, one desiccated one, a survivor, and a cactus I had killed with kindness. The body count was higher than the harvest. There was nothing on that balcony but evidence.</p><p>But here’s the thing nobody tells you about falling in love with growing things: it doesn’t happen on the good days. It happens in the middle of the mess.</p><p>Somewhere between the drowned tomatoes and the crispy cactus, I was out there every morning anyway. I’d step onto the balcony in my socks, coffee in hand, and just look. Not because I expected anything — I’d stopped expecting anything — but because I couldn’t stop.</p><p>And then one morning, it did.</p><p>The scrawny cherry tomato — the survivor, the spiteful one — had a flower on it. A small, yellow, unremarkable flower, the kind you’d walk past in a field. I nearly cried. (Years later, I wrote up the whole <a href="/how-to-grow-cherry-tomatoes-at-home/">indoor cherry tomato plan</a>, including the light setup I got wrong on that balcony.)</p><p>I didn’t water it more. I didn’t repot it. I’d finally learned the gardener’s hardest lesson, which is that the best thing you can do for a plant is mostly leave it alone and check on it anyway. The flower turned into a tiny green marble. The marble sat there for what felt like a month, and I checked it every single day, and I talked to it — quietly, so the neighbors wouldn’t hear.</p><p><img src="https://img.673383.xyz/api/cfile/AgACAgUAAyEGAASo6uz_AAMbaqOzI-cly9tpwikxwsIaWCUwT0MAAqsUaxt3OiFV2MSXGeILGxkBAAMCAAN3AAM9BA" alt="A hand holding one small ripe red cherry tomato on a balcony in golden evening light"></p><p>And then one evening, it was red. A real tomato. Small, imperfect, slightly lopsided, warm from the sun. The most expensive tomato in history, if you count the pots, the soil, the three plants, and the cactus.</p><p>I picked it, stood on the balcony, and ate it right there in the parking lot breeze.</p><p>I don’t remember what it tasted like. That’s the honest truth — it was probably fine, probably a little bland. But I remember the weight of it in my hand, and the absurd pride of having coaxed something from a plant into an actual fruit. It was the first thing I’d ever grown that grew back.</p><h2 id="The-Balcony-Since"><a href="#The-Balcony-Since" class="headerlink" title="The Balcony Since"></a>The Balcony Since</h2><p>That was years ago now. The balcony is still small. So is my success rate, some years. I have killed plenty of things since: herbs, succulents, at least one plant I’m still not sure what it was. I keep a list in my head, or I did, until it got too long to be a list and became a bibliography.</p><p>But I never stopped checking on things in the morning. And somewhere between the drowned tomatoes and the crispy cactus, I fell in love with growing things — not because I was good at it, not even close, but because I couldn’t stop trying.</p><p>If you’re a first-time balcony gardener right now, standing in front of a drooping plant and wondering where you went wrong: you’re in good company. The most expensive tomato in my history taught me more than any perfect harvest could have. The failures weren’t the opposite of gardening. They were the gardening.</p><p>So grab a <a href="https://www.amazon.com/dp/B0B4HVN7DZ?tag=homegrownnook-20">pot</a>. Pick a plant. Water it a little too much, then a little too little, then figure it out. That’s the whole secret: you keep failing until the day you don’t.</p><p><em>Happy growing. Go check on your plants — but maybe put the cup down first.</em></p><p><em>Disclosure: Some links in this post are affiliate links. If you buy through them, I may earn a small commission at no extra cost to you. See the full <a href="/affiliate-disclosure/">affiliate disclosure</a>.</em></p>]]>
    </content>
    <id>https://homegrownnook.com/killed-a-cactus-balcony-gardening/</id>
    <link href="https://homegrownnook.com/killed-a-cactus-balcony-gardening/"/>
    <published>2026-09-11T19:53:04.000Z</published>
    <summary>I drowned three tomato plants, underwatered them, bought the wrong soil, and killed a cactus. Somewhere in the mess, I fell in love with gardening.</summary>
    <title>I Killed a Cactus, and Fell in Love With Balcony Gardening</title>
    <updated>2026-09-17T16:00:00.000Z</updated>
  </entry>
  <entry>
    <author>
      <name>Sage</name>
    </author>
    <category term="Stories" scheme="https://homegrownnook.com/categories/stories/"/>
    <category term="Houseplants" scheme="https://homegrownnook.com/categories/Houseplants/"/>
    <category term="Plant Diaries" scheme="https://homegrownnook.com/categories/stories/plant-diaries/"/>
    <category term="houseplant-care" scheme="https://homegrownnook.com/tags/houseplant-care/"/>
    <category term="monstera" scheme="https://homegrownnook.com/tags/monstera/"/>
    <category term="monstera-fall-care" scheme="https://homegrownnook.com/tags/monstera-fall-care/"/>
    <category term="brown-leaves" scheme="https://homegrownnook.com/tags/brown-leaves/"/>
    <category term="plant-stories" scheme="https://homegrownnook.com/tags/plant-stories/"/>
    <content>
      <![CDATA[<p><img src="https://img.673383.xyz/api/cfile/AgACAgUAAyEGAASo6uz_AAMSaqObb7fNseT7QA1FGJGNL9AiSCsAAl8Uaxt3OiFVxiW_6lD5W00BAAMCAAN3AAM9BA" alt="A large Monstera deliciosa in a terracotta pot by a bright living room window"></p><h1 id="My-Monstera-Started-Dying-The-Fall-Care-That-Saved-It"><a href="#My-Monstera-Started-Dying-The-Fall-Care-That-Saved-It" class="headerlink" title="My Monstera Started Dying: The Fall Care That Saved It"></a>My Monstera Started Dying: The Fall Care That Saved It</h1><p>The first Saturday of September, I found the brown edge.</p><p>It was on the biggest leaf, the one I’m a little proud of, the one with the deepest splits. The edge was dry and crispy, like paper that had been held too close to a flame, and it ran along the whole left side. I told myself it was nothing. A scrape. A weird draft. Then, the next morning, the leaf next to it had the same crisp brown line, and the new leaf that had been slowly unrolling for two weeks was still half-curled, like it had given up mid-effort.</p><p>My monstera — two years old, five feet tall, the plant I’d bragged about all summer — was quietly falling apart, and I had no idea why.</p><p>If you’re here because your monstera started doing something weird as the days got shorter, this story is for you. Fall care for monstera is genuinely different from summer care, and most of what I did wrong was simple: I kept treating September like July. Here’s what went wrong, in order, and exactly what fixed it.</p><h2 id="The-Summer-I-Got-Too-Confident"><a href="#The-Summer-I-Got-Too-Confident" class="headerlink" title="The Summer I Got Too Confident"></a>The Summer I Got Too Confident</h2><p>Let me back up. From May through August, that plant was the easiest thing in my house. New leaves every couple of weeks, each one bigger than the last. The aerial roots were reaching across the room like it was trying to shake hands with the bookshelf. I watered it every Sunday, threw a splash of <a href="https://www.amazon.com/dp/B0D4JHN28P?tag=homegrownnook-20">liquid fertilizer</a> in once a month, and it just… grew. I started to think I had some kind of gift. (Everything I should have been doing differently in September is in the <a href="/fall-houseplant-care-checklist/">fall houseplant care checklist</a>, by the way.)</p><p>I did not have a gift. I had a plant that was doing fine on momentum, and the momentum ran out in September.</p><h2 id="What-Actually-Happened-First"><a href="#What-Actually-Happened-First" class="headerlink" title="What Actually Happened First"></a>What Actually Happened First</h2><p>Looking back, the warning signs were all there, but they were spread out enough that each one seemed minor:</p><p><img src="https://img.673383.xyz/api/cfile/AgACAgUAAyEGAASo6uz_AAMTaqObdBm28aaVXa18sfrPmx7PnHMAAmAUaxt3OiFVQUkM8_ETdYoBAAMCAAN3AAM9BA" alt="Close-up of a Monstera leaf with dry crispy brown edges"></p><ul><li>The leaf edges turned brown and crispy, starting on the oldest leaves.</li><li>The newest leaf stalled — it stayed curled up for over two weeks.</li><li>The soil on top looked dry, but when I stuck my finger in, it was still damp two inches down.</li><li>The plant looked fine at a distance, so I almost ignored all of it.</li></ul><p>I was still watering every Sunday, because that’s what had worked since May. That was mistake number one, and it wasn’t even the biggest one.</p><h2 id="The-Real-Culprit-Dry-Indoor-Air"><a href="#The-Real-Culprit-Dry-Indoor-Air" class="headerlink" title="The Real Culprit: Dry Indoor Air"></a>The Real Culprit: Dry Indoor Air</h2><p>Here’s the thing nobody tells you about monstera care in fall: the plant doesn’t care about the calendar, but the air in your house does.</p><p>The first night the temperature dropped below 50°F, I turned the heat on. Within a week, the humidity in my living room dropped from somewhere comfortable to about 30% — I checked with a little hygrometer I bought for ten bucks after I started suspecting the air. Monstera deliciosa comes from tropical cloud forests. It wants 50–60% relative humidity. At 30%, the leaves lose water faster than the roots can supply it, and the edges dry out first. That’s exactly where my brown edges were: not in the middle, not as spots, but along the leaf edges and tips, crisp and dry to the touch.</p><p>Dry, crispy edges on a monstera are almost always a humidity problem — or an underwatering problem. Soft, mushy brown patches are something else entirely. If your edges are crispy, start with the air.</p><p><img src="https://img.673383.xyz/api/cfile/AgACAgUAAyEGAASo6uz_AAMUaqObeuMFmpvnWb-TGdJPHhTF2fkAAmEUaxt3OiFVMGGwaAoDZkABAAMCAAN3AAM9BA" alt="A hand holding a digital hygrometer beside Monstera leaves"></p><p><strong>The fix that worked:</strong> I bought a <a href="https://www.amazon.com/dp/B013IJPTFK?tag=homegrownnook-20">small humidifier</a> and put it on the shelf next to the plant, aimed at the leaves from about three feet away. I also set the pot on a pebble tray — a shallow dish with water and pebbles, with the pot sitting on the pebbles, not in the water. Within a week the humidity around the plant was reading 50% and the browning had stopped spreading. The edges that were already brown never turned green again — that’s not how leaves work — but no new crispy edges appeared.</p><p><img src="https://img.673383.xyz/api/cfile/AgACAgUAAyEGAASo6uz_AAMVaqObfklyr7_9fEH_R9_uc8vVgmwAAmIUaxt3OiFVrpJnh82FKDUBAAMCAAN3AAM9BA" alt="A humidifier beside a Monstera on a pebble tray"></p><p>One more thing: check where your plant sits. If it’s near a heating vent or a radiator, the hot dry air is blasting straight at the leaves. Two feet away can make a real difference. Mine was three feet from a vent; moving it to the far side of the shelf helped almost immediately.</p><h2 id="Watering-I-Was-Still-on-Summer-Schedule"><a href="#Watering-I-Was-Still-on-Summer-Schedule" class="headerlink" title="Watering: I Was Still on Summer Schedule"></a>Watering: I Was Still on Summer Schedule</h2><p>My second mistake was the watering. In summer, with long bright days and the plant actively growing, watering once a week was right. In fall, growth slows way down, the days are shorter, and the plant drinks less. My Sunday watering habit was keeping the soil wetter than the plant wanted — which is why the soil was still damp two inches down, even though the top looked dry.</p><p><strong>The fix:</strong> I stopped watering on a schedule entirely. Now I stick my finger two inches into the soil. If it’s dry at that depth, I water — thoroughly, until water runs out the drainage holes. If it’s even slightly damp, I wait a few days and check again. In September and October, that has turned out to be roughly every ten days to two weeks for my plant, depending on the weather. If you’re in a warmer climate or your plant is in brighter light, it’ll be sooner. Trust the finger, not the calendar.</p><p><img src="https://img.673383.xyz/api/cfile/AgACAgUAAyEGAASo6uz_AAMWaqObg9jiaTmSq0eAC9i0rtUWca0AAmMUaxt3OiFVSfuI1V2pCNEBAAMCAAN3AAM9BA" alt="Fingers testing soil moisture two inches deep in a Monstera pot"></p><p>This matters more in fall than any other season, because the plant won’t bounce back from overwatering the way it does in summer. Cold, wet soil is how monstera roots rot.</p><h2 id="Fertilizer-I-Was-Feeding-a-Plant-That-Wasn’t-Hungry"><a href="#Fertilizer-I-Was-Feeding-a-Plant-That-Wasn’t-Hungry" class="headerlink" title="Fertilizer: I Was Feeding a Plant That Wasn’t Hungry"></a>Fertilizer: I Was Feeding a Plant That Wasn’t Hungry</h2><p>This one I feel dumb about. In summer, monthly liquid fertilizer at half strength kept the leaves dark and pushed out growth. In fall, the plant is slowing down — it can’t use the extra nutrients, and they build up in the soil as salts, which can burn the roots and cause brown tips all on their own.</p><p><strong>The fix:</strong> I stopped fertilizing at the start of September. For a monstera in a typical home, that’s usually right — ease off through the fall, skip it entirely in winter, and start again in spring when new growth kicks in. If your monstera is under a strong grow light and still actively pushing out leaves, you can stretch it to a lighter feeding once a month, but for most of us, fall is a no-feed season. If you’ve been feeding monthly all summer, your plant will thank you for the break.</p><h2 id="Light-The-Days-Got-Shorter-and-I-Didn’t-Notice"><a href="#Light-The-Days-Got-Shorter-and-I-Didn’t-Notice" class="headerlink" title="Light: The Days Got Shorter and I Didn’t Notice"></a>Light: The Days Got Shorter and I Didn’t Notice</h2><p>Monstera is a “bright, indirect light” plant, and in my apartment the window spot that was perfect in July — bright but filtered — was noticeably dimmer by mid-September. The sun is lower, the days are shorter, and plants absolutely notice. Less light means less growth, which is normal, but if your monstera is in a dark corner, the slowdown turns into decline.</p><p><strong>The fix:</strong> I moved mine to the brightest spot in the room, a few feet back from a south-facing window where it gets bright indirect light most of the day. I did not put it in direct afternoon sun — monstera leaves can scorch, especially after a summer of being used to filtered light. If you don’t have a bright window, a grow light makes a huge difference. Mine is a simple <a href="https://link.amazon/B005NF0GQ">full-spectrum LED bulb</a> in a regular lamp, on for about six hours in the evening. It cost me about twenty dollars and honestly, it did more for the new leaf than anything else.</p><p>Also worth saying: keep the plant away from cold glass in fall. The temperature right against a window at night drops fast, and a monstera leaf pressed against cold glass can brown from the cold alone. A couple of feet back fixes that too.</p><h2 id="What-It-Looked-Like-Three-Weeks-Later"><a href="#What-It-Looked-Like-Three-Weeks-Later" class="headerlink" title="What It Looked Like Three Weeks Later"></a>What It Looked Like Three Weeks Later</h2><p>The browning stopped spreading by the end of the first week. The leaf that had been stalled for two weeks finally unrolled — it came out slightly smaller than the summer leaves, and it has one small brown nick on the edge where it must have gotten too dry while it was stuck, but it’s clean and green and fully open.</p><p><img src="https://img.673383.xyz/api/cfile/AgACAgUAAyEGAASo6uz_AAMXaqObiE-gqggWcDEFpWmXVv57x7MAAmQUaxt3OiFV26ymuIdjYxwBAAMCAAN3AAM9BA" alt="A freshly unfurled healthy new Monstera leaf in morning light"></p><p>The plant isn’t the showpiece it was in June. It doesn’t need to be. It’s September, it’s alive, it’s healthy, and it’s going into winter the right way — with soil that dries out between waterings, air it can breathe, and no fertilizer salt piling up in the pot. That’s the actual goal of monstera fall care: not growth, but survival done properly, so spring starts from a strong place instead of a rescue.</p><h2 id="Your-Monstera-Fall-Checklist"><a href="#Your-Monstera-Fall-Checklist" class="headerlink" title="Your Monstera Fall Checklist"></a>Your Monstera Fall Checklist</h2><p>If your monstera is showing crispy edges, stalled growth, or just looks a little sad as the season turns, here’s the list I wish I’d had in September:</p><ul><li><input disabled="" type="checkbox"> Check the humidity around the plant — if it’s below 40%, add a humidifier or a pebble tray</li><li><input disabled="" type="checkbox"> Move it away from heating vents, radiators, and cold windows</li><li><input disabled="" type="checkbox"> Stop watering on a schedule — use the finger test and let the top two inches dry out</li><li><input disabled="" type="checkbox"> Expect to water every 10–14 days in fall, not weekly — but trust your finger, not the number</li><li><input disabled="" type="checkbox"> Stop fertilizing through the fall and winter</li><li><input disabled="" type="checkbox"> Move it to your brightest spot, or add a grow light for a few hours a day (here’s our <a href="/grow-lights-for-indoor-plants/">grow lights for indoor plants guide</a>)</li><li><input disabled="" type="checkbox"> Don’t panic about the leaves that already browned — they won’t heal, but the plant will</li></ul><h2 id="The-Honest-Ending"><a href="#The-Honest-Ending" class="headerlink" title="The Honest Ending"></a>The Honest Ending</h2><p>I spent most of September convinced my monstera had a disease. I googled fungus, I googled root rot, I nearly repotted it into new soil for no reason. What it actually had was a bedroom at 30% humidity, a watering habit left over from June, a weekly fertilizer habit it no longer needed, and a window that was getting dimmer by the day. Four boring problems. No drama. And every single one of them was fixable for under thirty dollars.</p><p>Plants tell you what they need. They just don’t use words. The brown edge was the first sentence, and I almost didn’t read it. If your monstera is talking to you right now — brown edges, a stalled leaf, soil that won’t dry — listen to it before you buy anything or repot anything. Start with the air, then the water, then the food, then the light. In that order.</p><p>And if you want to skip the guessing, the two tools that actually settled mine were a cheap hygrometer and a finger. Everything else was just patience.</p><p><em>Happy growing — and keep an eye on your edges as the heat comes on.</em></p><p><em>Disclosure: Some links in this post are affiliate links. If you buy through them, I may earn a small commission at no extra cost to you. See the full <a href="/affiliate-disclosure/">affiliate disclosure</a>.</em></p>]]>
    </content>
    <id>https://homegrownnook.com/monstera-fall-care-story/</id>
    <link href="https://homegrownnook.com/monstera-fall-care-story/"/>
    <published>2026-09-11T13:00:00.000Z</published>
    <summary>A first-person story about monstera fall care: brown crispy edges, dry indoor air, and the five fixes that saved it.</summary>
    <title>My Monstera Started Dying: The Fall Care That Saved It</title>
    <updated>2026-09-17T16:00:00.000Z</updated>
  </entry>
  <entry>
    <author>
      <name>Sage</name>
    </author>
    <category term="Plant Library" scheme="https://homegrownnook.com/categories/plant-library/"/>
    <category term="Beginner Basics" scheme="https://homegrownnook.com/categories/plant-library/beginner-basics/"/>
    <category term="Succulents &amp; Cacti" scheme="https://homegrownnook.com/categories/Succulents-Cacti/"/>
    <category term="succulents" scheme="https://homegrownnook.com/tags/succulents/"/>
    <category term="indoor-plants" scheme="https://homegrownnook.com/tags/indoor-plants/"/>
    <category term="houseplants" scheme="https://homegrownnook.com/tags/houseplants/"/>
    <category term="cactus-care" scheme="https://homegrownnook.com/tags/cactus-care/"/>
    <content>
      <![CDATA[<h1 id="How-to-Grow-a-Cactus-at-Home-and-Keep-It-Alive-Past-Year-One"><a href="#How-to-Grow-a-Cactus-at-Home-and-Keep-It-Alive-Past-Year-One" class="headerlink" title="How to Grow a Cactus at Home and Keep It Alive Past Year One"></a>How to Grow a Cactus at Home and Keep It Alive Past Year One</h1><p>Most cacti don’t die from neglect. They die from kindness. Someone buys a little barrel cactus at a grocery store, sets it on a windowsill, waters it every Sunday like clockwork, and watches it turn to mush in six weeks. That’s the whole story for about nine out of ten dead house cacti.</p><p>This guide is for anyone who’s killed one already, or who wants to skip that step (if you’ve lost a cactus, my <a href="/killed-a-cactus-balcony-gardening/">balcony gardening story</a> starts with exactly that). By the end of this you’ll know what to buy, where to put it, how to water it without guessing, and what to do when something goes wrong.</p><p><img src="https://img.673383.xyz/api/cfile/AgACAgUAAyEGAASo6uz_AAMcaqQjsVNG7EwAAe1zsuS5JOVYTkApAALgFWsbdzohVe6GZ7ToATWWAQADAgADeQADPQQ" alt="A small barrel cactus in a terracotta pot on a bright windowsill, afternoon light raking across its spines"></p><h2 id="What-“growing-a-cactus-at-home”-actually-requires"><a href="#What-“growing-a-cactus-at-home”-actually-requires" class="headerlink" title="What “growing a cactus at home” actually requires"></a>What “growing a cactus at home” actually requires</h2><p>Here’s the part nobody tells you at the register: a cactus is not a low-maintenance houseplant. It’s a plant with a very specific set of demands, and it punishes you only when you violate them.</p><p>Three things keep a cactus alive. Bright light, fast-draining soil, and a watering habit built around dryness instead of a calendar. Get those three right and the plant needs almost nothing from you. Get any one of them wrong and you’ll be back at the store in a month.</p><p>The fourth thing, which matters more than people expect, is patience. Cacti grow slowly on purpose. A plant that looks identical in March and September is probably doing fine.</p><h2 id="Pick-a-cactus-that-fits-your-light-before-you-buy-anything"><a href="#Pick-a-cactus-that-fits-your-light-before-you-buy-anything" class="headerlink" title="Pick a cactus that fits your light (before you buy anything)"></a>Pick a cactus that fits your light (before you buy anything)</h2><p>The single most common mistake happens before the plant comes home. People buy a desert cactus for a desk in a windowless office, then wonder why it stretches into a sad green pencil over the winter.</p><p>Desert cacti — barrel cactus, prickly pear, mammillaria, most of what you see in a store’s cactus rack — want direct sun for at least four to six hours a day. That means a south-facing windowsill, ideally, or a west-facing one. If your best window faces north, a desert cactus will never be happy there.</p><p>Jungle cacti are the exception, and they’re the ones to buy if your light is limited. Christmas cactus, Thanksgiving cactus, and Easter cactus all come from forest canopies rather than deserts. They want bright indirect light and a bit more moisture than their desert cousins. Treating a Christmas cactus like a barrel cactus is why so many of them drop their buds in November.</p><p>When you’re standing in the store, pick a plant with firm, plump tissue. Pass on anything with soft or mushy spots, blackened patches near the base, or small white cottony tufts tucked into the crevices. Those tufts are mealybugs, and you don’t want to bring them home to your other plants.</p><h2 id="The-soil-mix-that-keeps-cactus-roots-alive"><a href="#The-soil-mix-that-keeps-cactus-roots-alive" class="headerlink" title="The soil mix that keeps cactus roots alive"></a>The soil mix that keeps cactus roots alive</h2><p>Standard potting soil is the wrong tool for this job. It’s built to hold moisture, which is great for a fern and fatal for a cactus. Cactus roots need air, and they need water to leave the pot quickly instead of sitting around the root ball for a week.</p><p>The easiest fix is to buy a <a href="https://www.amazon.com/dp/B0799NMGPC?tag=homegrownnook-20">bagged cactus and succulent mix</a>, then cut it with grit. Even the mixes labeled for cacti tend to be peat-heavy and stay wet longer than they should. A blend like a quality succulent and cactus mix works well as a base, but plan on adding <a href="https://link.amazon/B03AAtOwy">perlite or pumice</a> to it.</p><p>If you’d rather mix your own, use this:</p><p><img src="https://img.673383.xyz/api/cfile/AgACAgUAAyEGAASo6uz_AAMjaqQmgmxLnF3wtkZzzUX3oEHBdTcAAuwVaxt3OiFVUqH6E2ln1tYBAAMCAAN5AAM9BA" alt="Three glass bowls holding potting soil, white perlite, and coarse horticultural sand on a wooden work surface"></p><ul><li><strong>2 parts potting soil:</strong> the organic base</li><li><strong>1 part perlite or pumice:</strong> creates air pockets so roots can breathe</li><li><strong>1 part coarse horticultural sand:</strong> adds weight and speeds drainage</li></ul><p>Two things to avoid. Fine beach sand compacts into a brick and actually blocks drainage, so use particles in the 2 to 4 millimeter range. Vermiculite is the other one to skip; it’s designed to hold water, which is the opposite of what you want here.</p><p>The finished mix should feel gritty and loose, closer to a handful of damp sand than to garden soil. If it clumps into a ball when you squeeze it, add more perlite.</p><h2 id="The-pot-matters-more-than-you-think"><a href="#The-pot-matters-more-than-you-think" class="headerlink" title="The pot matters more than you think"></a>The pot matters more than you think</h2><p>A <a href="https://www.amazon.com/dp/B08HCX2D9V?tag=homegrownnook-20">pot with a drainage hole</a> isn’t optional. A cactus in a sealed decorative pot is a cactus standing in a puddle, and the rot hasn’t started yet. It will.</p><p>Unglazed terracotta is the best material for beginners. The clay is porous, so water vapor escapes through the walls of the pot, not just the drainage hole. That extra evaporation buys you a wider margin for error on watering. Glazed ceramic and plastic hold moisture longer, which means mistakes show up faster.</p><p>Size matters too, and here the instinct is usually wrong. Pick a pot only slightly wider than the root ball. Dropping a small cactus into a big planter means a large volume of soil stays wet around roots that can’t drink it fast enough. A 4-inch cactus wants a 4- to 5-inch pot, not a 10-inch one.</p><p>Terraced clay pots with a matching saucer, like this <a href="https://www.amazon.com/dp/B0B4HVN7DZ?tag=homegrownnook-20">set of unglazed terracotta pots with drainage</a>, cover both needs at once. Whatever you buy, dump the saucer 15 minutes after watering. Letting a pot sit in the runoff is a slow way to rot the roots from the bottom up.</p><p><img src="https://img.673383.xyz/api/cfile/AgACAgUAAyEGAASo6uz_AAMeaqQkxdfc4ocsFTIXSy6-L_4AAdFKAALkFWsbdzohVfzoo8DjTzQoAQADAgADeQADPQQ" alt="An unglazed terracotta pot with a visible drainage hole, resting on a matching clay saucer"></p><h2 id="How-to-water-a-cactus-without-killing-it"><a href="#How-to-water-a-cactus-without-killing-it" class="headerlink" title="How to water a cactus without killing it"></a>How to water a cactus without killing it</h2><p>This is the section that saves plants.</p><p>Forget the calendar. Cactus watering is a moisture test, not a schedule, because the right interval depends on your humidity, your pot, your soil, and the season. Water when the soil is genuinely dry. Not damp, not “probably fine.” Dry.</p><p>The test that works is a wooden chopstick. Push it two to four inches into the soil, leave it for a minute, then pull it out. If it comes back clean with dry crumbs clinging to it, water. If there’s damp soil stuck to the wood, wait.</p><p>When you do water, soak the pot until water runs out the drainage holes. This flushes accumulated salts out of the mix and wets the whole root ball, not just the top inch. Then let it drain completely and empty the saucer.</p><p>As a rough starting point for most homes:</p><table><thead><tr><th>Season</th><th>Watering interval</th><th>Notes</th></tr></thead><tbody><tr><td>Spring &amp; summer</td><td>Every 2–4 weeks</td><td>Active growth; soak fully each time</td></tr><tr><td>Fall</td><td>Every 3–5 weeks</td><td>Taper off as days shorten</td></tr><tr><td>Winter</td><td>Once a month at most</td><td>Often skip entirely; see dormancy below</td></tr></tbody></table><p>Two hard rules. Don’t mist a cactus, ever. Humidity is what invites rot, and these plants have no use for it. And never water on a fixed weekly rhythm just because it’s convenient. That habit alone accounts for most cactus deaths.</p><p>If you’d rather not poke around in the soil, a simple <a href="https://link.amazon/B00pXneVx">moisture meter</a> such as a basic soil probe takes the guesswork out. Push the probe down toward the root zone, and water only when the reading comes back dry. Cheap meters drift over time, so replace them every couple of years.</p><p><img src="https://img.673383.xyz/api/cfile/AgACAgUAAyEGAASo6uz_AAMfaqQkyxF5Tgc0DKGg9o7tik8MnDwAAuUVaxt3OiFV3r3pXh8fMz8BAAMCAAN5AAM9BA" alt="A wooden chopstick pushed two inches into gritty cactus soil during the dry-to-depth watering test"></p><h2 id="Light-how-much-and-where-to-put-it"><a href="#Light-how-much-and-where-to-put-it" class="headerlink" title="Light: how much, and where to put it"></a>Light: how much, and where to put it</h2><p>A cactus that isn’t getting enough light tells you clearly, just slowly. It grows taller and thinner than it should, pale instead of deep green, reaching toward whatever window it can find. That’s etiolation, and the stretched growth is permanent. It won’t thicken back up once conditions improve.</p><p>Aim for four to six hours of direct sun per day. A south-facing window is the goal; west is the next best thing. If your cactus sits right against the glass, check for bleached white or brown patches, which is sunburn from a sudden move into full sun. Move it back a few inches and, if you’re relocating it outdoors for summer, acclimate it over about ten days rather than all at once.</p><p>When natural light isn’t enough, which covers short winter days, a north-facing apartment, and any basement office, a grow light closes the gap. Small <a href="https://link.amazon/B005NF0GQ">full-spectrum LED bars</a> like compact grow lights work well for a windowsill collection. Mount them 6 to 12 inches above the top of the plant, run them 10 to 12 hours a day, and put them on a <a href="https://www.amazon.com/dp/B00MVFF59S?tag=homegrownnook-20">timer</a> so the plant gets the same cycle every day.</p><p>One more light habit worth building: rotate your pots a quarter turn every week or two. Cacti lean toward their light source, and a plant that never moves grows lopsided.</p><h2 id="Repotting-without-wrecking-the-roots"><a href="#Repotting-without-wrecking-the-roots" class="headerlink" title="Repotting without wrecking the roots"></a>Repotting without wrecking the roots</h2><p>Most cacti only need repotting every two to four years. The signals are roots coming out of the drainage holes, soil that dries out suspiciously fast, or a plant that’s become top-heavy enough to tip its pot.</p><p>Do it in spring, before the growth season kicks in, so the plant has months of warm weather to recover.</p><ol><li><strong>Stop watering for a few days first.</strong> Dry soil slips off the roots more easily and the plant is less likely to split.</li><li><strong>Protect your hands.</strong> Thick leather gloves, kitchen tongs, or a folded strip of newspaper wrapped around the body all work. Spines go through latex like it isn’t there.</li><li><strong>Tease the roots loose.</strong> Knock off the old soil and untangle any roots that have circled the bottom of the pot. Trim away anything black or mushy with clean shears.</li><li><strong>Set the plant at the same depth it was before.</strong> Burying the stem below its original soil line is a direct path to stem rot.</li><li><strong>Wait a week before watering.</strong> Any roots nicked during the move need time to callus over. Watering immediately invites infection into open wounds.</li></ol><p>That last step is the one people skip, and it’s the one that costs them the plant.</p><p><img src="https://img.673383.xyz/api/cfile/AgACAgUAAyEGAASo6uz_AAMgaqQlHms-WD_cYKGKo_I4C04XeZ8AAuYVaxt3OiFVrTe8wM7eNAkBAAMCAAN5AAM9BA" alt="Two hands in thick leather gloves steadying a bare-root cactus above a fresh clay pot of dry gritty mix"></p><h2 id="Winter-dormancy-and-getting-yours-to-bloom"><a href="#Winter-dormancy-and-getting-yours-to-bloom" class="headerlink" title="Winter dormancy and getting yours to bloom"></a>Winter dormancy and getting yours to bloom</h2><p>Most desert cacti need a cool, dry rest from roughly mid-October through February. This isn’t optional maintenance you can skip — it’s the trigger for spring blooms, and it’s the most commonly ignored part of cactus care.</p><p>During dormancy the plant barely drinks. Water it once a month at most, or skip it entirely if the stems stay plump. Stop fertilizing completely; salts accumulate in soil that’s never flushed and burn the roots. Keep the plant in bright light, and if you can, move it somewhere cooler. Around 50 to 55°F is ideal, so a cool spare room or an enclosed porch works fine.</p><p>Then in spring, when you see buds forming, move the plant back to warmth, resume normal watering, and don’t rotate or move it again until the flowers open. Bud drop from a plant being turned at the wrong moment is a genuine heartbreak, and it happens in the last week before bloom.</p><p>Jungle cacti run on a different clock. Christmas and Thanksgiving cacti need about 13 hours of uninterrupted darkness every night for six to eight weeks in fall, plus cool nights around 13 to 15°C. A lamp left on in the room, or a streetlight through the window, can break that dark cycle and cost you the flowers.</p><p><img src="https://img.673383.xyz/api/cfile/AgACAgUAAyEGAASo6uz_AAMhaqQlIyU2t8BjIRJ2ncjGVZUJZ0IAAucVaxt3OiFV2_DBtEiaUsMBAAMCAAN5AAM9BA" alt="A Christmas cactus with segmented green stems and pink buds on a cool windowsill in late autumn"></p><h2 id="Troubleshooting-what’s-wrong-with-your-cactus"><a href="#Troubleshooting-what’s-wrong-with-your-cactus" class="headerlink" title="Troubleshooting: what’s wrong with your cactus"></a>Troubleshooting: what’s wrong with your cactus</h2><p>Once you know the three basics, most problems resolve into one of a few familiar patterns.</p><p><strong>Soft, mushy base.</strong> This is rot, and it’s the emergency. Stop watering, unpot the plant, and cut away everything soft and discolored with a sterile blade. Let the healthy top dry in open air for several days, then repot it in fresh dry mix and don’t water for a week. If the rot has reached the center of the plant, take a clean cutting from the top to save what you can.</p><p><strong>Wrinkled, shriveled stems.</strong> Usually underwatering, which is the rarest cactus problem there is. But check the roots first. If the soil is dry and the roots are firm and pale, water it and the plant should plump up within days. If the roots are brown and mushy, it’s rot, not thirst, and water will make it worse.</p><p><strong>Pale, thin, stretched growth.</strong> Not enough light. Move it somewhere brighter, gradually, and accept that the leggy section is permanent. New growth will come in normal.</p><p><strong>Yellowing at the base.</strong> Usually overwatering, sometimes a light problem. Check the soil first; if it’s been damp for more than five days, that’s your answer.</p><p><strong>White cottony tufts in the crevices.</strong> Mealybugs. Dab them with a cotton swab dipped in 70% isopropyl alcohol, or spray with neem oil. Quarantine the plant from your others until you’ve gone two weeks without seeing new ones.</p><p><strong>Brown corky patches near the base of an older plant.</strong> This one is fine. It’s corking, a normal part of a cactus aging, and it needs no treatment at all.</p><h2 id="FAQ"><a href="#FAQ" class="headerlink" title="FAQ"></a>FAQ</h2><p><strong>How often should I water an indoor cactus?</strong><br>Water only when the soil is completely dry two to four inches down, which lands around every two to four weeks in spring and summer. In fall and winter, cut back to once a month or less. A wooden chopstick pushed into the soil is a better gauge than any calendar.</p><p><strong>Why is my cactus growing tall and skinny?</strong><br>That’s etiolation, and it means the plant isn’t getting enough light. The thin growth won’t reverse, but moving it to a south- or west-facing window, or adding a 6,500K LED grow light six to twelve inches above it (see our <a href="/grow-lights-for-indoor-plants/">grow lights for indoor plants guide</a> for the distance math), will make new growth come in compact and normal.</p><p><strong>What kind of soil do cacti need?</strong><br>A fast-draining mix that’s more than half mineral. A reliable DIY blend is two parts potting soil, one part perlite or pumice, and one part coarse horticultural sand. Skip fine beach sand and vermiculite; both hold water and compact.</p><p><strong>Can a cactus survive in a low-light apartment?</strong><br>Most desert cacti can’t, and they’ll stretch and fade within a few months. If your only windows face north, choose a jungle cactus like a Christmas cactus and run a grow light ten to twelve hours a day.</p><h2 id="The-short-version-your-buying-checklist"><a href="#The-short-version-your-buying-checklist" class="headerlink" title="The short version (your buying checklist)"></a>The short version (your buying checklist)</h2><p>If you read nothing else, take these five things to the store. A cactus that matches the light you actually have. A bag of cactus mix, plus perlite to loosen it further. An unglazed terracotta pot with a drainage hole, only slightly wider than the root ball. A wooden chopstick, which is the only watering tool you need. And a commitment to water less than feels right.</p><p>Start with the mix and the pot. A bag of cactus potting mix and a proper clay pot solve most beginner problems before the plant even goes in. If your light is the limiting factor, spend your money there instead and pick up a grow light before you buy a fourth cactus for a windowsill that can’t support one.</p><p>The plant will handle the rest. Cacti are patient, and they forgive almost everything except too much water.</p><p><em>Disclosure: Some links in this post are affiliate links. If you buy through them, I may earn a small commission at no extra cost to you. See the full <a href="/affiliate-disclosure/">affiliate disclosure</a>.</em></p>]]>
    </content>
    <id>https://homegrownnook.com/how-to-grow-cactus-at-home/</id>
    <link href="https://homegrownnook.com/how-to-grow-cactus-at-home/"/>
    <published>2026-09-11T13:00:00.000Z</published>
    <summary>Learn how to grow a cactus at home without killing it. Soil mix ratios, the chopstick watering test, light needs, winter dormancy, and fixes for rot.</summary>
    <title>How to Grow a Cactus at Home and Keep It Alive Past Year One</title>
    <updated>2026-09-17T16:00:00.000Z</updated>
  </entry>
  <entry>
    <author>
      <name>Sage</name>
    </author>
    <category term="Plant Library" scheme="https://homegrownnook.com/categories/plant-library/"/>
    <category term="Beginner Basics" scheme="https://homegrownnook.com/categories/plant-library/beginner-basics/"/>
    <category term="Edibles &amp; Vegetables" scheme="https://homegrownnook.com/categories/Edibles-Vegetables/"/>
    <category term="beginner-gardening" scheme="https://homegrownnook.com/tags/beginner-gardening/"/>
    <category term="container-gardening" scheme="https://homegrownnook.com/tags/container-gardening/"/>
    <category term="potted-plants" scheme="https://homegrownnook.com/tags/potted-plants/"/>
    <category term="plant-care" scheme="https://homegrownnook.com/tags/plant-care/"/>
    <content>
      <![CDATA[<h1 id="8-Container-Gardening-Mistakes-and-How-to-Fix-Them"><a href="#8-Container-Gardening-Mistakes-and-How-to-Fix-Them" class="headerlink" title="8 Container Gardening Mistakes and How to Fix Them"></a>8 Container Gardening Mistakes and How to Fix Them</h1><p><img src="https://img.673383.xyz/api/cfile/AgACAgUAAyEGAASo6uz_AAMLaqJl-jNWJPILnOvMWFUDw1ExNx4AArgRaxsC1hFVNzekvOtDdcUBAAMCAAN3AAM9BA" alt="A thriving container vegetable garden on a sunny balcony with cherry tomatoes, lettuce and basil"></p><p>My first container garden was a small-scale disaster, and honestly? It was my own fault.</p><p>That first spring, I hauled home three tomato plants, two bags of garden soil, and a pretty ceramic pot with zero drainage holes because it matched my patio. By the fourth of July, all three tomatoes were rotting from the roots up, and the pot weighed about nine pounds of pure swamp. I watered every single day because I thought more water meant more growth. It doesn’t. (The full saga, cactus and all, is the <a href="/killed-a-cactus-balcony-gardening/">balcony gardening story</a>.)</p><p>The good news: everything I killed taught me something, and none of it was complicated. Almost every container gardening mistake beginners make comes down to the same handful of basics — drainage, watering, soil, light, and pot size. Get those five right, and you can grow a shocking amount of food on a balcony, a patio, or a sunny corner of a driveway.</p><p>Here are the eight mistakes that kill more potted plants than anything else, and exactly how to fix each one.</p><h2 id="Mistake-1-Using-Pots-Without-Drainage-Holes"><a href="#Mistake-1-Using-Pots-Without-Drainage-Holes" class="headerlink" title="Mistake #1: Using Pots Without Drainage Holes"></a>Mistake #1: Using Pots Without Drainage Holes</h2><p><img src="https://img.673383.xyz/api/cfile/AgACAgUAAyEGAASo6uz_AAMMaqJl_0t9Ow_wXhwQBywENAF2EzsAArkRaxsC1hFVpfSiOopLdAkBAAMCAAN3AAM9BA" alt="A wilting tomato plant in a ceramic pot with no drainage holes and waterlogged soil"></p><p>This is the #1 killer, and it’s the easiest one to fix. If your pot doesn’t have holes in the bottom, the water has nowhere to go. The roots sit in soggy soil, oxygen gets pushed out, and within a couple of weeks you’ve got root rot — which smells exactly as bad as it sounds and is almost always fatal.</p><p>I know the pretty pots are tempting. I bought one. Don’t be me.</p><p><strong>The fix:</strong> Every single container needs at least one drainage hole, ideally 1&#x2F;4 to 1&#x2F;2 inch wide. If you fell in love with a pot that doesn’t have one, drill it — a diamond bit for ceramic, a regular drill bit for plastic. And here’s the part people skip: put something over the hole so soil doesn’t wash out, like a piece of screen mesh or a coffee filter, then add your soil. Skip the gravel-in-the-bottom trick. It doesn’t help drainage, it just shrinks your soil volume.</p><h2 id="Mistake-2-Overwatering-The-1-Plant-Killer"><a href="#Mistake-2-Overwatering-The-1-Plant-Killer" class="headerlink" title="Mistake #2: Overwatering (The #1 Plant Killer)"></a>Mistake #2: Overwatering (The #1 Plant Killer)</h2><p><img src="https://img.673383.xyz/api/cfile/AgACAgUAAyEGAASo6uz_AAMNaqJmBEEu98f6_wsML2YSD71KnLIAAroRaxsC1hFVh0-rVnWBDosBAAMCAAN3AAM9BA" alt="Finger test checking potting soil moisture two inches deep in a terracotta pot"></p><p>Beginners kill plants with love. We water every day because the top of the soil looks dry, and then we’re confused when the leaves turn yellow and the plant wilts anyway. Here’s the thing: if the plant is wilting and the soil is wet, you’re drowning it, not helping it.</p><p>The finger test is the only watering tool you need. Stick your finger two inches into the soil. If it’s dry at that depth, water. If it’s even slightly damp, wait a day and check again. That’s it. No calendar, no “water every Monday” schedule — plants don’t care what day it is.</p><p><strong>The fix:</strong> Water deeply but less often. When you do water, add enough that it runs out the drainage holes — that tells you the whole root ball got a drink — then leave it alone until the soil dries out. A <a href="https://link.amazon/B00pXneVx">moisture meter</a> costs about ten bucks if you want a backup, but your finger works fine.</p><h2 id="Mistake-3-Using-Garden-Soil-Instead-of-Potting-Mix"><a href="#Mistake-3-Using-Garden-Soil-Instead-of-Potting-Mix" class="headerlink" title="Mistake #3: Using Garden Soil Instead of Potting Mix"></a>Mistake #3: Using Garden Soil Instead of Potting Mix</h2><p><img src="https://img.673383.xyz/api/cfile/AgACAgUAAyEGAASo6uz_AAMOaqJmB1g4K7QdilWxl_O6TgL5xAoAArsRaxsC1hFV98MPkAABcH9SAQADAgADdwADPQQ" alt="Light fluffy potting mix with perlite in an open bag for container gardening"></p><p>This one trips up almost everyone who starts in containers after growing in the ground. Bagged “garden soil” is dense, heavy, and compacts like concrete in a pot. It holds too much water, suffocates roots, and turns into a brick within a season. Potting mix — which is actually usually soil-less — is light, fluffy, and full of air pockets that roots need to breathe.</p><p><strong>The fix:</strong> Always use a <a href="https://www.amazon.com/dp/B082BPL2ZF?tag=homegrownnook-20">quality potting mix</a> for containers, not garden soil. Look for one labeled for containers or raised beds, ideally with <a href="https://link.amazon/B03AAtOwy">perlite</a> or vermiculite for drainage. If you’re growing tomatoes, peppers, or anything hungry, mix in a slow-release fertilizer or add a little compost. Cheap potting mix is a false economy — you’ll just buy it twice.</p><h2 id="Mistake-4-Choosing-Pots-That-Are-Too-Small"><a href="#Mistake-4-Choosing-Pots-That-Are-Too-Small" class="headerlink" title="Mistake #4: Choosing Pots That Are Too Small"></a>Mistake #4: Choosing Pots That Are Too Small</h2><p>Nothing stresses a plant out like cramped roots, and stressed plants get sick. I once put a zucchini in a 10-inch pot and watched it sulk all summer. Root vegetables need depth, tomatoes need room to anchor, and even shallow-rooted greens need more space than a teacup.</p><p>Here’s a rough guide that covers most crops:</p><table><thead><tr><th>Crop</th><th>Minimum Container Depth</th></tr></thead><tbody><tr><td>Lettuce, spinach, herbs</td><td>6–8 inches</td></tr><tr><td>Bush beans, radishes</td><td>8–12 inches</td></tr><tr><td>Peppers, eggplants</td><td>12–14 inches</td></tr><tr><td>Tomatoes (determinate), cucumbers</td><td>14–18 inches</td></tr></tbody></table><p><strong>The fix:</strong> When in doubt, go one size up. A bigger pot means more soil, which means more water retention, which means you can miss a watering day without a plant tantrum. For tomatoes, skip the tiny pots entirely — a <a href="https://link.amazon/B03tKXGa4">5-gallon grow bag</a> is the realistic minimum.</p><h2 id="Mistake-5-Guessing-Light-Instead-of-Measuring-It"><a href="#Mistake-5-Guessing-Light-Instead-of-Measuring-It" class="headerlink" title="Mistake #5: Guessing Light Instead of Measuring It"></a>Mistake #5: Guessing Light Instead of Measuring It</h2><p>Container plants live where you put them, and a lot of beginners put them in the wrong place and then wonder why nothing grows. Tomatoes and peppers want 6–8 hours of direct sun. Leafy greens can get by on 4. Herbs sit somewhere in the middle. If you’re guessing, you’re gambling.</p><p><strong>The fix:</strong> Spend one day actually watching your patio or balcony. Check at 9 a.m., noon, and 4 p.m., and count how many hours of direct sun each spot actually gets. Most balconies have a sunny pocket and a shade pocket — put sun-lovers in one and greens in the other. If you genuinely don’t have the light, grow what matches your space: lettuce and herbs over tomatoes, every time.</p><h2 id="Mistake-6-Fertilizing-Like-It’s-a-Buffet"><a href="#Mistake-6-Fertilizing-Like-It’s-a-Buffet" class="headerlink" title="Mistake #6: Fertilizing Like It’s a Buffet"></a>Mistake #6: Fertilizing Like It’s a Buffet</h2><p><img src="https://img.673383.xyz/api/cfile/AgACAgUAAyEGAASo6uz_AAMPaqJmDJJybMv_OG03AlLCJB-Yfs4AArwRaxsC1hFVa1z8h2a6S38BAAMCAAN3AAM9BA" alt="Watering a potted pepper plant with a small can of diluted fertilizer in golden afternoon light"></p><p>More fertilizer does not mean more growth. It means burned roots, salt buildup in the soil, and plants with lots of leaves and no fruit. Containers are especially vulnerable because there’s no ground to flush the excess into.</p><p><strong>The fix:</strong> Follow the package directions — halve them if you’re nervous — and don’t fertilize until the plant has real roots established, usually two to three weeks after planting. Once a month with a <a href="https://www.amazon.com/dp/B0D4JHN28P?tag=homegrownnook-20">balanced liquid fertilizer</a> (like a 10-10-10 diluted to half strength) is plenty for most container veggies. Compost top-dressing is even more forgiving and hard to mess up.</p><h2 id="Mistake-7-Cramming-Too-Many-Plants-Into-One-Pot"><a href="#Mistake-7-Cramming-Too-Many-Plants-Into-One-Pot" class="headerlink" title="Mistake #7: Cramming Too Many Plants Into One Pot"></a>Mistake #7: Cramming Too Many Plants Into One Pot</h2><p>That seed packet says “thin to 4 inches apart,” and you plant all twelve seeds anyway because you want a full pot. I get it — but plants compete for water, nutrients, and light, and crowded containers mean nobody wins. You end up with twelve spindly plants instead of four strong ones.</p><p><strong>The fix:</strong> Trust the spacing on the seed packet or plant tag. If it feels empty for the first couple of weeks, that’s normal — the plants will fill in fast. When in doubt, plant fewer and healthier. One thriving cherry tomato beats five struggling ones every time.</p><h2 id="Mistake-8-Forgetting-That-Pots-Are-Weather-Dependent"><a href="#Mistake-8-Forgetting-That-Pots-Are-Weather-Dependent" class="headerlink" title="Mistake #8: Forgetting That Pots Are Weather-Dependent"></a>Mistake #8: Forgetting That Pots Are Weather-Dependent</h2><p><img src="https://img.673383.xyz/api/cfile/AgACAgUAAyEGAASo6uz_AAMQaqJmEaR2x_FyWeoUoAwT6IxAOBwAAr0RaxsC1hFVE4I1_JbyUD0BAAMCAAN3AAM9BA" alt="A woven basket full of freshly picked cherry tomatoes and lettuce on a sunny patio"></p><p>Containers have no ground to insulate them. They heat up faster in the sun and freeze faster in cold snaps, and they dry out shockingly fast in summer wind. A heat wave that a garden bed shrugs off can cook a pot’s roots in an afternoon.</p><p><strong>The fix:</strong> Group pots together so they shade each other and slow moisture loss. Mulch the top of the soil with straw or shredded bark. During heat waves, move smaller pots into afternoon shade if you can. And for cold snaps, either bring pots in or wrap them — even a sheet thrown over them overnight can make the difference between a plant that survives and one that turns to mush.</p><h2 id="The-60-Second-Container-Garden-Check"><a href="#The-60-Second-Container-Garden-Check" class="headerlink" title="The 60-Second Container Garden Check"></a>The 60-Second Container Garden Check</h2><p>Before you buy another plant, run this list:</p><ul><li><input disabled="" type="checkbox"> Pot has drainage holes (and they’re not blocked)</li><li><input disabled="" type="checkbox"> You’re using potting mix, not garden soil</li><li><input disabled="" type="checkbox"> Pot is big enough for the mature plant</li><li><input disabled="" type="checkbox"> The spot gets enough real sunlight</li><li><input disabled="" type="checkbox"> You know how to do the finger test</li><li><input disabled="" type="checkbox"> You’re not fertilizing more than once a month</li></ul><h2 id="Start-Small-Grow-Smart"><a href="#Start-Small-Grow-Smart" class="headerlink" title="Start Small, Grow Smart"></a>Start Small, Grow Smart</h2><p>Here’s the honest version: you don’t need a perfect setup to grow food in containers. You need decent drainage, reasonable soil, enough light, and the self-control to stop watering on a schedule. Start with three plants — a cherry tomato, some lettuce, and a herb you actually cook with. Learn how they behave. Add more pots when you’ve got the rhythm. (No yard? The <a href="/how-to-grow-cherry-tomatoes-at-home/">indoor cherry tomato plan</a> walks through the whole 60-day version.)</p><p>My patio tomatoes finally thrived in year two, once I stopped drowning them and gave them a pot with actual holes. They tasted like summer, and honestly, they tasted like proof that I’d figured it out.</p><p>If you’re just getting started, grab a bag of quality potting mix and a couple of <a href="https://www.amazon.com/dp/B08HCX2D9V?tag=homegrownnook-20">pots with drainage holes</a> before you buy anything else. Get the basics right, and the rest is just patience.</p><p><em>Happy growing — and keep your finger out of the water.</em></p><p><em>Disclosure: Some links in this post are affiliate links. If you buy through them, I may earn a small commission at no extra cost to you. See the full <a href="/affiliate-disclosure/">affiliate disclosure</a>.</em></p>]]>
    </content>
    <id>https://homegrownnook.com/container-gardening-mistakes/</id>
    <link href="https://homegrownnook.com/container-gardening-mistakes/"/>
    <published>2026-09-10T20:20:00.000Z</published>
    <summary>The eight container gardening mistakes that kill more potted plants than anything else, and exactly how to fix each one.</summary>
    <title>8 Container Gardening Mistakes and How to Fix Them</title>
    <updated>2026-09-17T16:00:00.000Z</updated>
  </entry>
  <entry>
    <author>
      <name>Sage</name>
    </author>
    <category term="Stories" scheme="https://homegrownnook.com/categories/stories/"/>
    <category term="Plant Diaries" scheme="https://homegrownnook.com/categories/stories/plant-diaries/"/>
    <category term="welcome" scheme="https://homegrownnook.com/tags/welcome/"/>
    <content>
      <![CDATA[<h1 id="Welcome-to-homegrownnook"><a href="#Welcome-to-homegrownnook" class="headerlink" title="Welcome to homegrownnook"></a>Welcome to homegrownnook</h1><p>Every plant disaster I’ve ever had started the same way: I bought something green, set it in the sunniest spot I could find, and believed that wanting it to live would be enough. It never was. I drowned a barrel cactus. I watched a monstera go crispy in dry September air. I planted cherry tomatoes in pots with no drainage and wondered why the leaves turned yellow within a month.</p><p>This blog exists because of all those failures — and because the lessons that finally saved my plants are almost never the ones in the glossy care-guide cards that come stuck in the soil.</p><h2 id="What-homegrownnook-is-about"><a href="#What-homegrownnook-is-about" class="headerlink" title="What homegrownnook is about"></a>What homegrownnook is about</h2><p>homegrownnook is a lifestyle-first houseplant blog for real homes. Not greenhouses, not grow rooms, not perfectly calibrated humidity tents — real houses and apartments, with the corner that gets half-decent light in the morning, the shelf above the radiator, and the windowsill that’s just barely big enough for one small pot.</p><p>I write about what it actually looks like to live with plants:</p><ul><li><strong>Stories</strong> — first-person accounts of the corners that work, the ones that don’t, and everything I learned along the way. Real plants, real failures, real fixes.</li><li><strong>Plant Library</strong> — practical care guides organized by plant, by light, and by room, written so you can find the answer in under a minute instead of scrolling through a novel.</li><li><strong>Picks</strong> — honest, hands-on notes about the gear worth your money. I only recommend things I’ve actually used, and I say so when something isn’t worth it.</li></ul><h2 id="Why-this-blog-exists"><a href="#Why-this-blog-exists" class="headerlink" title="Why this blog exists"></a>Why this blog exists</h2><p>I killed more plants than I can count before I kept any alive. My first balcony garden was a small-scale disaster: three tomato plants, two bags of garden soil, a pretty ceramic pot with zero drainage holes, and the firm conviction that more water meant more growth. By the fourth of July, all three tomatoes were rotting from the roots up.</p><p>Somewhere in that mess, I started paying attention instead of guessing. I learned what soil actually does. I learned that light matters more than love. I learned that most houseplants die from overwatering, not neglect — and that fixing that one habit saves more plants than any miracle product ever will.</p><p>That’s the kind of knowledge I want to share here: the stuff you learn from actually messing up, in language that sounds like a person, not a plant encyclopedia.</p><h2 id="What-you’ll-find-here"><a href="#What-you’ll-find-here" class="headerlink" title="What you’ll find here"></a>What you’ll find here</h2><h3 id="Stories"><a href="#Stories" class="headerlink" title="Stories"></a>Stories</h3><p>The personal side of living with plants:</p><ul><li><a href="/killed-a-cactus-balcony-gardening/">I Killed a Cactus — and Fell in Love With Balcony Gardening</a> — how three drowned tomato plants and one dead cactus turned a tiny rental balcony into my favorite place in the apartment.</li><li><a href="/monstera-fall-care-story/">My Monstera Started Dying in September — the Fall Care That Saved It</a> — the brown crispy edges, the dry indoor air, and the five fixes that brought a beloved houseplant back before winter.</li></ul><h3 id="Plant-Library"><a href="#Plant-Library" class="headerlink" title="Plant Library"></a>Plant Library</h3><p>Practical guides that skip the fluff:</p><ul><li><a href="/how-to-grow-cactus-at-home/">How to Grow a Cactus at Home (and Keep It Alive Past Year One)</a> — soil mix ratios, the chopstick watering test, light needs, and winter dormancy.</li><li><a href="/how-to-grow-cherry-tomatoes-at-home/">How to Grow Cherry Tomatoes Indoors: 60 Days, No Yard</a> — variety, pot size, light distance, and hand-pollination that actually sets fruit.</li><li><a href="/container-gardening-mistakes/">8 Container Gardening Mistakes That Are Killing Your Plants (and How to Fix Them)</a> — the eight mistakes that kill more potted plants than anything else, and exactly how to fix each one.</li></ul><h3 id="Picks"><a href="#Picks" class="headerlink" title="Picks"></a>Picks</h3><p>When I recommend a pot, a light, a soil, or a tool, it’s because I’ve used it in my own home — not because someone paid me to say so. If you buy through a link in <a href="/picks/">my picks</a>, I may earn a small commission at no extra cost to you. It never changes what I recommend, and you can read the full <a href="/affiliate-disclosure/">affiliate disclosure</a> anytime.</p><h2 id="Who-this-blog-is-for"><a href="#Who-this-blog-is-for" class="headerlink" title="Who this blog is for"></a>Who this blog is for</h2><p>You’re in the right place if you:</p><ul><li>have killed a plant and want to know why (spoiler: it’s usually the watering);</li><li>live in an apartment or a small house and think you don’t have room to grow anything;</li><li>are tired of care guides written for people with greenhouses and grow rooms;</li><li>want honest recommendations from someone who actually bought the thing.</li></ul><h2 id="A-few-honest-notes-before-you-start"><a href="#A-few-honest-notes-before-you-start" class="headerlink" title="A few honest notes before you start"></a>A few honest notes before you start</h2><ul><li><strong>I’m not a botanist.</strong> I’m someone who has kept plants alive for years by paying attention, and I share what actually works in real homes. For serious plant health emergencies, a local nursery or extension service is a better bet.</li><li><strong>I don’t pretend everything thrives everywhere.</strong> If a plant needs more light than your apartment gets, I’ll tell you to pick a different plant instead of selling you a lamp.</li><li><strong>New stories and guides land every week.</strong> The blog is always growing, so if something you’re looking for isn’t here yet, it probably will be soon.</li></ul><h2 id="Start-here"><a href="#Start-here" class="headerlink" title="Start here"></a>Start here</h2><p>If you’re brand new to the site, the best place to start is the story that explains how this whole thing began: <a href="/killed-a-cactus-balcony-gardening/">I Killed a Cactus — and Fell in Love With Balcony Gardening</a>. From there, follow your curiosity — the Plant Library has guides for whatever is sitting on your windowsill right now.</p><p>Thanks for stopping by. Whether you’re here because you love your plants, because one is dying and you don’t know why, or just because you’re curious what lives in other people’s homes — pull up a chair.</p><p>If you have a question, a plant emergency, or a story of your own, <a href="/contact/">say hello</a> — I read everything that comes through.</p><p>Happy growing,<br><strong>homegrownnook</strong></p>]]>
    </content>
    <id>https://homegrownnook.com/welcome-to-homegrownnook/</id>
    <link href="https://homegrownnook.com/welcome-to-homegrownnook/"/>
    <published>2026-09-07T21:00:00.000Z</published>
    <summary>Welcome to homegrownnook: a lifestyle-first houseplant blog for real homes. Real stories, care guides that work, honest gear picks.</summary>
    <title>Welcome to homegrownnook</title>
    <updated>2026-09-07T21:00:00.000Z</updated>
  </entry>
</feed>